Navigate to Admin panel – Approval Workflow Settings
To activate the Approval workflow, it is necessary to check the Use Approval workflow option. After that, the Workflow Settings and Document Approval Settings sections will appear.
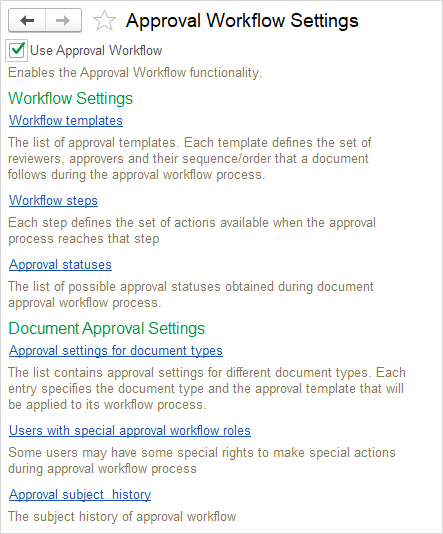
The Approval Workflow functionality enables structured and automated execution of approval processes within AccountingSuite. Prior to initiating any approval procedure, the following elements must be configured:
Approval workflow templates #
Approval Workflow Templates allow organizations to efficiently and consistently define the approval process for documents through various stages and steps. These templates enable the clear definition of the sequence of actions a document must go through, as well as the responsible parties for review and approval at each stage. By using approval templates, organizations can improve the efficiency of their processes and ensure transparency at every step.
To create a new approval workflow template, follow these steps:
- Click the “Create” button to start creating a new template. This is the first step in defining the template, guiding you to input the key data that defines it.
- Enter the following information:
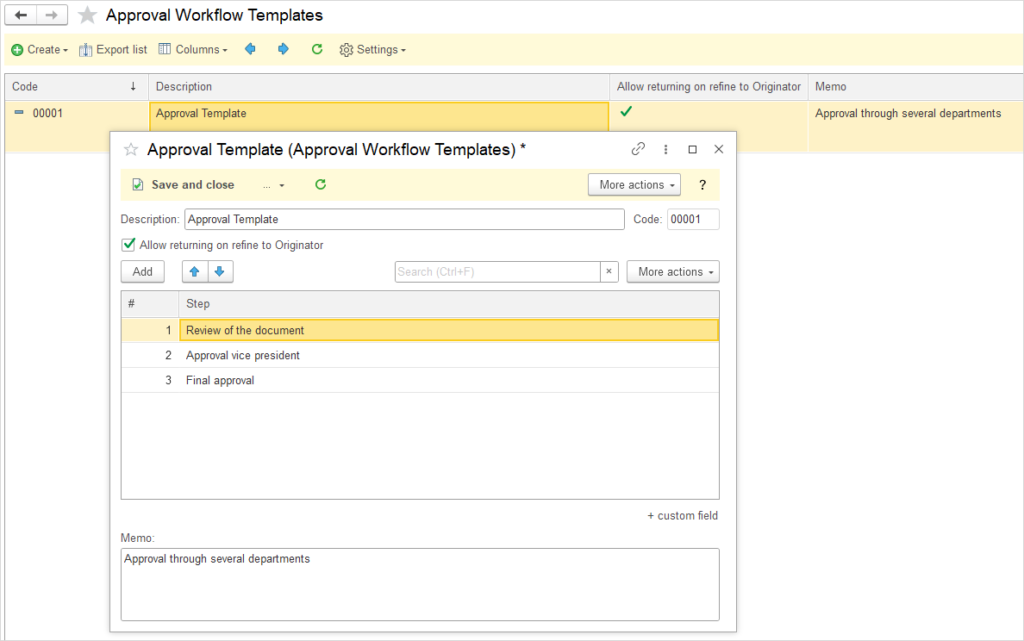
- Description: In this field, provide the name or a brief description of the template. This description should clearly reflect the purpose and function of the template, for example, “Department Approval Template” or “Marketing and Commercial Approval Workflow.” This section is important as it gives users insight into the purpose and application of the template within the organization.
- Allow returning on refine to Originator – When this option is enabled, returning a request for refinement routes the task directly to the Originator of the request. When the option is disabled, the task after refinement is assigned to the previous handler in the approval flow, according to the defined process path.
- Steps: In this section, enter the name of each individual step that the document must go through during the approval process. These steps represent the phases that the document will pass through, such as initial review, approval by specific departments, or final approval. The sequence of these steps ensures that the document follows a defined path and that each stage is completed in the correct order.
- Memo: In this section, enter additional information that clarifies the specifics of the template. For example, you may specify conditions such as “Approval through several departments,” “Cross-departmental review,” or “Approval by executive management.” These details help users better understand the specific requirements or objectives of the template.
Once all the necessary information is entered, you can save the template and use it as a standardized approval process within your organization. Using templates enables greater efficiency, reduces the likelihood of errors, and provides a clear view of how the approval process should be carried out, making it more transparent and easier to track.
Workflow steps #
Approval Workflow Steps are a key component of any document approval management system. These steps define the sequence of actions that can be taken as a document progresses through the approval process. By clearly defining the steps, organizations can ensure an efficient and transparent approval process.
To create a new step in the approval process, follow these steps:
- Click the “Create” button to start adding a new step to the process.
- Enter the following details:
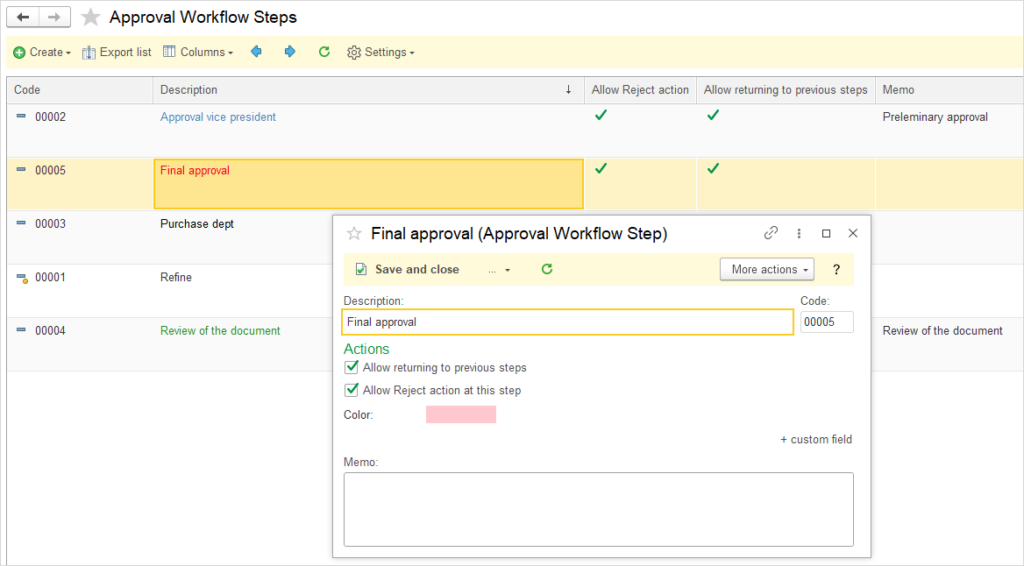
- Description: Provide a brief description or name for the step (e.g., “Refinement”, “Review by Marketing Dept.”, or “Approval by Vice President”). This description should clarify the purpose of the step in the approval process.
- Actions: Select one or more actions that will be available in this step. Actions can include:
- Allow returning to previous steps
- Allow Reject action at this step
- Color: Choose a color to visually differentiate this step from others in the workflow.
- Memo: Enter additional context or instructions related to the activities to be performed at this step (e.g., “Refinement/Correction”, “Document Review”, “Preliminary Approval”).
Approval Statuses #
In the approval workflow, there are four key statuses that indicate the current stage of the document in the process. Each status reflects the progress and actions taken at different points of the approval journey. These statuses help track the document’s lifecycle, ensuring that all stakeholders understand the current status and next steps. The four approval statuses are:
- Created – This status indicates the document is created and saved but the approval process has not yet started. It awaits initiation by the Originator or delegate.
- In Progress – The approval workflow is active: the document routes through designated Reviewers and Approvers sequentially, with ongoing reviews, feedback, comments. The document can not be modfied, but it can be sent back to the Originator for refinement.
- Approved – The document is fully approved after all steps; the process completes successfully
- Rejected – Approval is denied after review; the process ends, but a new workflow can be restarted on the same document after revisions.

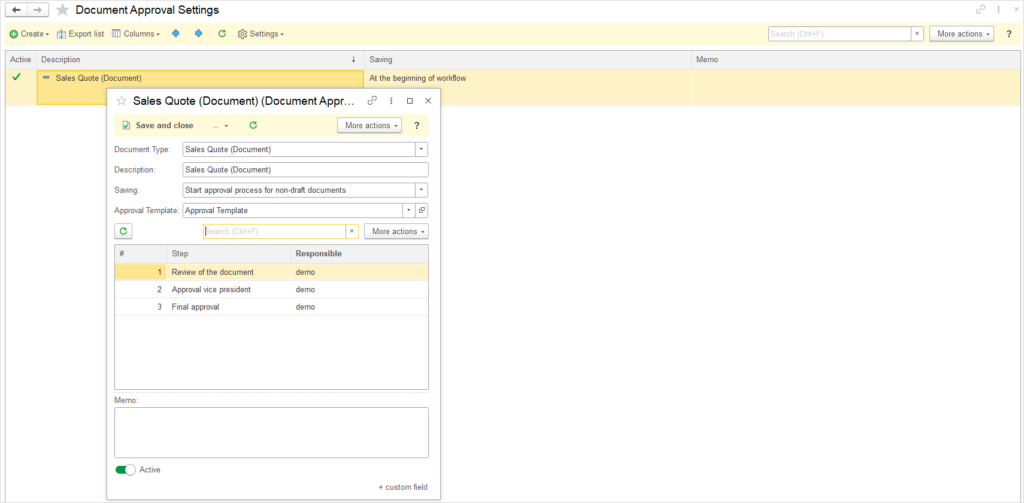
Document approval settings #
Approval settings for document types allow the definition of specific templates and approval settings for different types of documents. This process ensures that each document type has an appropriate Approval Workflow, in line with the specific requirements of the business process. Through these settings, a specific document is linked to the corresponding Approval Template, which automatically defines all steps and responsible parties within the approval process. Approval settings can be created for the following document types: Sales Order, Sales Quote, Sales Invoice, Purchase Order, and Bill.
To create new approval settings for a specific document type, follow these steps:
- Click the “Create” button to begin the process of creating new approval settings for the document.
- Enter the following details:
- Document Type: Select the document type that will use this workflow (e.g., Sales Quote, Sales Order, Sales Invoice, Purchase Order, or Bill).
- Description: This description will automatically be filled in and will match the document type name (e.g., for Purchase Order, it will automatically be populated as “Purchase Order”).
- Saving:
- Start approval process for non-draft documents – the approval process is automatically initiated upon saving a document that is not in a draft state.
- Start approval process from draft documents – the approval process is automatically initiated upon saving a document that is in a draft state.
- Approval Template: Select the appropriate Approval Template that has been previously created, or click the option to create a new template. The template defines the steps to be followed during the approval process.
- Steps: All steps from the selected template will automatically be displayed in the table below. Each step includes the responsible individuals who can be assigned from the list of users.
- Responsible: For each step, select the users who are responsible for executing that step. You can assign an existing user or create a new user.
- Memo: Enter specific information or instructions related to the document, such as specific approval requirements or additional notes.
- Active: Check whether these settings are active (if the option is enabled, a green checkmark will be displayed).
Once the settings are completed, click Save to save the approval settings. These settings will then be automatically applied to the selected document type, linking it with the corresponding Approval Template and ensuring that the approval process is standardized and automated according to predefined steps and responsibilities.
Users with special approval workflow roles #
This option enables the assignment of extended permissions to specific users, allowing them to intervene in the approval process in ways not available to regular participants. The overview displays a list of users and their assigned special roles, which include the following permissions:
- Reposting – the right to resubmit a document for approval
- Reassign tasks – the right to redirect tasks to other users
- Back to draft – the right to return a document to draft status for further revisions
The assignment of these roles ensures the necessary flexibility in managing the approval process, enabling authorized users to respond appropriately in situations requiring intervention, while maintaining the integrity of the standard approval workflow.
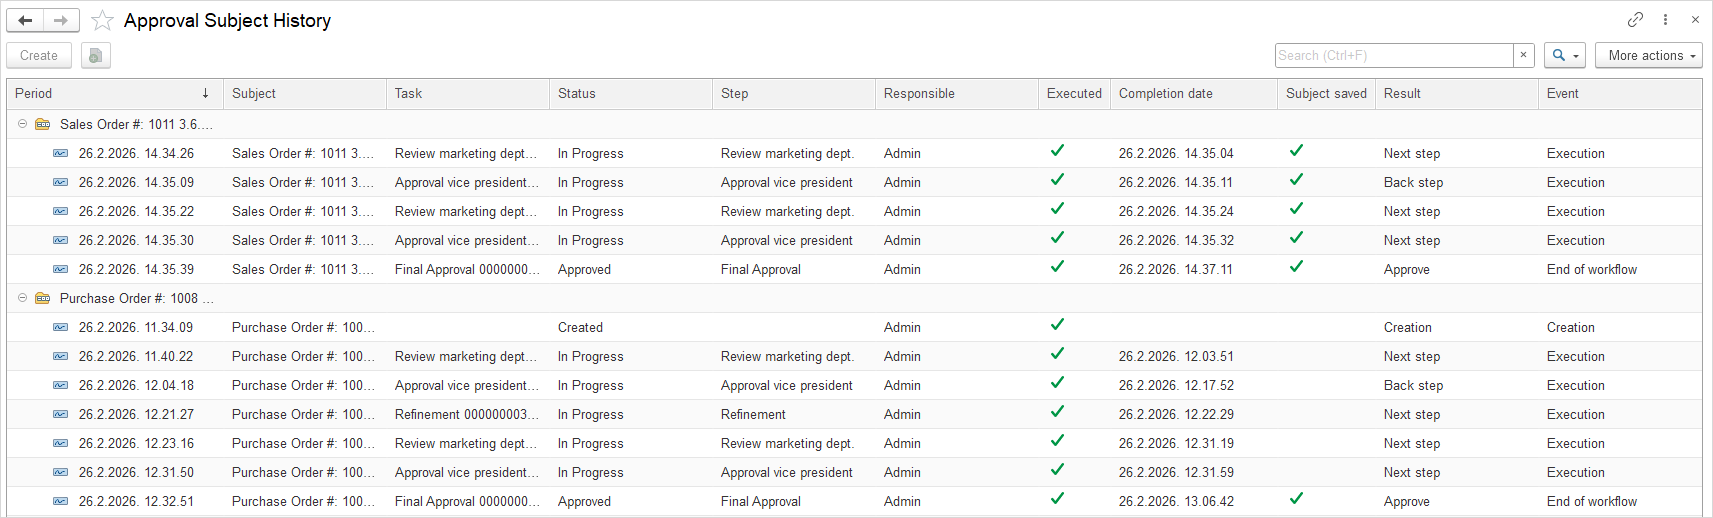
Approval subject history #
The Approval subject approval history provides a complete record of all activities and actions taken on a document during the approval process. This option offers insight into the entire sequence of events – from the initiation of the procedure to the final outcome.
The overview contains all relevant information about each step in the process: who was responsible for a particular phase, who actually performed the action, when the task was completed, and what the result was. This ensures full transparency, facilitates control over the activities carried out, and enables easy audit of the entire approval process.