Importing Documents with Data Import Tool #
Switch to AccountingSuite with confidence using our new Opening Balances Import feature, designed to make your migration fast, accurate, and hassle-free. Effortlessly transfer your historical balances from Excel or CSV files directly into AccountingSuite, including unpaid invoices, bills, credits, and inventory details—far surpassing the limitations of traditional journal entry imports. This feature ensures your opening balances for accounts receivable, accounts payable, and inventory are imported with full document details such as dates, invoice numbers, and due dates, allowing for seamless future payment and credit application.

Data Import Tool for documents to import historical transaction will be available soon in AccountingSuite.
Please refer to the Import Options overview to learn more.

Importing Journal Entries #
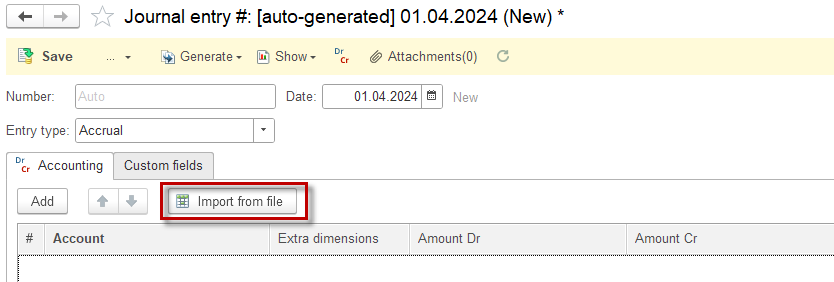
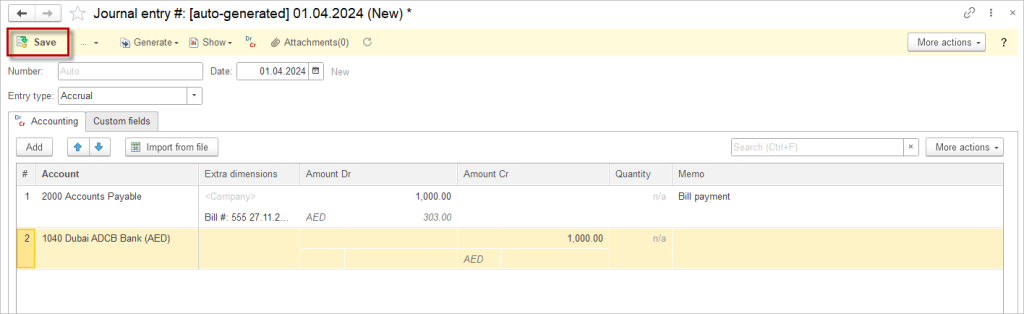
1. Navigate to Accounting → Journal Entries. Create a new Journal entry and click Import from file.
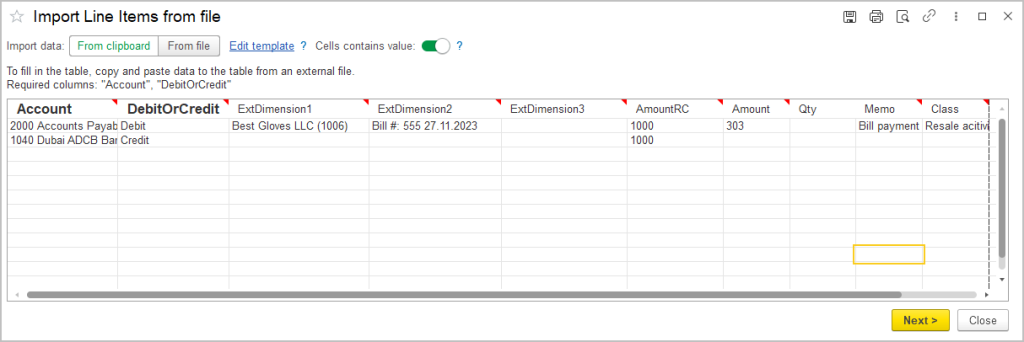
2. Fill in the table manually or copy and paste data from a spreadsheet.
3. Tick the checkbox Cells contains value to choose the data from the dropdown list.
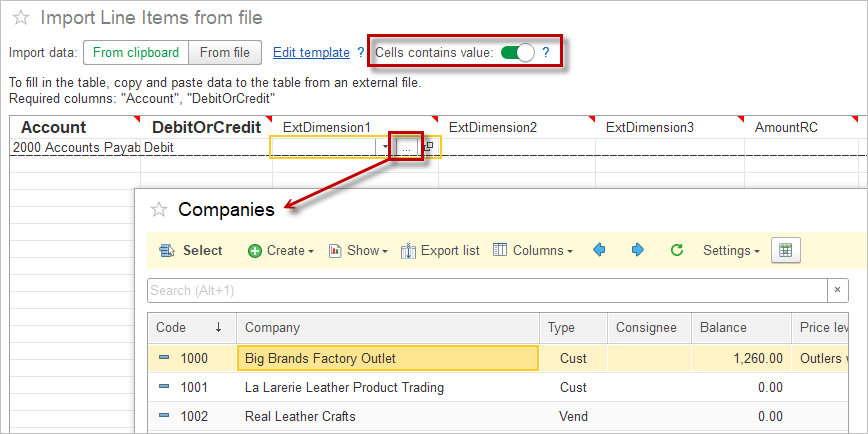
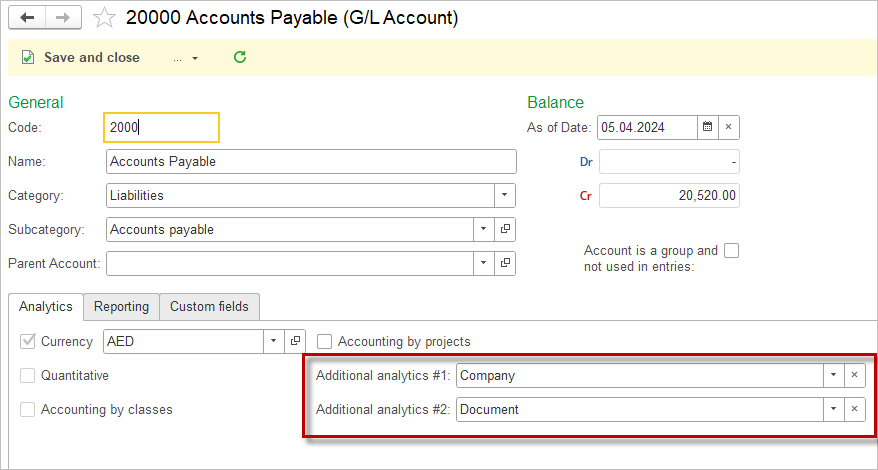
4. To check what Extra dimensions does the selected account have, open the account.
5. Fill in the table and click Next
6. Save the Journal entry
How to import Journal entry with Data Import Tool
Open Inventory Balances #
Inventory Adjustment document can be used for importing the inventory opening balances.
The Costing Method applicable to the opening inventory is essential for import:
For the Weighted Average method, items can be imported in a single Inventory Adjustment document, as batch tracking and receipt dates are not relevant to the correct calculation of cost.
For the FIFO costing method, however, it is crucial to import the historical receipt dates, as this data determines the cost sequence applied to outgoing inventory. For the FIFO costing method, items within one Inventory Adjustment document are considered as one batch with one receipt date.
Therefore, to ensure proper FIFO costing, make sure that information about the receipt dates for closing inventory from the previous accounting system is available, and create a single Inventory Adjustment document for each receipt date.
How to import Inventory Adjustment Documents
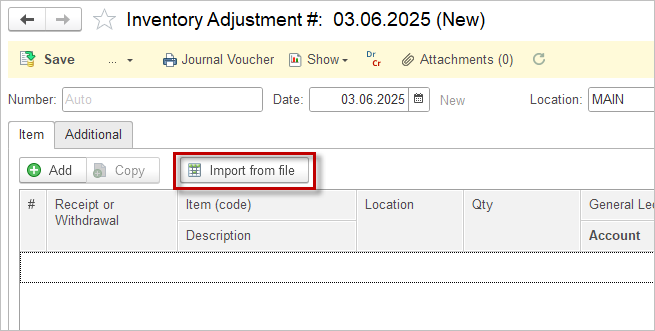
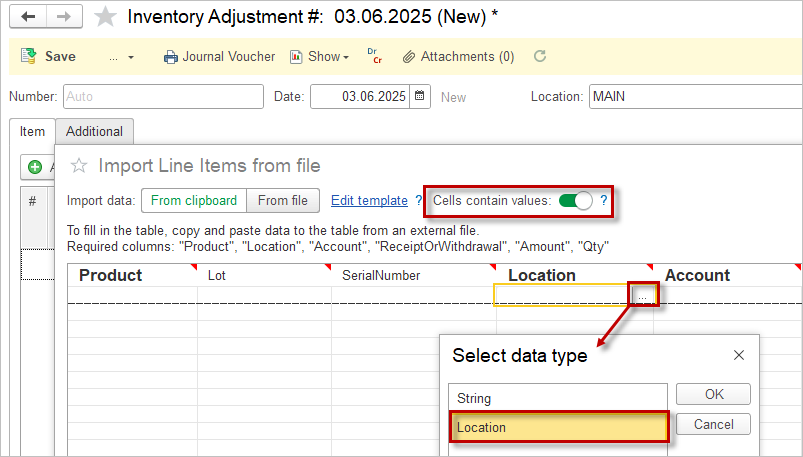
1. Navigate to Inventory → Inventory Adjustments.
2. To import multiple document, select Import from file on the documents list. To create one Inventory adjustment, click Create and Import from file.
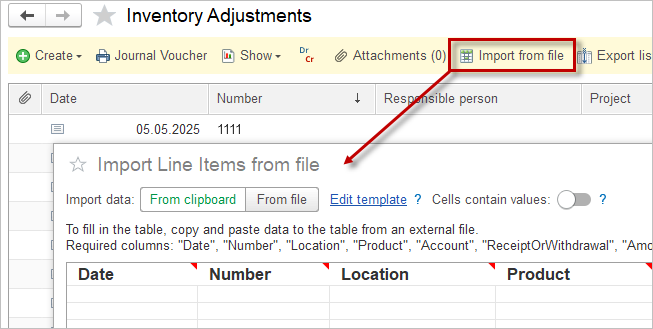
3. The Import window opens, showing the columns required for import. Required columns are marked in bold.
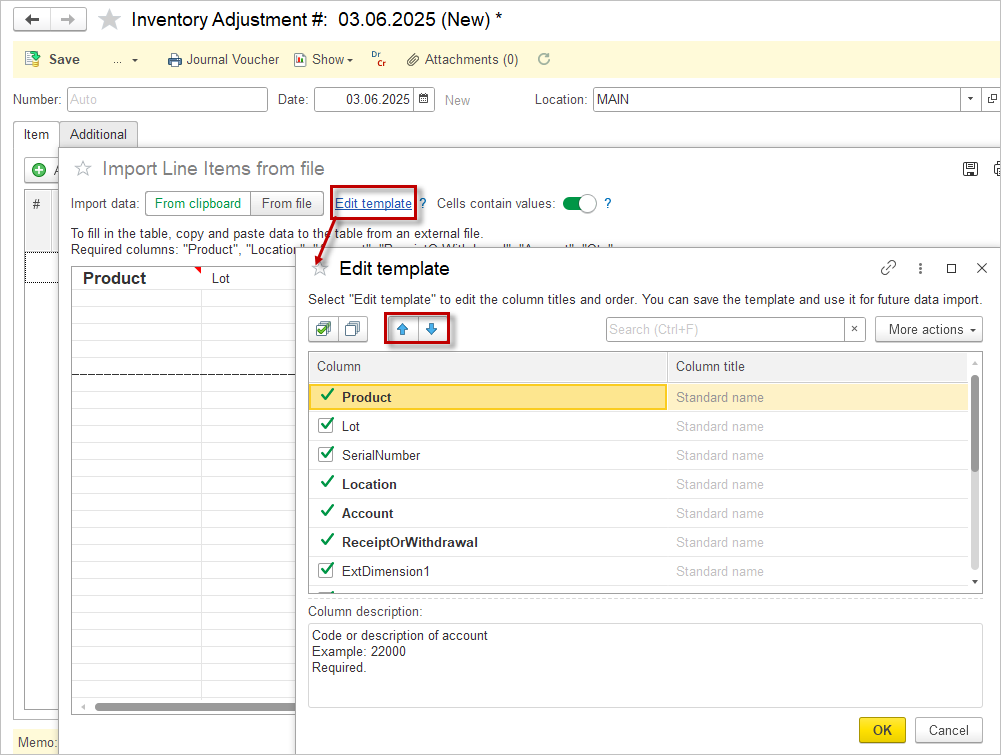
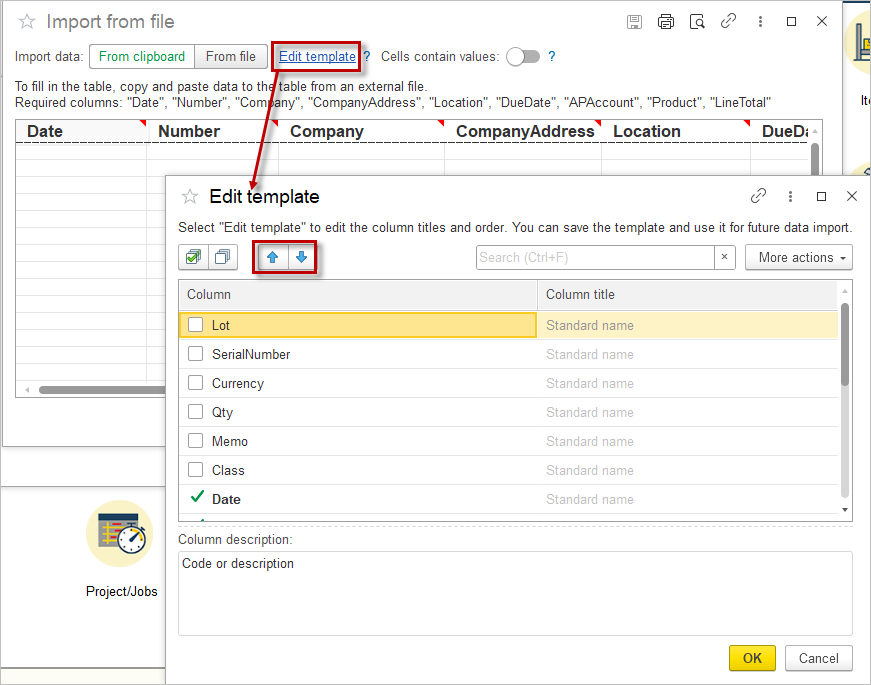
4. If you would like to import additional data along with the required columns, click Edit template to add more columns and tick the additional columns. Use the arrows to change the order of the columns.
5. Fill in the table manually or copy and paste data from a spreadsheet.
Or select From File and Save the template to your computer. Fill in the table and then click Import spreadsheet
6. Tick the checkbox Cells contains value to select the data from the dropdown list.
7. Click Next after filling in the table.
8. The result of the import will be displayed.
Open Accounts Payable / Accounts Receivable #
This import is designed to create fake historical documents (Sales invoice for AR and Bill for AP), for the following purposes:
- that they can be referred to later in the Apply Vendor / Apply Customer credits document once the payment will have been collected/performed (“Document” Extra dimension will be filled with these documents);
- of Aging AR/Aging AP reports to assess the outstanding invoices and bills, categorizing them by the length of time they have been unpaid to help manage cash flow and identify potential collection or payment issues.
The documents posted by these imports (Sales invoice for Accounts Receivable and Bill for Accpunts Payable) have a hidden manual posting mode and will make the following accounting entries without real transaction in Revenue, Cost of Goods Sold, Inventory and Taxes:
For accounts payable:
Dr 30000 Opening balance (set in the Accounting Settings)
Cr Accounts Payable (specified in the import table)
For accounts receivable:
Dr Accounts Receivable (specified in the import table)
Cr 30000 Opening balances (set in the Accounting Settings)
Please note: These are not full-fledged documents. They are only for entering customer and vendor debt balances. These documents do not need to be edited later. There will be no impact on the G/L entries. If you need to change the amount of the document, you need to delete such opening document and import it again.
The amounts must be imported, including all applicable taxes, in the same way as they appear in the Trial Balance from the previous accounting system.
How to import Open AP/ AR
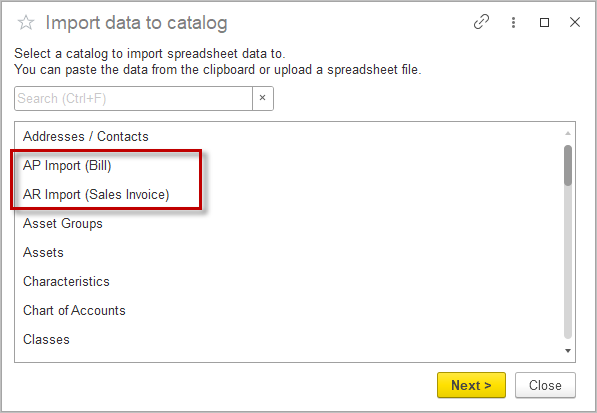
1. Navigate to Admin Panel → Data Import Tool.
2. Select Accounts Payables (Bills) or Accounts Receivables (Sales Invoices).
3. The Import window opens, showing the columns required for import. Required columns are marked in bold.
4. Date is accepted in the following formats:
- MM/DD/YYYY
- DD/MM/YYYY
- MM.DD.YYYY 00:00:00 (24 hours format)
- DD.MM.YYYY 00:00:00 (24 hours format)
- MM.DD.YYYY 00:00:00 A.M. (AM/PM format)
5. If you would like to import additional data along with the required columns, click Edit template to add more columns and tick the additional columns. Use the arrows to change the order of the columns. Additional information can be imported as a Custom field. Create a Custom Field for Bill or Sales Invoice document and add it in the Edit template window.
6. Fill in the table manually or copy and paste data from a spreadsheet.
Or select From File and Save the template to your computer. Fill in the table and then click Import spreadsheet
7. Tick the checkbox Cells contains value to select the data from the dropdown list.
8. Click Next after filling in the table.
9. The result of the import will be displayed.