Inventory catalogs refers to the goods and materials that a business holds.
An Item represents something that can be bought or sold (or both). An item can be a type of product or a service, and the attributes that are assigned differ depending on this distinction.
Product items can be in multiple locations, have more than one unit of measure, and be part of another assembled item.
Service items can be sold without purchase and are used in the time tracking module and can be added as hours, minutes or a flat rate.
The Items module not only represents the list of products and services, but also displays the quantitative measures (e.g., quantity on stock) and values (e.g., expected cost).

Create Item #
Remember that one way to create multiple Items at the first start is to import the list of items using the Data import tool.
If you are creating an item similar to another existing item, you may copy it to save time. Right click the item in the list view and choose Copy. Change the info that is different for the new item (the code must be unique) and click Save.
- Navigate to Lists – Items
- Create new Item
- Enter Code (optional)
- Enter the Description
- Choose Item type – Product (tracked in Inventory) or Service (not tracked in Inventory)
- Choose Item Category
- Choose Item group or leave empty
- Enter the Item price. For a more complex pricing structure using Price Levels and/or Categories, use the Price Matrix.
- Enter the expected item Cost
- Enter Lots or Serial numbers, if you will be tracking lots and/or serial numbers on this item.
- If an Items is assembled, tick the Assembly box (please refer to Item’s assembly setting for more information)
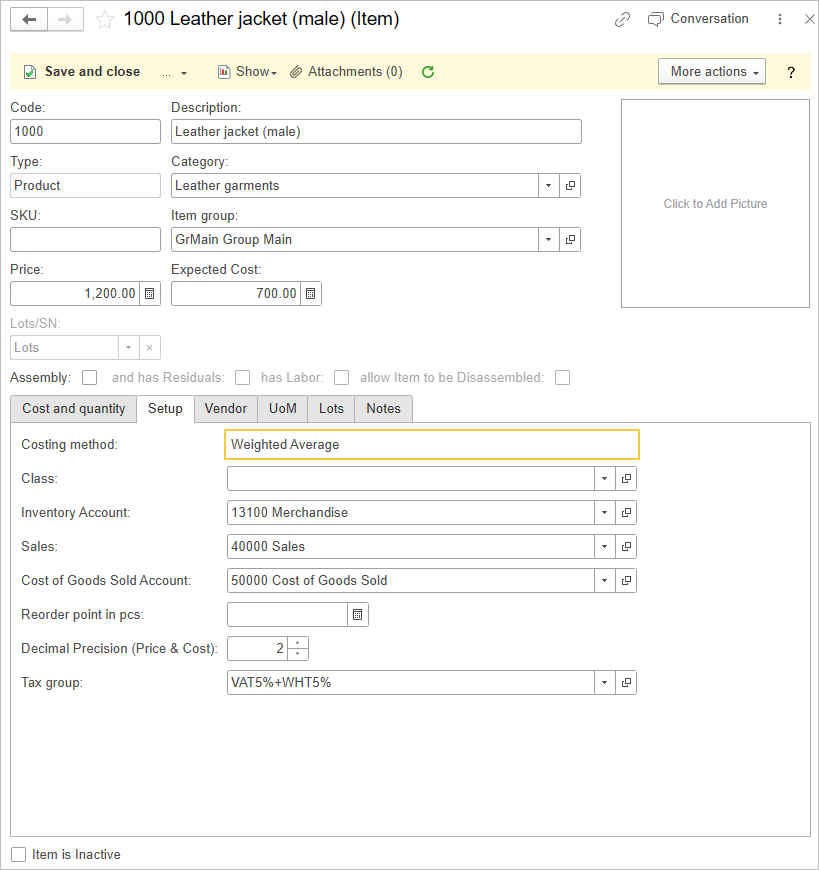
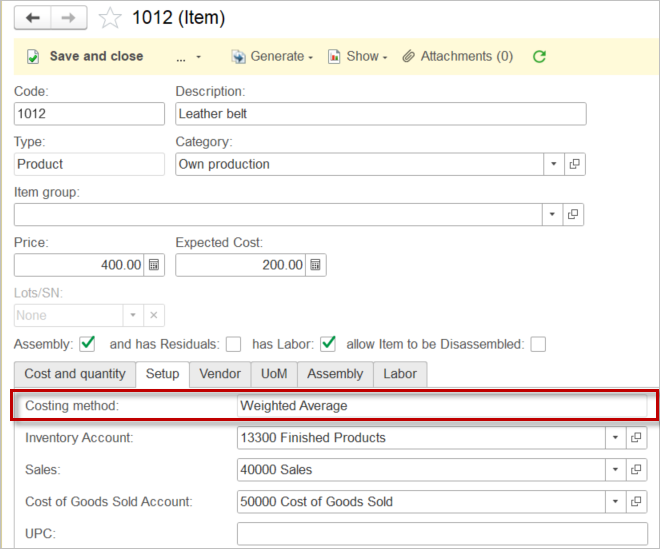
- On the Setup tab: choose Costing method, default Expense and Sales accounts, number of decimals to use in pricing, and UPC (Universal Product Code) (all optional). The default accounts are pre-filled in accordance with Accounting settings, but they can be changed
- On the Vendor tab:
- On the UOM tab:
In the Items list you can create whatever you need. Works, products, services, etc. The type of item (product/service) means how the cost will be calculated in the sale and if it is possible to have negative stock. The products to be sold must first be purchased. The services/works to be sold can be sold without items on hand.
This is the difference. Other abilities are the same.
Items group #
You can use groups for grouping your Item List. Click Create – New group and create hierarchy you need.
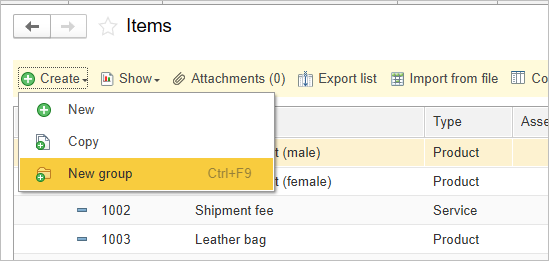
Use More action – View mode to switch group’s view mode in a list.

Lots #
Lot numbers are assigned to a particular quantity, batch or grouping of a manufactured product in order to give traceability from raw material to consumption. In AccountingSuite, lots are recorded on the item receipt for purchased goods and assigned on Assembly builds for manufactured products. In contrast to a Serial number, a single lot number can refer to many of the product to which it is assigned.
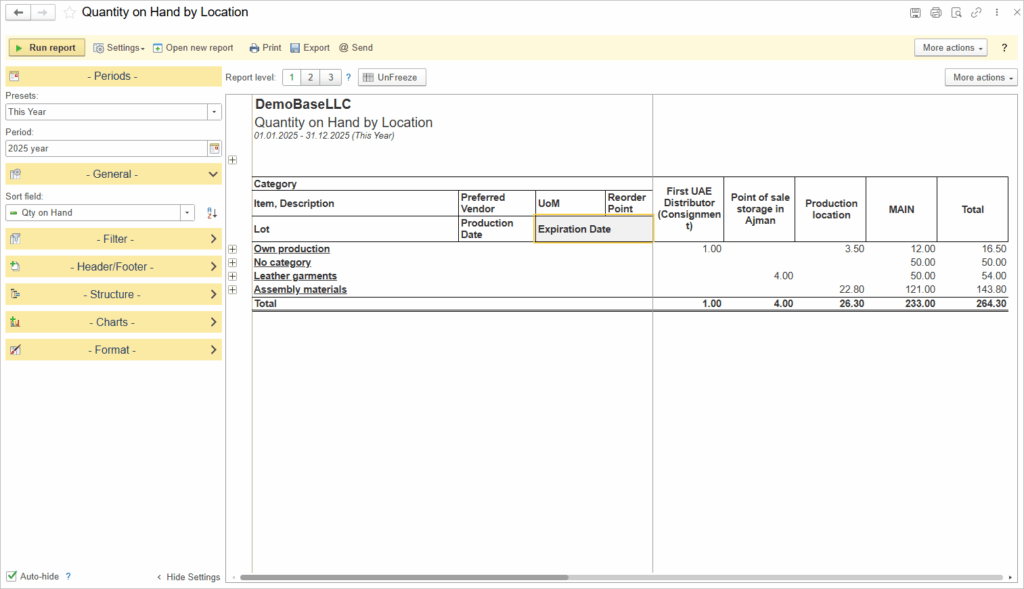
To organize batch expiration monitoring for your inventory you need to use Lots in Items. Lots can have Expiration date to track Inventory by overdue items.
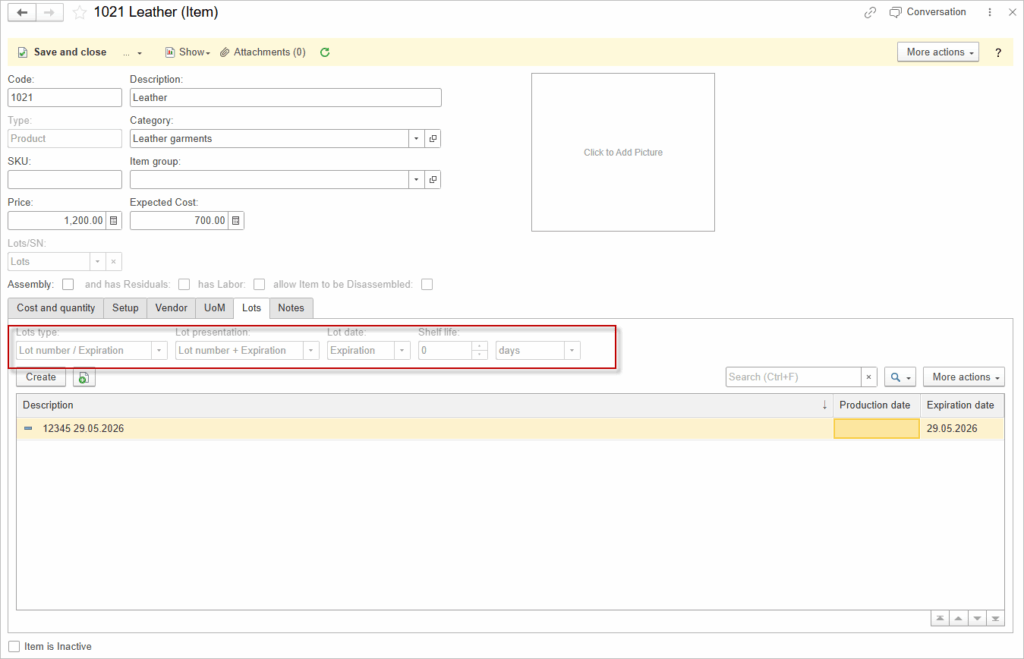
To control the lots by expiration date, use the report Quantity on Hand by Location.
See for more:
Serial numbers #
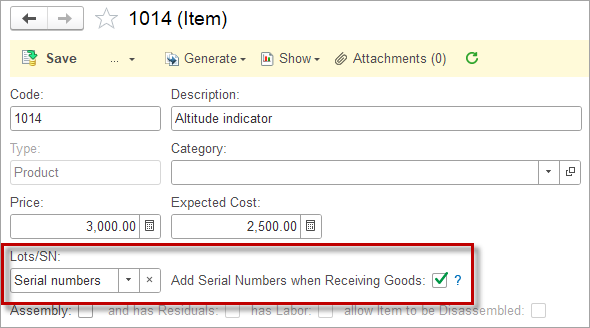
Using the Serial Number feature, assign serial numbers to received items on Item receipts or Bills and track items going out on Shipments or Sales invoices.
Choose Serial numbers in the Lots/SN field in the Item. To make Serial numbers a required field, tick the toggle “Add Serial Numbers when Receiving Goods”.
Costing methods #
Costing method is used to calculate the amount whenever an Inventory account is credited (e.g., by posting Sales invoice or Vendor credit memo). Select the costing method for an Item. Methods available for Items are:
Set of products #
If you sell sets of products of the same Items in several pieces, then create in a Unit of Measure Set new element Set or Pack of several pieces and choose this UoM for sale in Sales Invoice document.
If you sell several different products in one set, as an inseparable package, then create a separate Item with the name of this set and make Assembly Build from its constituent elements.
Treatment of Inactive Items #
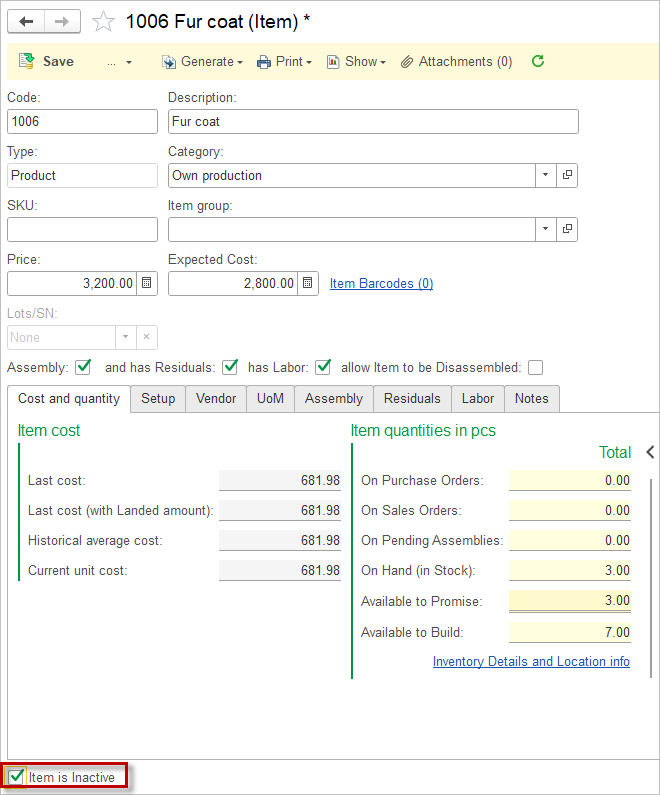
Managing your item list efficiently includes keeping it current by handling items you no longer need. When an item is no longer required for use in transactions and has no remaining stock, you should mark it as inactive rather than deleting it.

Please note: Only items with zero stock can be ticked as inactive. This ensures that items still holding inventory are not accidentally removed from active use, preventing discrepancies in stock management.
To mark an item as inactive, locate it in your item list and tick the checkbox labeled “Inactive.” Once marked inactive, the Item will no longer appear in active selection lists when entering new transactions, preventing accidental use. However, the item’s data remains in the system, allowing you to view past transactions and reports that include this item.
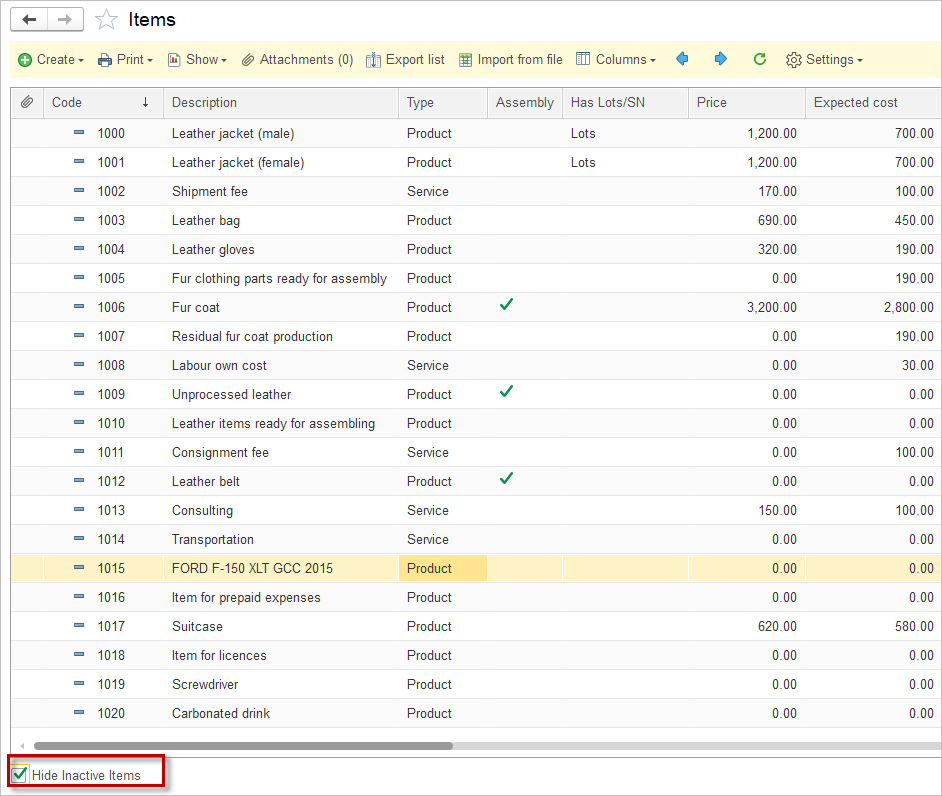
In the Items list, tick the checkbox below to hide inactive Items:
Additionally, you can create a separate folder, such as “Inactive” or “Archive,” within your Items catalog to organize these items. Once an Item is no longer needed, move it to this folder. This practice helps keep your active item list clean and focused, while still retaining access to inactive items for reference or reporting.

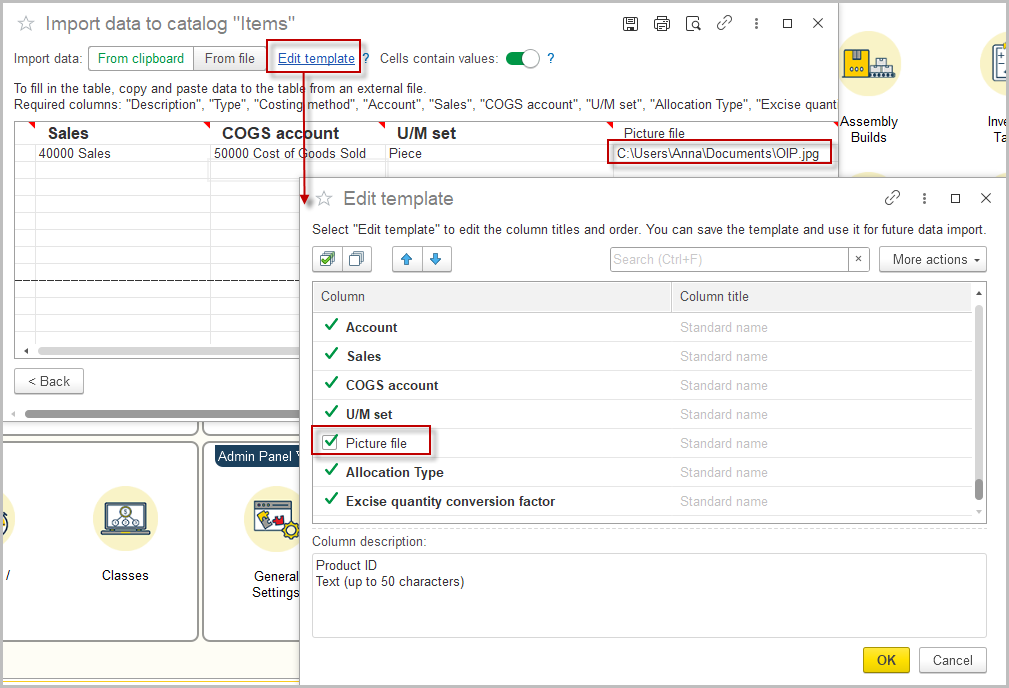
Items Import #
To add new items or update existing ones, use the Data Import Tool. You can also watch this video tutorial for step-by-step instructions.
Item images can be imported along with other item attributes by including the Picture File field in your template and specifying the image file path (for example: C:\Users\Documents\Image.jpg).