The use of the file management functionality involves three steps:
1. General configuration settings;
2. Personal user settings;
3. Work with files.
The system administrator is responsible for the first stage. The second stage is performed by the user with the help of the administrator. The final stage involves the configuration of users.
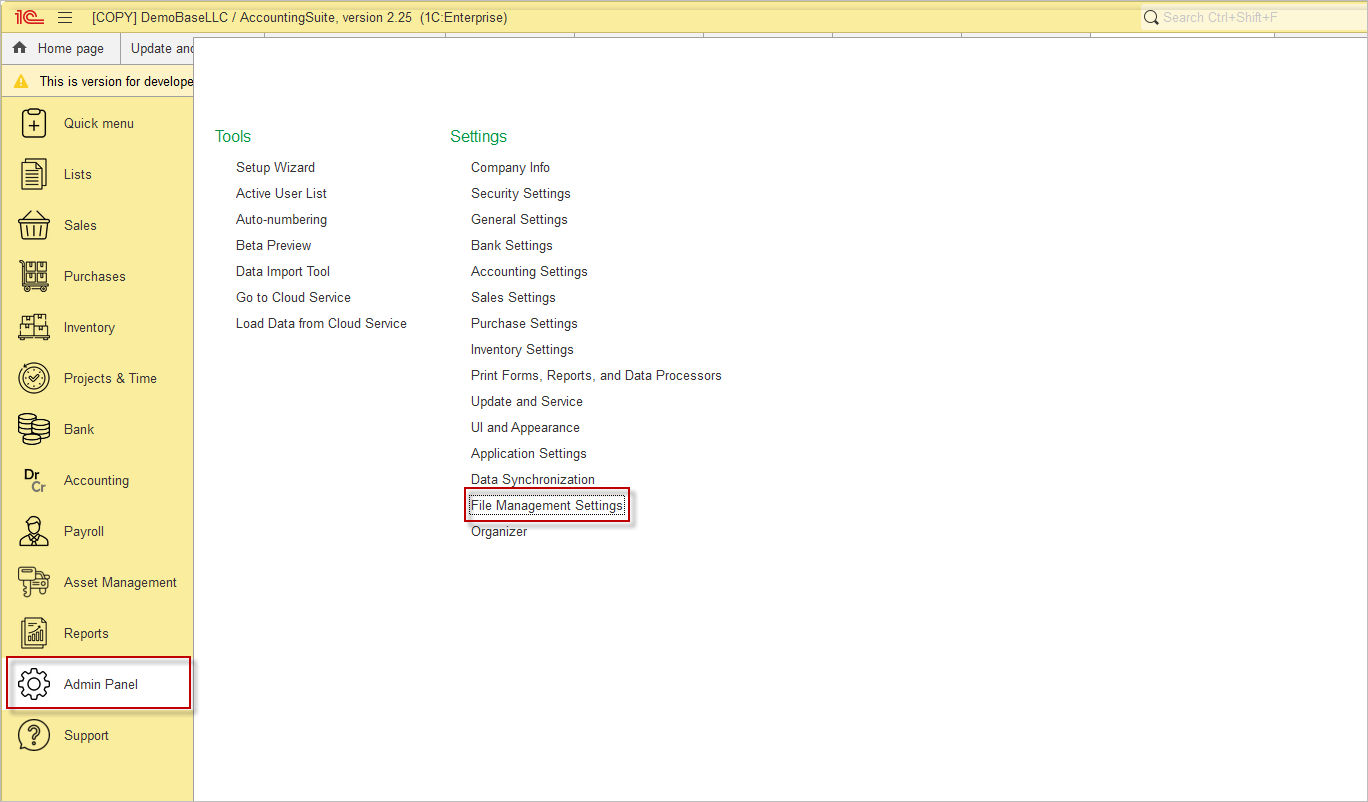
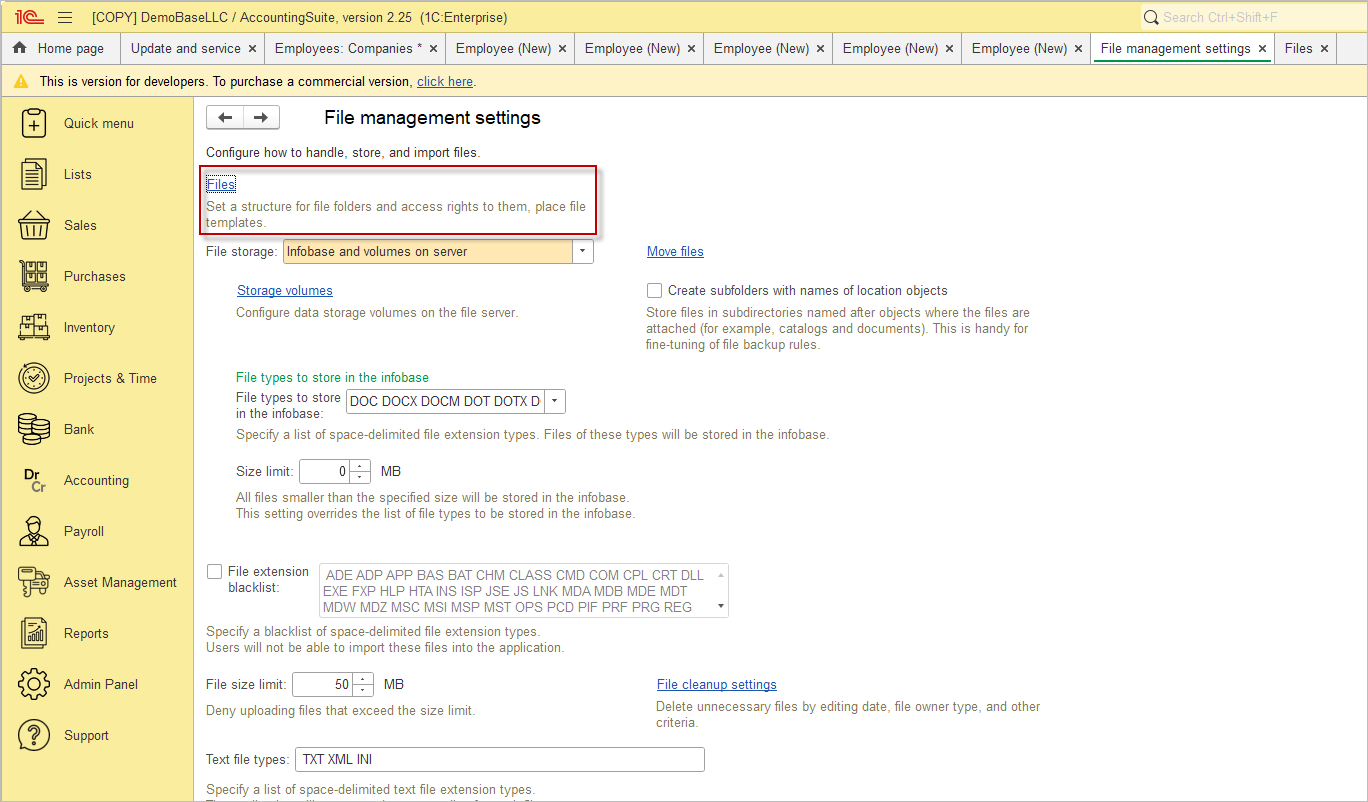
By selecting the Files button, you can establish the structure of your file folders and define the access rights for each. You can also place file templates.
You have the option to create folders and subfolders, and to add files using three functions: Local file, From template, From scanner

You can choose the format of file storage:
1 infobase
2 Volumes on server
3 infobase and volumes on server
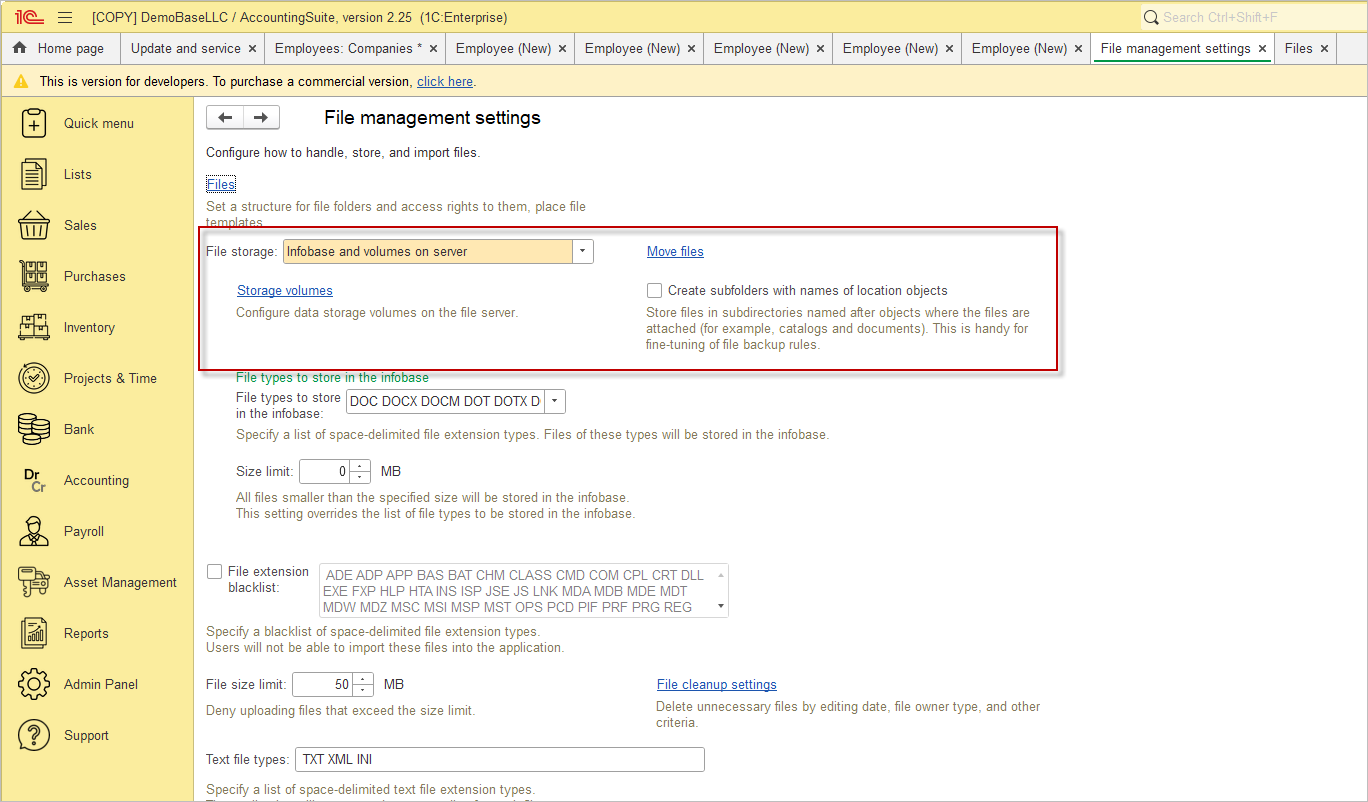
If you choose to store on a server. click Storage volumes and create a file storage volume. you can specify the path to the storage folder (on a Windows or Linux computer)
It is possible to adjust the number of orders, set the maximum and current size in megabytes, and attach a comment.
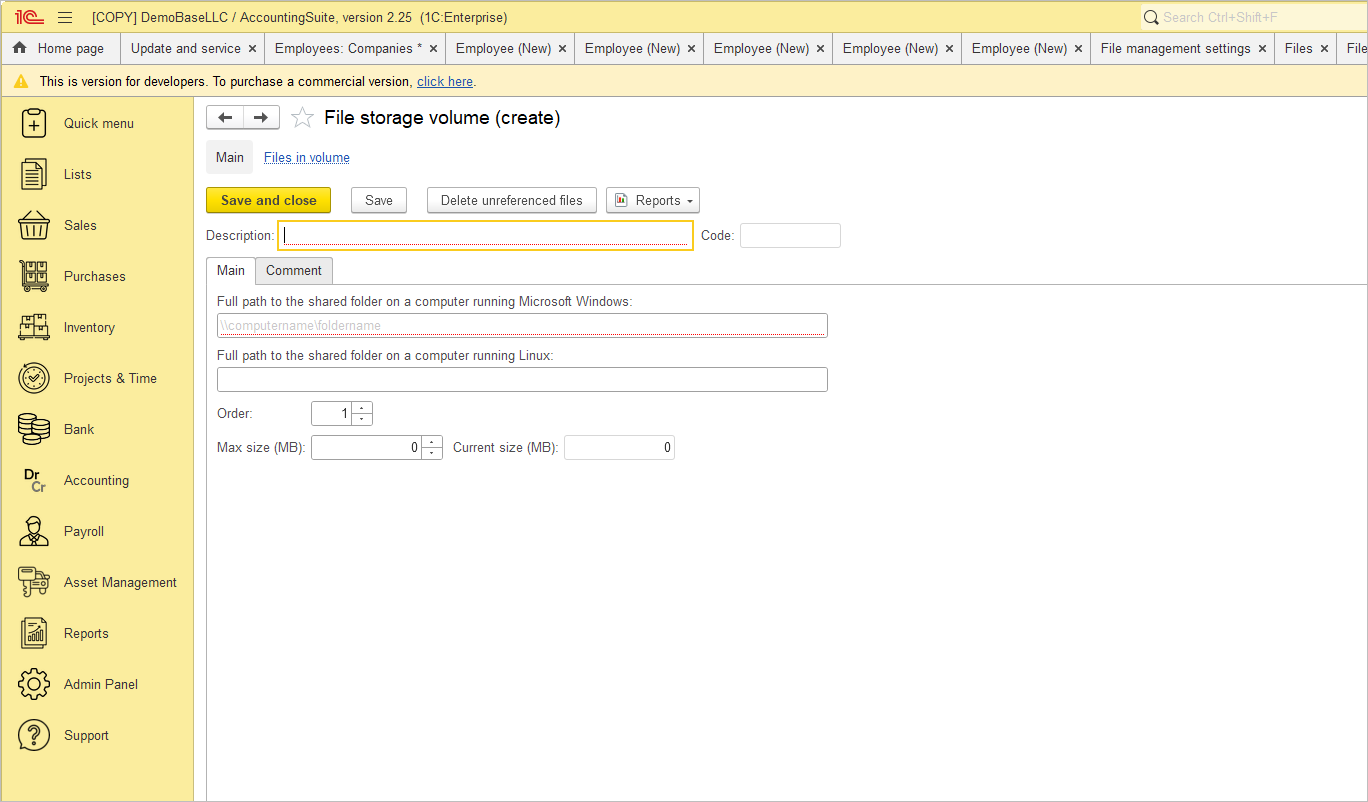

Please note: The volume path must be in the UNC format (\\servername\resource)
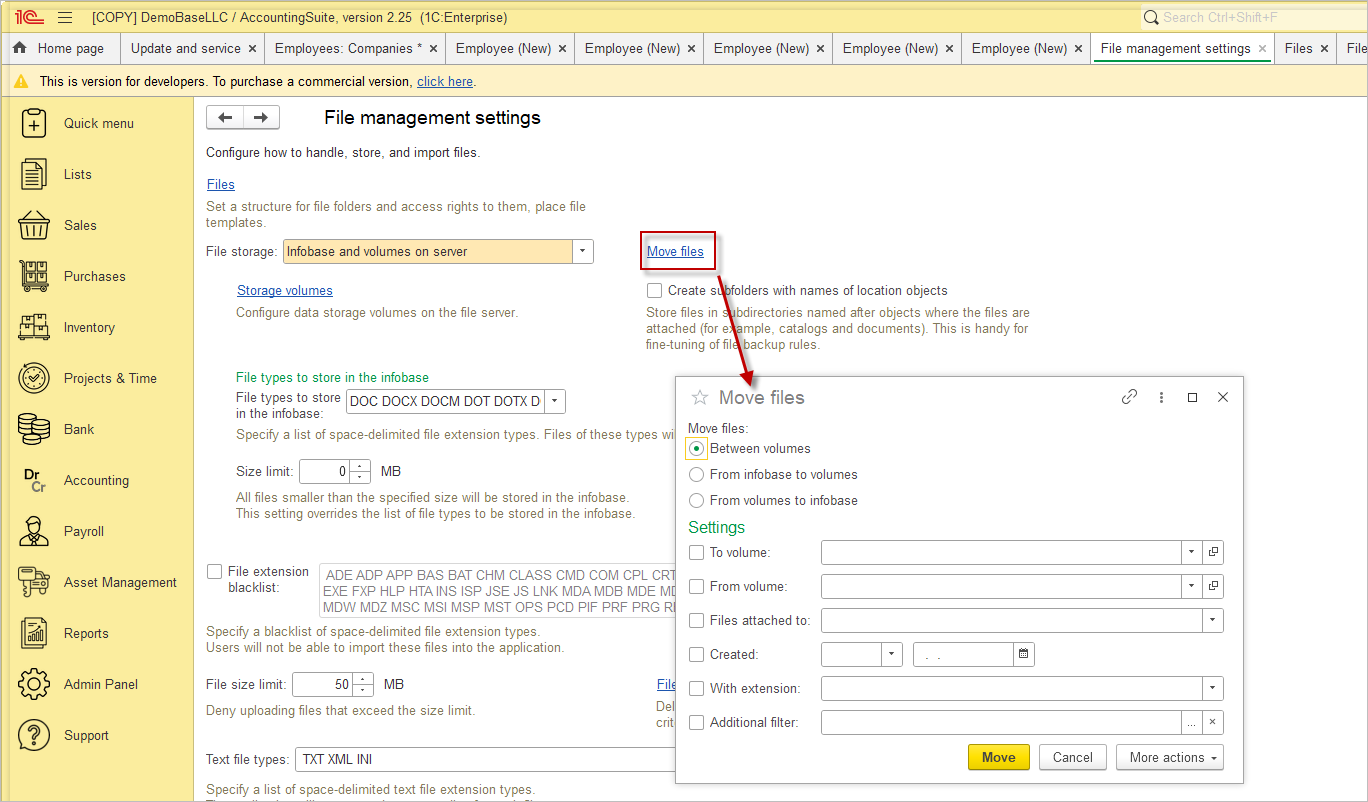
Move files allows you to move files between volumes, from the infobase to volumes, or from volumes to the infobase. You can also specify settings such as destination volume, source volume, attached files, creation date, file extension, and apply an additional filter.
If you select Create subfolders with names of location objects you will be able to Store files in subdirectories named after objects where the files are attached (for example, catalogs and documents). This is handy for fine-tuning of file backup rules.
File types to store in the infobase:
Select from the Office Documents (DOC, DOCX, DOCM, DOT…), Images (JPG, JPEG, JP2, JPG2, PNG, BMP, TIFF) templates, or customize to suit your needs.
Specify the acceptable file size in megabytes. All files smaller than the specified size are stored in the infobase. This setting overrides the list of file types to be stored in the infobase.

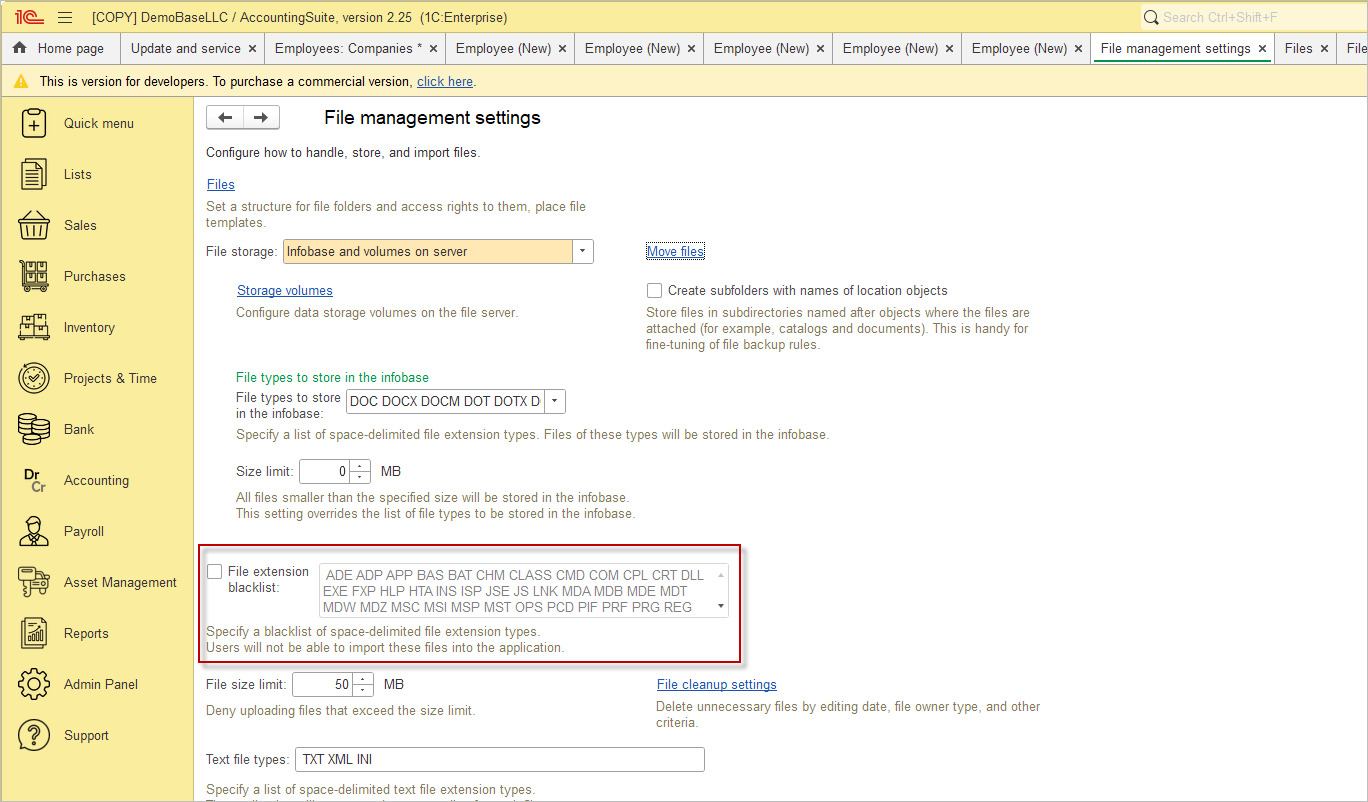
The File Extension Blacklist option allows you to specify a list of file extensions that users will not be able to import into the application. This helps to prevent potentially harmful or unwanted file types from being uploaded, thereby increasing security.
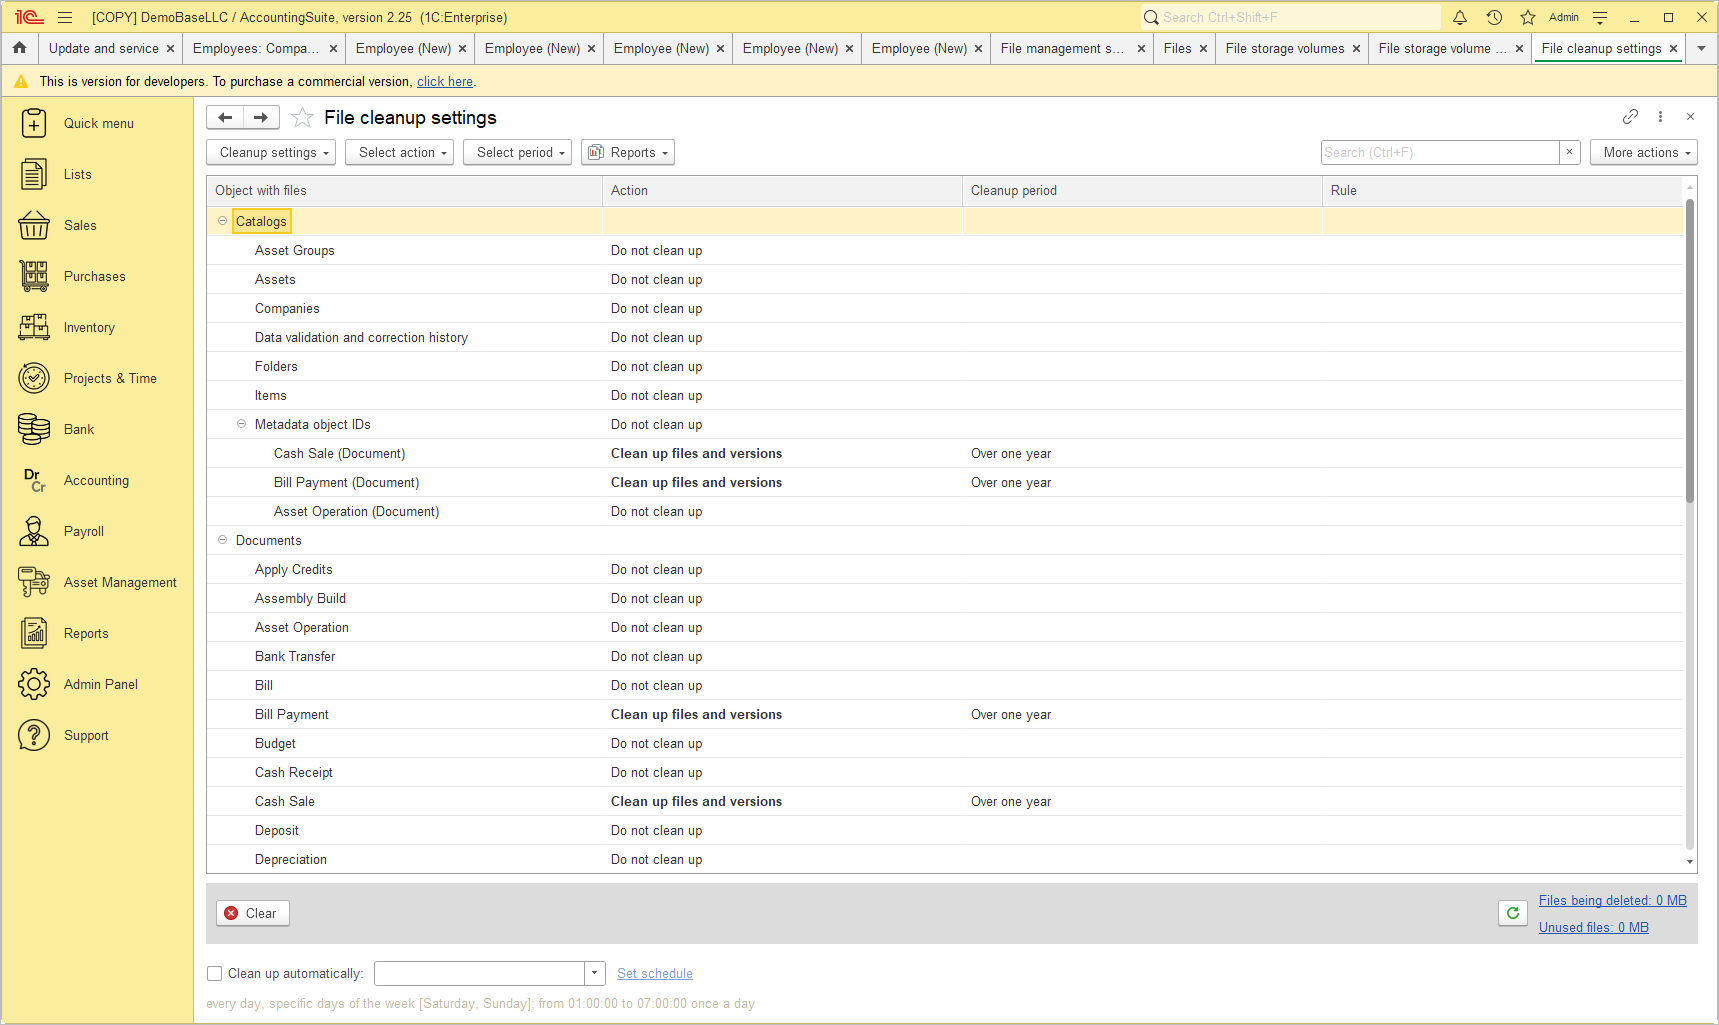
File cleanup settings:
Delete unnecessary files by editing date, file owner type, and other criteria. Select action, do not clean up, Clean up versions/files, Clean up files and versions.
Choose clean up period over a month/six months/a year. Click Select Action to apply the action to the items in the selected catalogue or document.
At the bottom of the screen, you can choose to automatically clean only deleted files, or deleted and unused files.
Please note: Check whether you should back up your database and network file storage volumes before uninstalling.
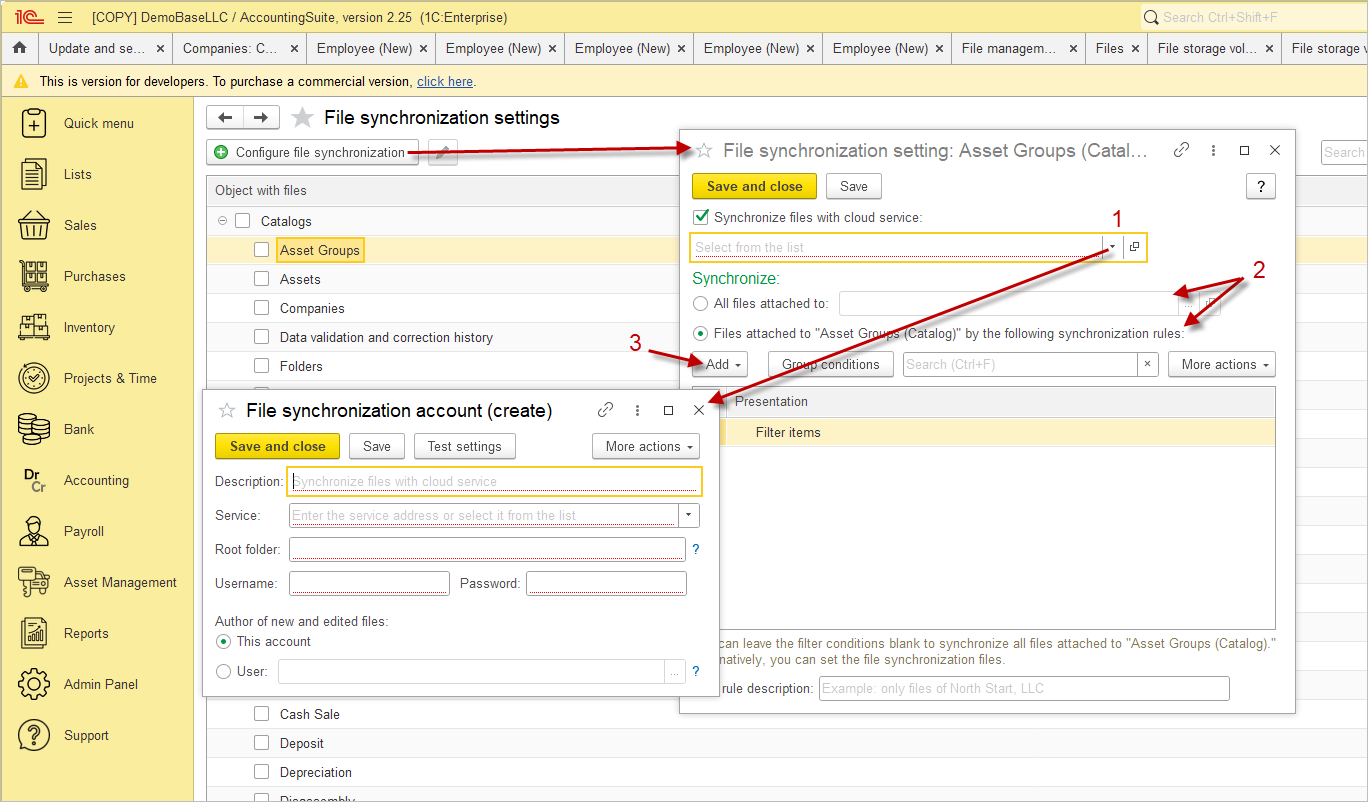
At the bottom of the file management settings window you can synchronise files with cloud services such as Yandex.Disk, Dropbox, and others.
Sync settings
Sync files with cloud storages by file owner types and other criteria.
The first step is to configure the service for synchronisation. To do this, select a service, for example, Yandex Disk, select the root folder, enter a user name and password, and select the author of new and edited files.
The second option is to synchronise all attached files: (choose what you need) or files attached to Asset groups (Catalog) by the following synchronisation rules: press add
Third – Configure synchronisation rules.