Using the Serial Number feature, assign serial numbers to received items on Item receipts or Bills and track items going out on Shipments or Sales invoices.

Setting up an Item to Serial Numbers #
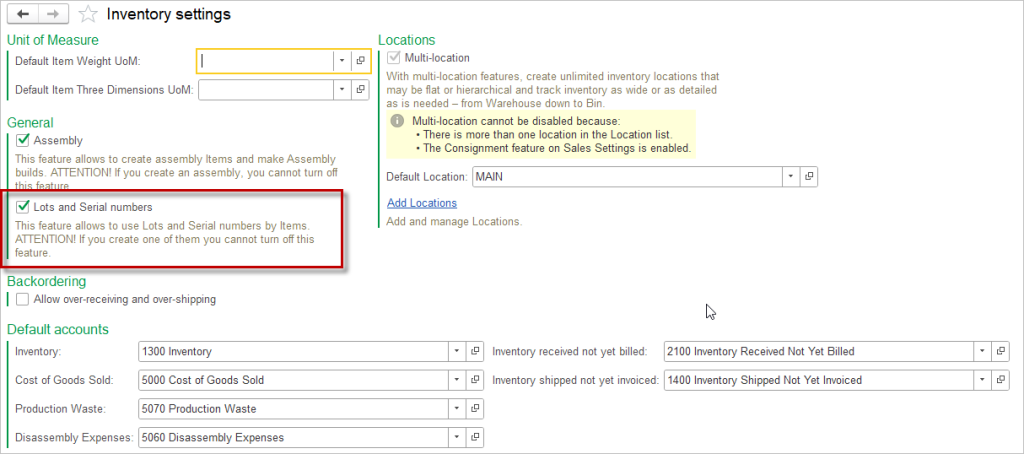
As a first step, enable Lots and serial numbers in the Inventory settings. Once enabled, the items in your inventory that will use lots will need to be setup.
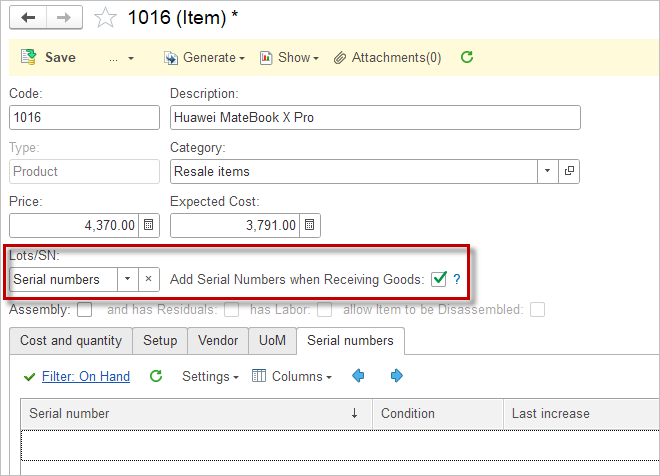
- Open or create an item that will use serial numbers.
- Check the box labeled Use lots / serial numbers.
- Click the lots / serial numbers tab.
- Click Use Serial Numbers.
- Tick the checkbox Add Serial Numbers when Receiving Goods.
- Click Save and Close.
Assign Serial Number to Item #
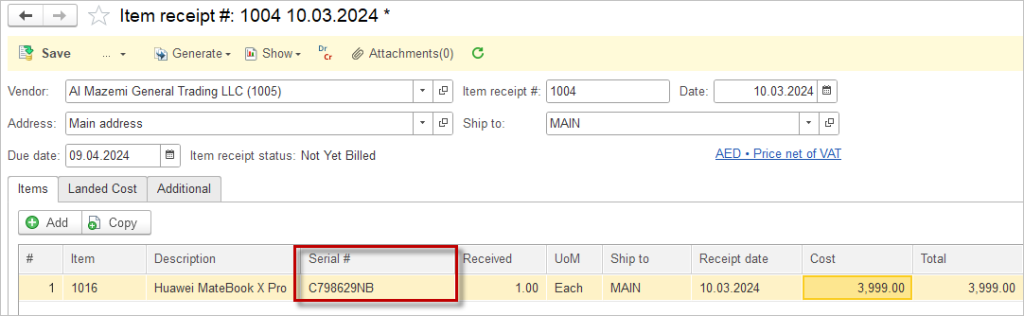
- On the Item Receipt or the Bill, click the on the line item in the field labeled serial #.
- Click Add.
- Type the Serial Number.
- Repeat step two for each quantity of the item.
- Click Save and Close.
Accounting #
Since the Serial numbers Adjustment is for management accounting purposes only, it does not generate any postings in the General Journal.