In Print form templates (Admin Panel – Print forms, reports and data processors) menu you can view the full list of templates used in our application. With a double click on a template, you can go to the template editor and change form for your needs and convenience.
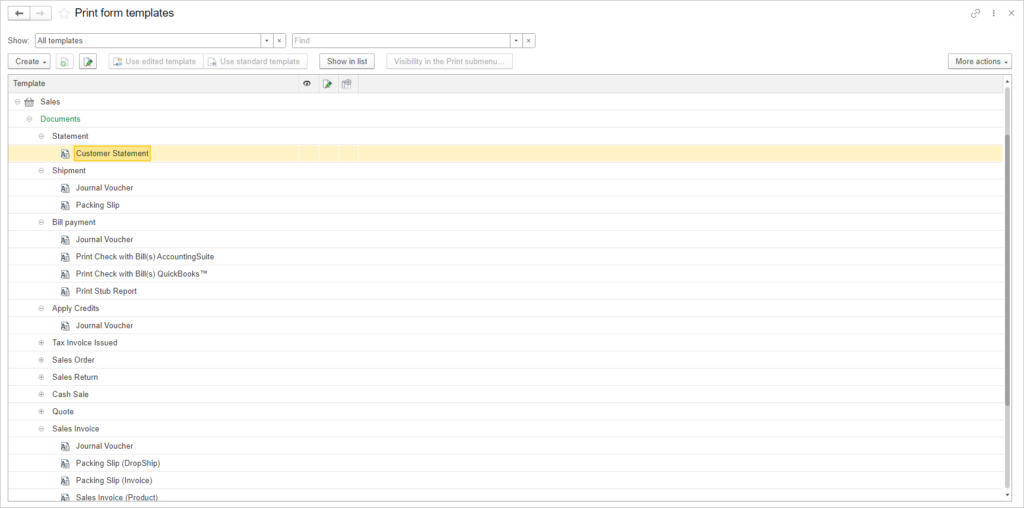
You can use the Show in list button to see which document or list this form belongs to.
If you created your new template, you can change Visibility conditions and check (uncheck) box in the Show in the Print submenu column.
You can always contact our team to fully customize print forms and reports to perfectly match your business needs, we will be pleased to help you. For more information click here.

Since you’re moving to automation, you don’t need to replicate the old handwritten paper print forms and try to match printing in non-empty paper. The system will create a new, clean invoice from a template. There’s no need to try and make the text fit into the boxes on the old scanned documents—just let AccountingSuite generate its own clean version on a “blank slate.” This is much more efficient and avoids formatting problems.
A quick heads-up regarding the invoice automation in AccountingSuite.
Think of the old process like filling in the blanks on a paper tax form. The new AccountingSuite process is like having a printer that generates the entire tax form from start to finish—lines, labels, and all—based on the data.
So, instead of instructing AccountingSuite to “fill in the boxes” on an image of your old form, you simply provide the data (like client name, amount, items) and let AccountingSuite “draw” the entire invoice on a fresh, white page. This is the core benefit of automation — it creates the document for you.
Please use the standard AccountingSuite invoice template with your logo rather than trying to match the old manual layout.
But if this is a necessary condition (Cheque, Strict reporting blank), it can be done like this. In strict print form, you need to:
- Adjust the page width correctly to fit the printer you want to print on.
- Define the boundaries of the print form – the outermost cell
- Make a drawing with transparency from a strict blank (.png format) and periodically try it on as a drawing on a print form.
- If everything is set up correctly, the preview will normally show the result.
But this is not a UI setting all the time. This should be done in 1C Designer in some cases.
UI settings has no option to set footer on the same place for strict blank. It is print form from code side.
You need to study use full developer’s stack in 1C Designer to have no limits in settings print form. Please see Strict Print Form for more.
Print forms – Editing template
Please note: There is a limit to change column’s width in web browser working with Cloud version with Edit Template mode. Use thin-client to work with web published database. See How to install 1C:Enterprise Web Client for Cloud version.
How to add amount in words and other fields #
To add a new field to a print form, follow these steps:
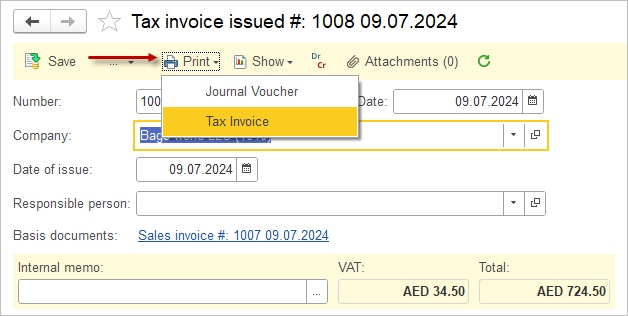
- Open the required document and click the Print button, then select the desired print form from the menu
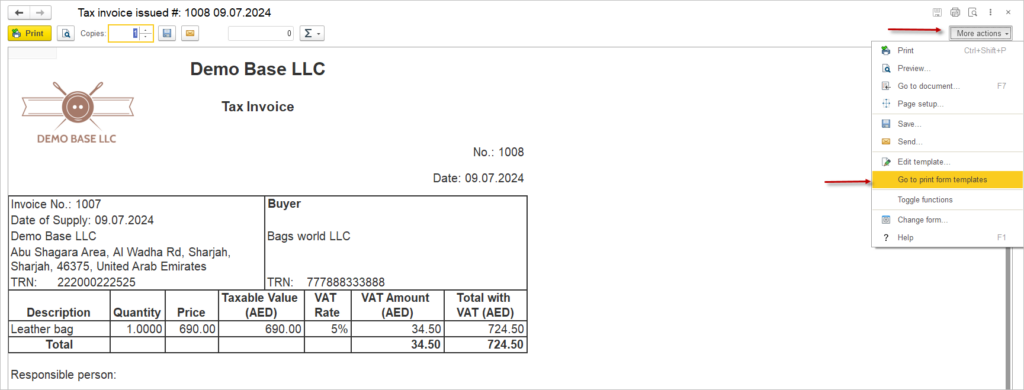
- In the opened print window, go to the More actions menu and select Go to print form templates
- Choose the desired form from the list and click Edit template
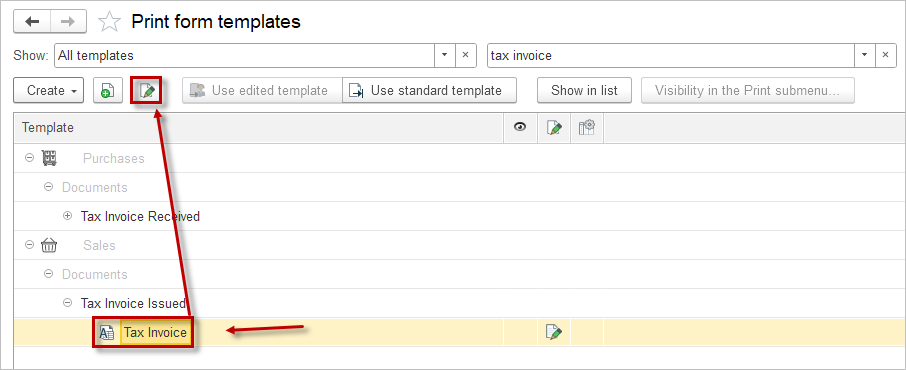
- Click the Available fields button in the upper left corner
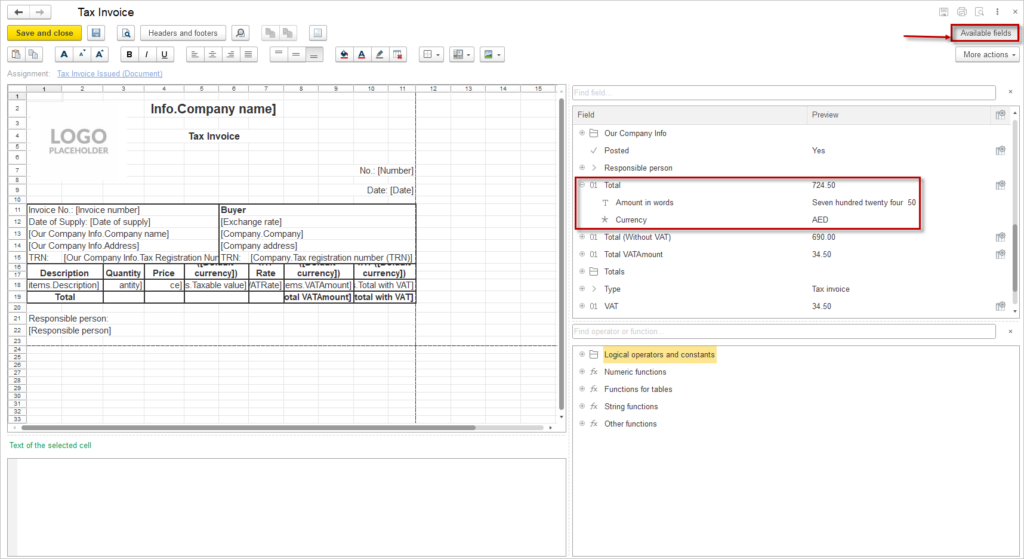
- Select the needed field from the opened list and move it to the appropriate place on the form
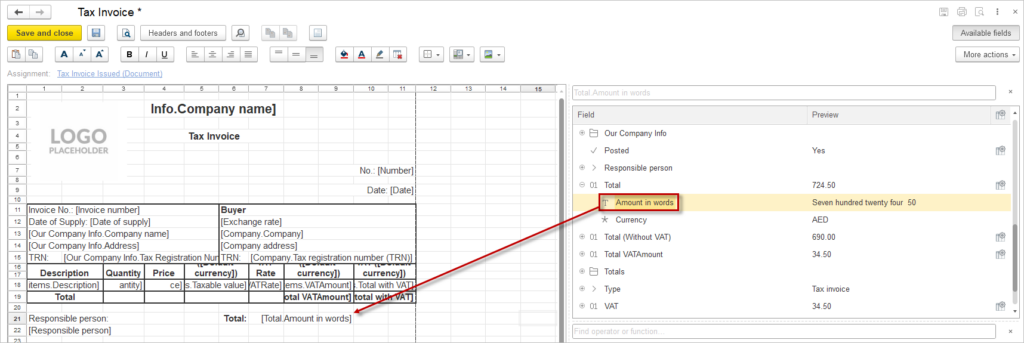
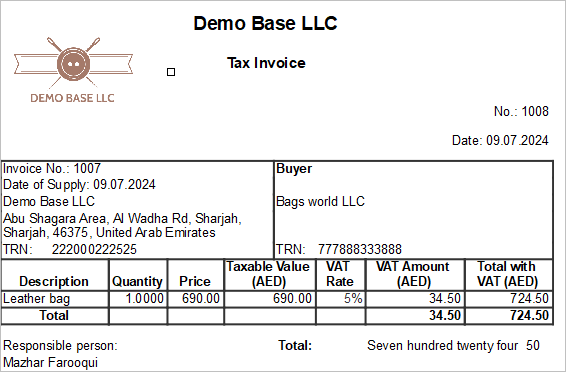
- Save the form. After this, all next versions of this document will be printed with this field
At the moment, the amount in words is supported in such print forms:
- Journal Voucher
- Inventory Taking
- Credit Note for Tax Invoice Issued
- Tax Invoice for Tax Invoice Issued
- Asset Disposal for Asset Operation
- Asset Receipt for Asset Operation
- Asset Transfer for Asset Operation
- Personnel Order
- Payroll
Conversion settings for amount in words #
For full compliance with local legislation, fine-tuning is available for amount in words. Navigate to General settings – Amount to Words Conversion Settings:
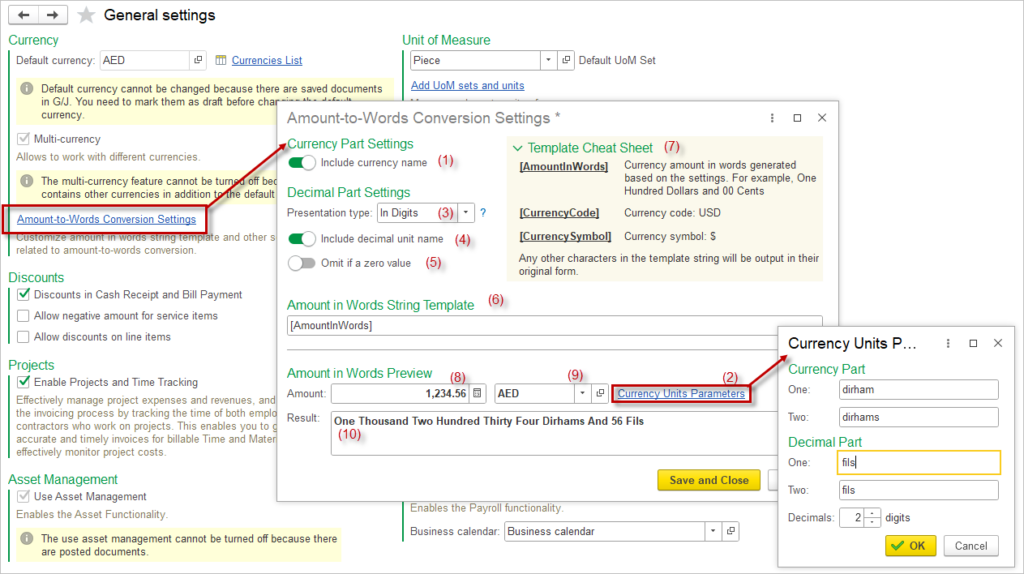
Select, if the currency name (1) and the decimal unit name (4) should be displayed on the print form. Change the names for currency and decimal part under Currency Unit Parameters (2) if required. After each changes in the settings, you can preview the result (10) straight away without saving the form.
Decimal part can be shown (3) in digits (e.g., “56”), in words (“fifty six”) or as a fraction (“56/100”).
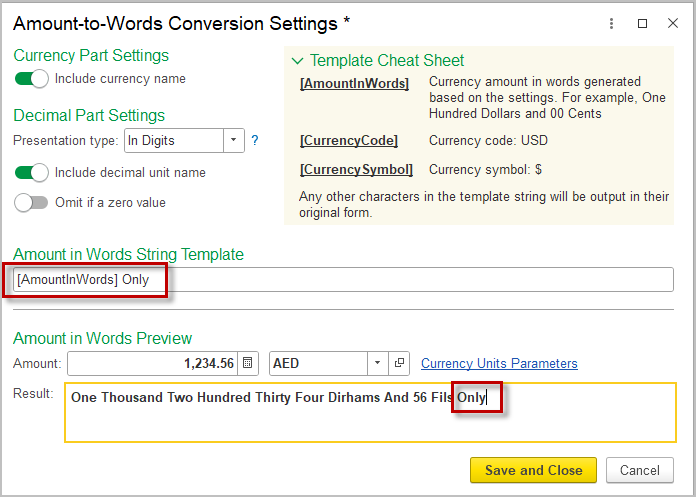
Use the Template Cheat Sheet (7) to add extra information to the Amount in Words String Template (6). If any additional information is needed, e.g. the word Only ater the amount in words, enter it in the Amount in Words String Template without the braces. Save and close and check the print form.
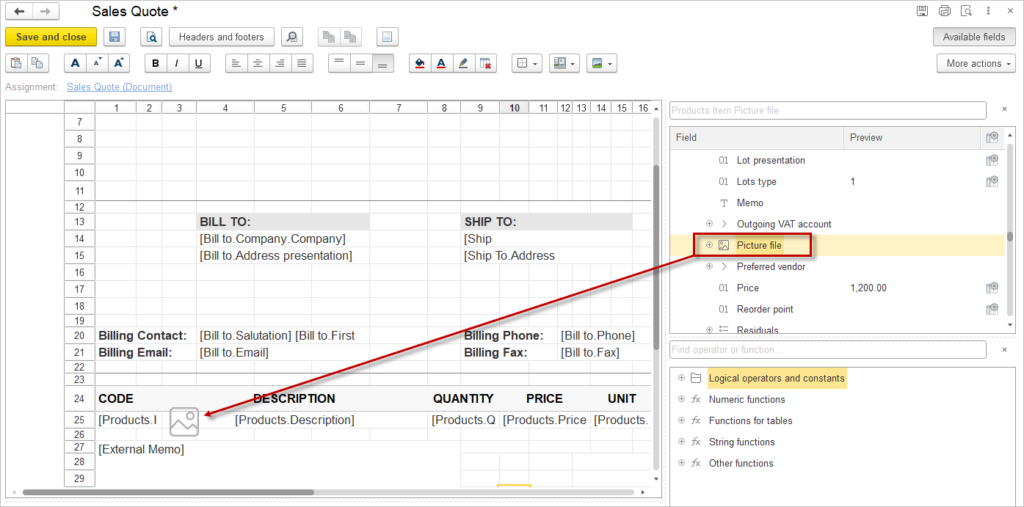
How to add Item image #
To add the Item image to a print from, follow the path: Product – Item – Pircture file on the right panel and drag and drop it to the print form.
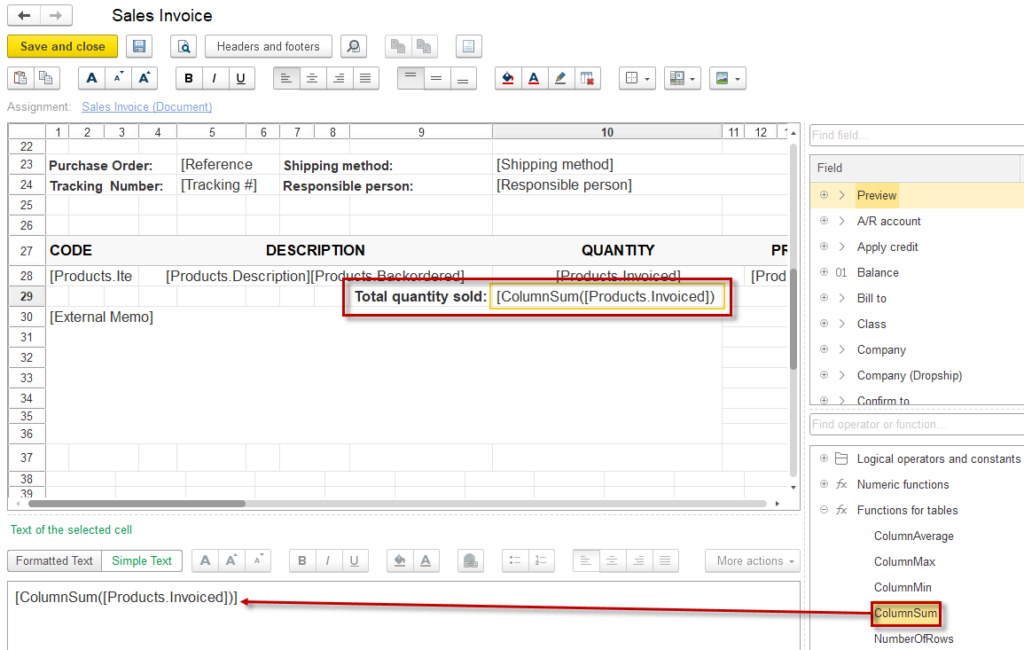
How to add total #
To add total for any column containing numbers, use the standard ColumnSum functions.
Place the cursor in the cell, then drag and drop the function from the right-hand pane. Place the name of the column where the sum is required into the braces.
Put whole functions into the square […] brackets. Here is an example: [ColumnSum([Products.Invoiced])]
How to Add Two or More Formulas in One Cell #
When working with formulas on your Print Form, you may need to combine multiple calculations in a single cell. Here’s how to do it correctly using the Max() function as an example:
Option 1: Two Separate Values
If you want to display two independent results, enclose each formula in its own square brackets []:
[Max([Subtotal]-[VAT], 0)] [Max([Subtotal]-[VAT], 0)]. This will output two distinct values.
Option 2: Nested Formulas (One Final Value)
If one formula depends on another (nested calculation), use a single set of brackets [] for the entire expression:
[Max(Max([Subtotal]-[VAT], 0)-[VAT], 0)]. This computes a single result by evaluating the inner Max() first, then applying the outer Max().
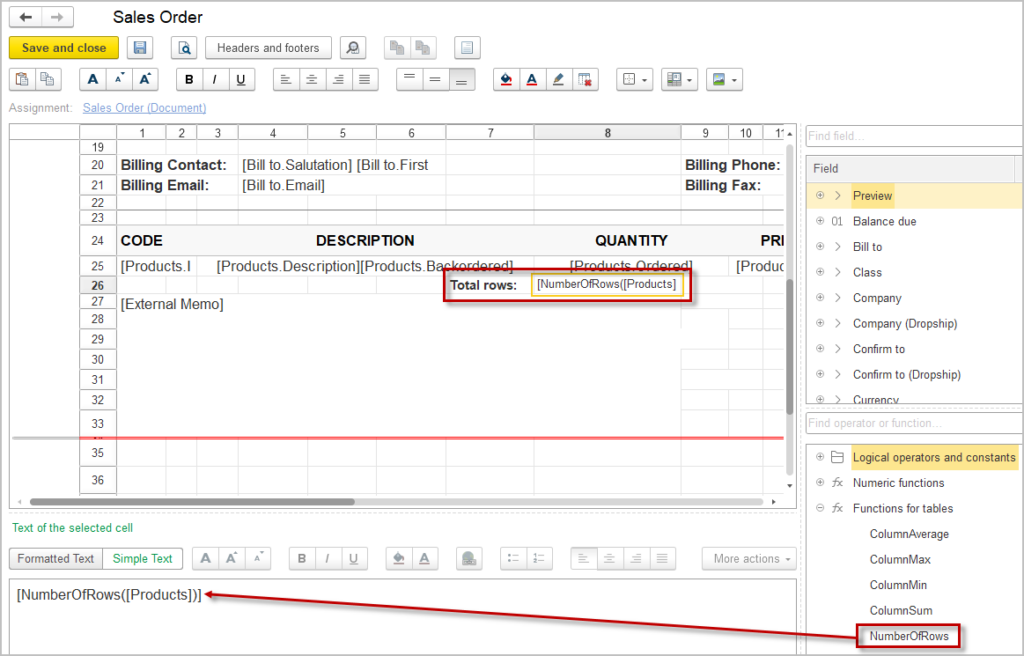
How to add Number or Rows
#
To add number of rows for Items, use the standard NumberOfRows functions.
Place the cursor in the cell, then drag and drop the function from the right-hand pane. Enter Products in the braces. Put whole functions into the square […] brackets. Finally, it should look like this: [NumberOfRows([Products])]
How to add Product Summary #
If it is required to summarize items with the same Item Code but different attributes, use the Product (Summary) option. If the line items have the same VAT rate, unit of Measure, and Product, they will be combined.
Lots and serial numbers are listed as comma-separated values. The price is calculated as the average — total amount divided by quantity.
This option is currently available only in the Sales Invoice Print form.

How to add sum with Condition #
To print separately Zero VAT 0% and VAT Exempt in a Print Form you need to use the formula of the condition.

- VAT Amount – [ColumnSum([Products.VAT])]
- Zero VAT 0% by Rate Amount – [ColumnSumWithCondition([Products.Total], [Products.VAT Rate.Rate] = 0)].
- Or Zero VAT 0% by Tax Rate Name – [ColumnSumWithCondition([Products.Total], [Products.VAT Rate.Description] = “Zero tax”)]
- VAT Exempt – [ColumnSumWithCondition([Products.Total], [Products.VAT Rate] = “”)]
The “ColumnSumWithCondition” formula is used to calculate the arithmetic sum of a numeric column, but only for those rows that meet one or more specified conditions. Syntax: [ColumnSumWithCondition(<NumericColumn>, <Condition>)]
Parameters
- <NumericColumn>: The name of the dataset column containing the numeric values to be summed.
- <Condition>: A logical expression defining the criteria that a row must meet to be included in the summation. This condition is built using references to other columns within the same tabular section.
Example: [ColumnSumWithCondition([Products.Total], [Products.VAT] > 0 And [Products.VAT Rate.Description] = “VAT5%”)]
The formula calculates the total sum of the Products.Total column, but only for rows where the value in the VAT column is greater than zero AND the value in the VAT Rate.Description column is exactly equal to “VAT5%”.
Constructing Conditions
Conditions are built using logical and comparison operators to form expressions that evaluate to True or False.
- Data Type Conventions:
- Numbers: Use numeric values directly, without quotes (e.g., 10, -5, 0).
When manually entering a numeric value for comparison within a condition (e.g., [Column] > 100), the number must be specified as an integer. The use of fractional numbers (decimals) is not supported in this context.
- Strings: Must be enclosed in double quotes “” (e.g., “VAT5%”, “Completed”).
- Checking for Emptiness:
- For numeric columns, compared to 0 (e.g., [Column] = 0).
- For string, reference, and other data types, compared to an empty string “” (e.g., [Column] = “”).
- Logical Operators:
- “And” – Both parts of the condition must be true.
- “Or” – At least one part of the condition must be true.
- “Not” – Reverses the result of the condition (e.g., Not [Column] = 10 is true for all values not equal to 10).
- Comparison Operators:
- “=”- Equals
- “>”- Greater than
- “<”- Less than
- “<>”- Not equal to
- “<=” – Less than or equal to
- “>=” – Greater than or equal to
- Mathematical Operators:
- “+”- Addition
- “-”- Subtraction
- “/”- Division
- “*”- Multiplication
These can be used within the condition to create complex expressions (e.g., [Products.VAT] > 0 + 250).
Condition
The “Condition formula” is used to return one of two values based on the evaluation of a logical expression.
Syntax: [Condition(<Logical_Expression>, <Value_If_True>, <Value_If_False>)]
Parameters
- <Logical_Expression>: Any expression that can be evaluated as True or False.
- <Value_If_True>: The value returned if the logical expression is true.
- <Value_If_False>: The value returned if the logical expression is false.
Key Notes:
- The logical expression can compare any values, including regular fields from the tabular section and other table fields.
- The output values (Value_If_True, Value_If_False) can be hardcoded (e.g., strings in quotes, numbers) or references to other fields.
Example: [Condition(ValueIsFilled([Products.Vat Rate]), [Products.Vat Rate], “NA”)]
The following formula checks if the Vat Rate field is filled. If it is (the condition is true), it returns the value from the Vat Rate field. If it is not filled (the condition is false), it returns the string “NA”.
How to add Digital Stamp or Signature #
Navigate to Admin Panel – Company Info and upload the image of Digital Stamp (Seal) and/or Digital Signature images:
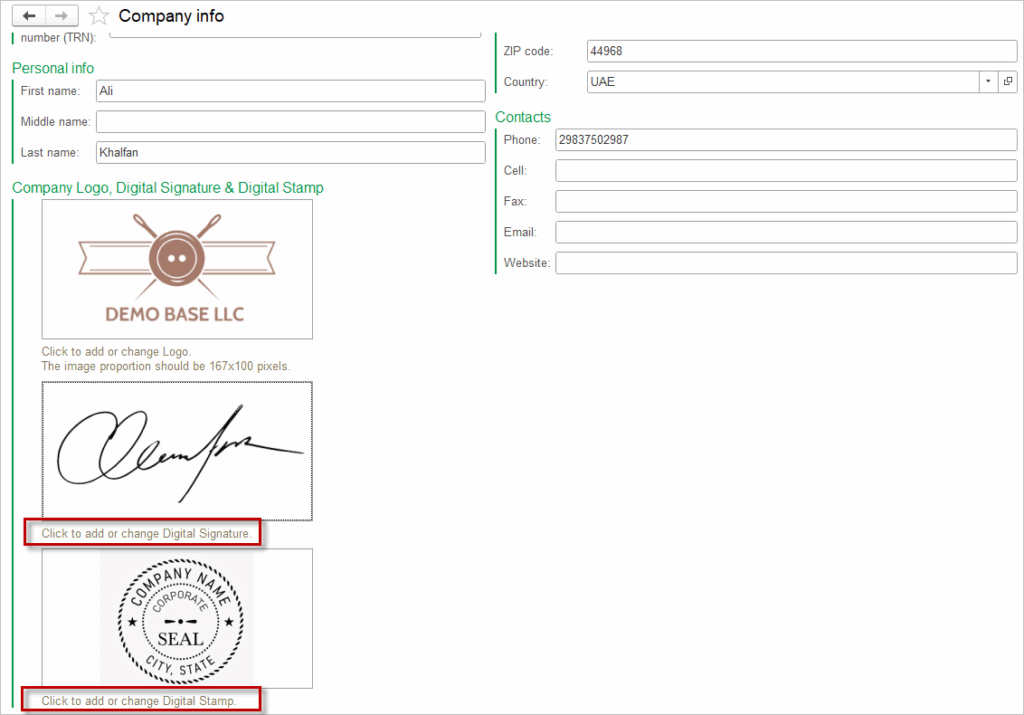
On the print form template, drag and drop the image from the right-hand pane (from the Common attributes). Manually adjust the image size if required.

Troubleshooting Print Forms #
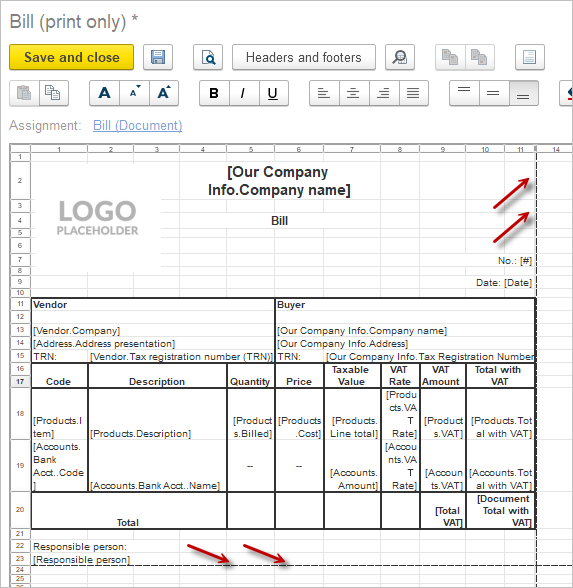
Fitting Print Form #
The scaling is configured to automatically operate in Fit Page Width mode during printing. If this setting is not functioning as expected and the selected option does not properly adjust the content to the page, the underlying cause may be that the form has not been fully cropped at the edges or that there is hidden content on the right side. Consequently, the Fit Page Width option attempts to accommodate the form in this manner.
To fix this, please check the printing area. The print area is indicated by dotted lines.