The warehouse transfers feature allows inventory users to record the transfer of an item from one location to another (multi-location must be enabled to use warehouse transfers).

Create Warehouse transfer #
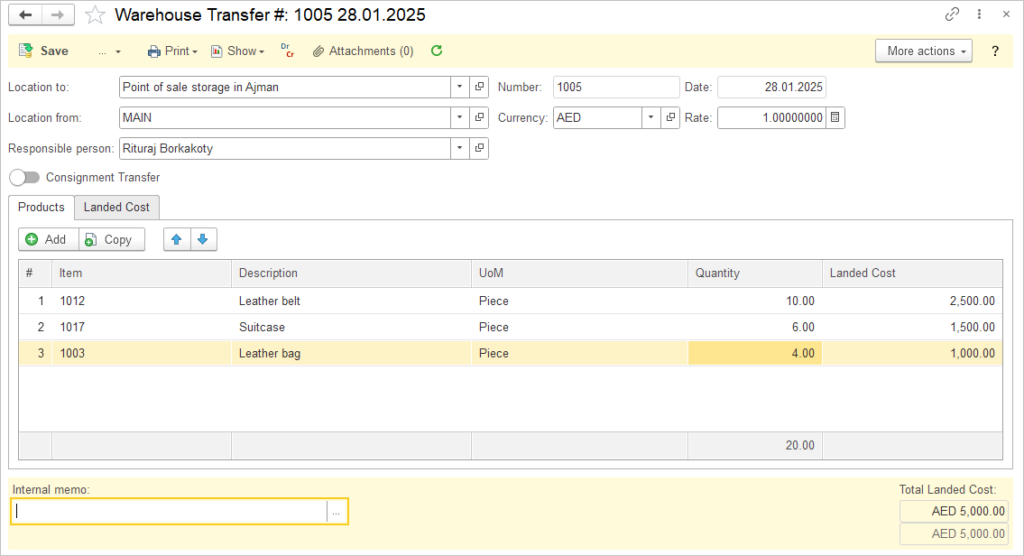
- Navigate to Inventory → Warehouse Transfers.
- Click Create.
- Modify the Number if desired. The Warehouse Transfer will use the next number configured in Document Numbering.
- Modify the Date, if necessary. The system defaults to today’s date.
- Change the Location from: if necessary. The system defaults to the default location.
- Pick a location to: from the drop-down list, which includes a list of all of your locations.
- Click Add to add a product.
- Choose the Item name from the drop-down list.
- Enter the Quantity to Transfer. The quantity is in the base unit of measure, if more than one unit of measure applies to this product.
- Fill in the Landed cost tab if required.
- Save the document.
Landed Cost in Warehouse Transfer #

Landed Cost option is available upon transfer of inventory between the Warehouses. It increases the carrying value of all specified Items across the Warehouses. Please refer to the Landed cost article to learn more about it’s accouting treatment.
Cost of goods sold is calculated without a breakdown to Warehouse or to Lot (Serial Number). These options will be available in next AccountingSuite releases.