Introduction #
This article provides a step-by-step guide to acquiring 1C:Enterprise software licenses for both client and server components.
Prerequisite: Setting Up the Database #
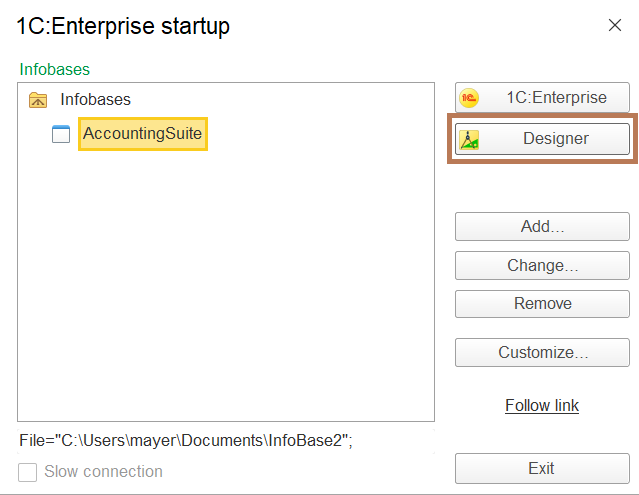
Before requesting a license, you need to create and start a file-mode database. When you start the file-mode database for the first time, the system will notify you that no license has been detected and prompt you to choose how you would like to acquire it.
Licensing Options #
This article focuses on acquiring licenses via the Internet (Acquire License) method. However, there are two alternative options:
- Specify License File (received from the License Center)
- Activate Community License
Both alternatives follow a similar process to the Acquire License option. For detailed instructions on these methods, see the 1C:Enterprise Software License Acquisition Guide.
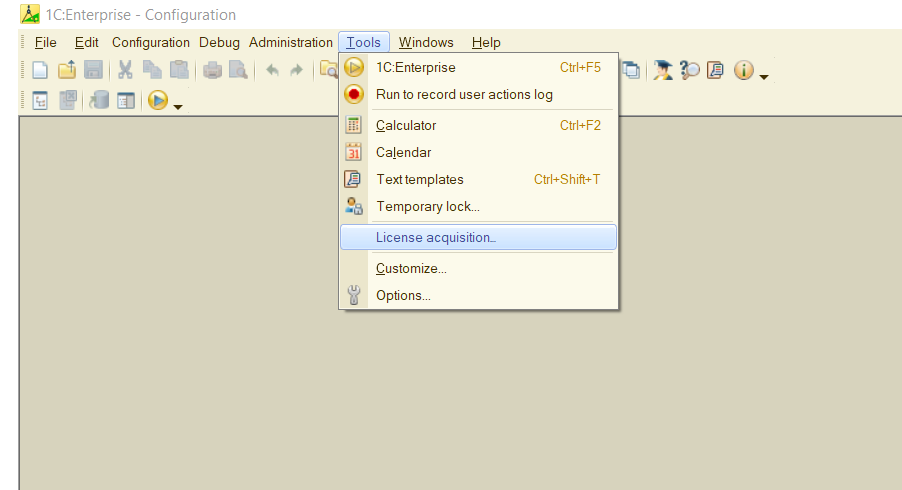
If licenses are already registered but you need to acquire additional licenses, you can relaunch the License Acquisition window from the 1C:Enterprise client’s Designer Mode:
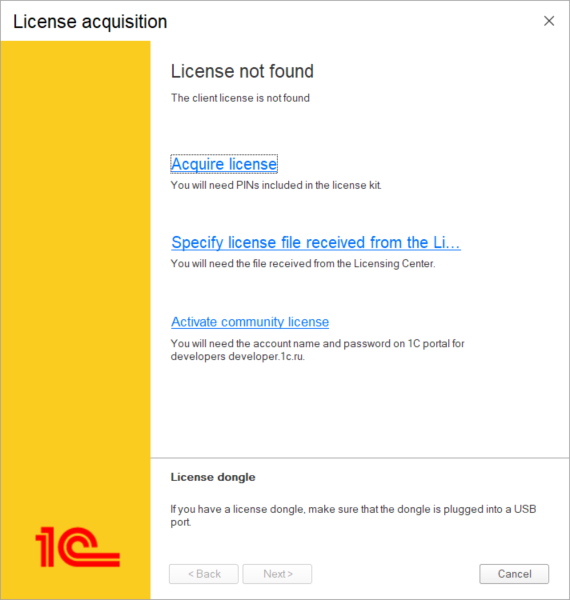
Step 1: Select Acquire License Option #
Select Acquire license option in the License acquisition window.
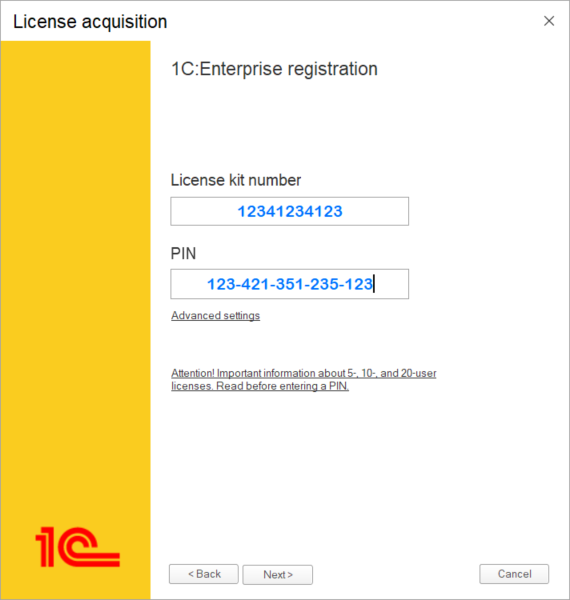
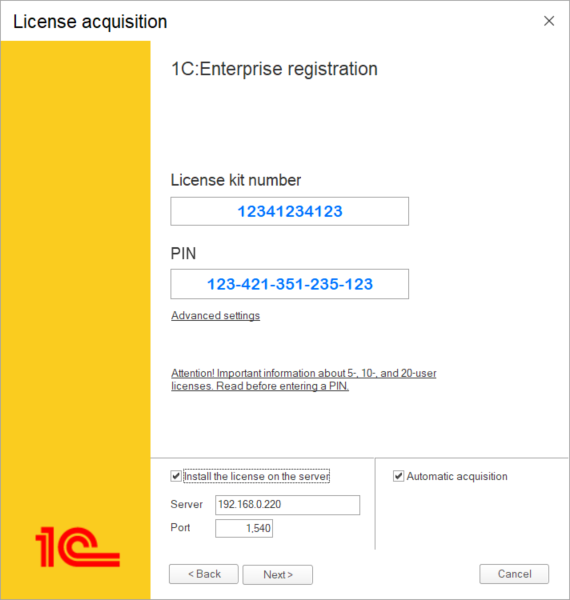
Step 2: Enter License Kit Details #
Input your License Kit Number and PIN, then click Advanced Settings.

Please note: A single-user license is installed on a workstation and allows its user to run multiple sessions.
A licenses for 5-, 10-, or 20-users is delivered with two sets of PIN codes: one for generating multiple single-user licenses, and the other for obtaining the same license in a multi-user mode. The multi-user license should be bound to the server, but not two a single user workstation. When the multi-user license is bound to the 1C server then 1C server distribute licenses one for each database connection.
For environments where all 1C clients are running on a terminal server, the optimal licensing configuration is to install the client licenses on the terminal server. This method ties a license to each user session, requiring only one license per active user. Conversely, installing licenses on the 1C server causes it to allocate a new license for every database connection, significantly increasing license consumption. If you have 5-, 10-, 20-users licenses than use multi-user pin-codes when you install them on terminal server. If you use single-user pin-codes you will need to install licenses as a bunch of single-user licenses one by one.
This guide explains how to install a client license on a 1C:Enterprise server, which is the most common method. If you need to install a single-user license on a client machine, refer to the 1C:Enterprise Software License Acquisition Guide.
Step 3: Install the License on the Server #
- Enable the option Install the License on the Server.
- Provide the 1C Server IP address.
- Click Next.
Step 4: Register the License for the First Time #
Click First-Time Registration to proceed.

Step 5: Input License Owner Details #
- Enter the license owner’s information.
- Save these details for future recovery.
- Check the confirmation box and click Next.

Step 6: Verify and Finalize #
- Verify that the license is being installed on the correct server.
- Click Next to complete the installation.

Important Notes
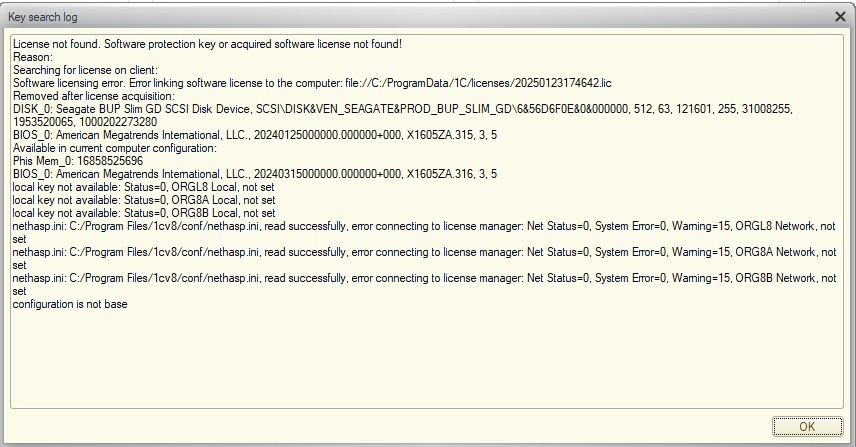
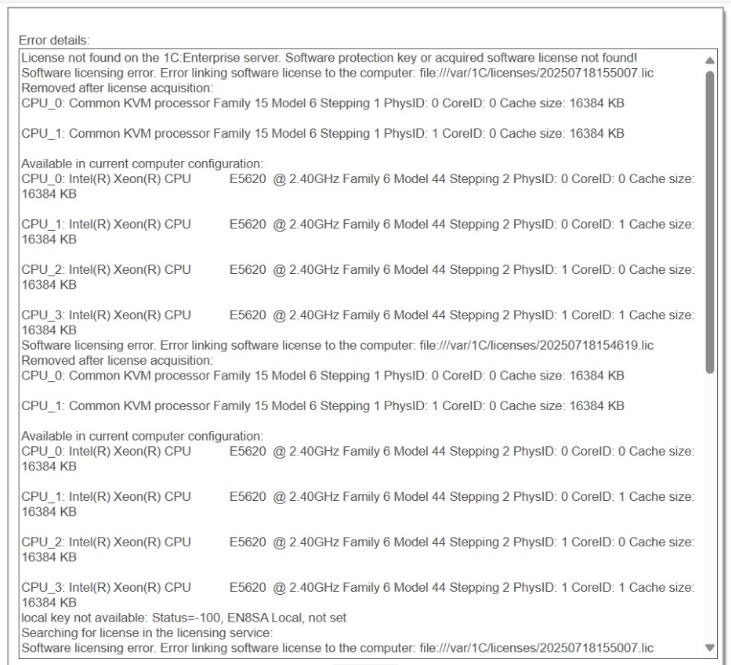
If you change key parameters of the computer which the license is locked to, the 1C:Enterprise platform will fail to start with error message. For example:
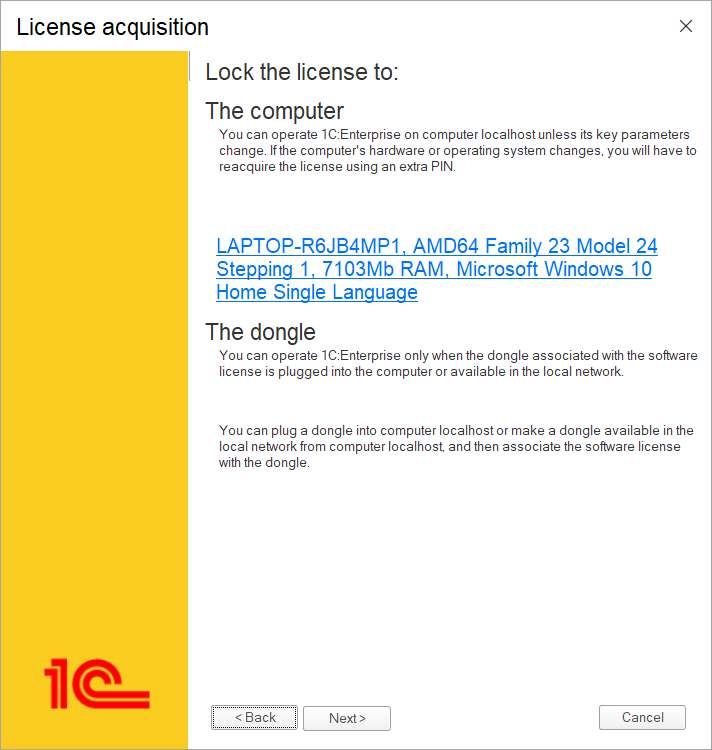
Keep the following in mind when making changes to its key hardware parameters:
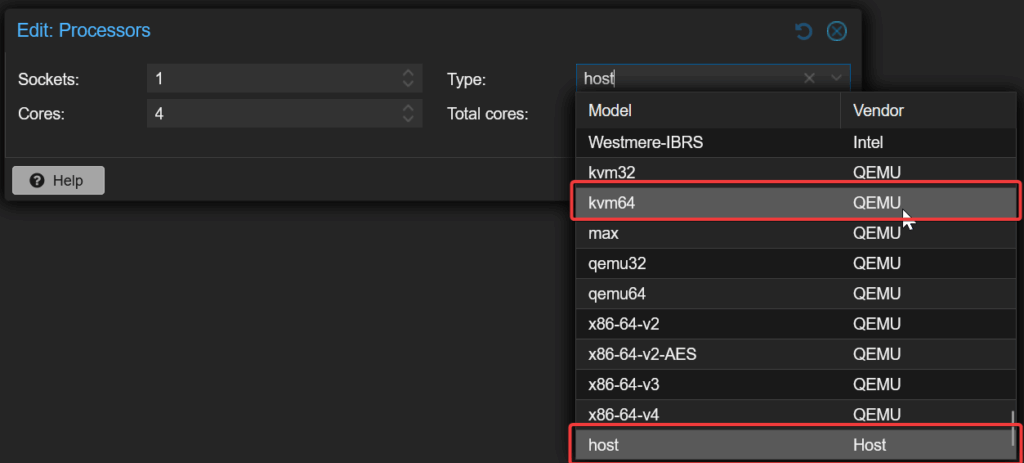
● The system only analyzes the removal of devices, not their addition. For example, if the license was activated when the computer had one network adapter, you can add another without needing to reactivate the license. However, replacing the existing adapter or processor with a different one will require reactivation with new pin-code. E.g., if you change the type of the processor of the KVM virtual machine from KVM to Host the license will need reactivation:
You can increase the computer’s RAM, but you cannot decrease it below the amount present at activation. For instance, if the license was activated with 2 GB of RAM, you can upgrade to 6 GB and later reduce it to 4 GB without reactivation. However, lowering it below 2 GB will require reactivating the license using new pin-code.
● Hardware changes are evaluated based on the computer’s current state compared to its configuration at the time of activation.
Refer to Licenses and Key Computer Parameters for details.
Conclusion #
You have successfully installed the license on your server. To manage additional licenses, repeat these steps for each client and server license obtained from your distributor.
For further details on managing license keys, consult the 1C:Enterprise Software License Acquisition Guide
To learn more about managing server solutions based on the 1C:Enterprise Platform, visit the 1C-DN Administration Library. You can also download the following PDF guides: