Introduction #
This article provides a step-by-step guide for the AccountingSuite server database creation. Make sure you have installed database management system, 1C:Enterprise server, 1C:Enterprise client and 1C:Enterprise licenses (both client and server) before you begin the steps described in this article. You can find detailed step-by-step instructions for the process of installation in the Getting Started-> How to section of the site. For more information refer to the 1C-DN Administration Library. You can also download the following PDF guides:
Attention:
The ports used by 1C Sever must be opened and reachable for the client’s hosts.
Check if there is a firewall on the server and turn it off or set up it properly.
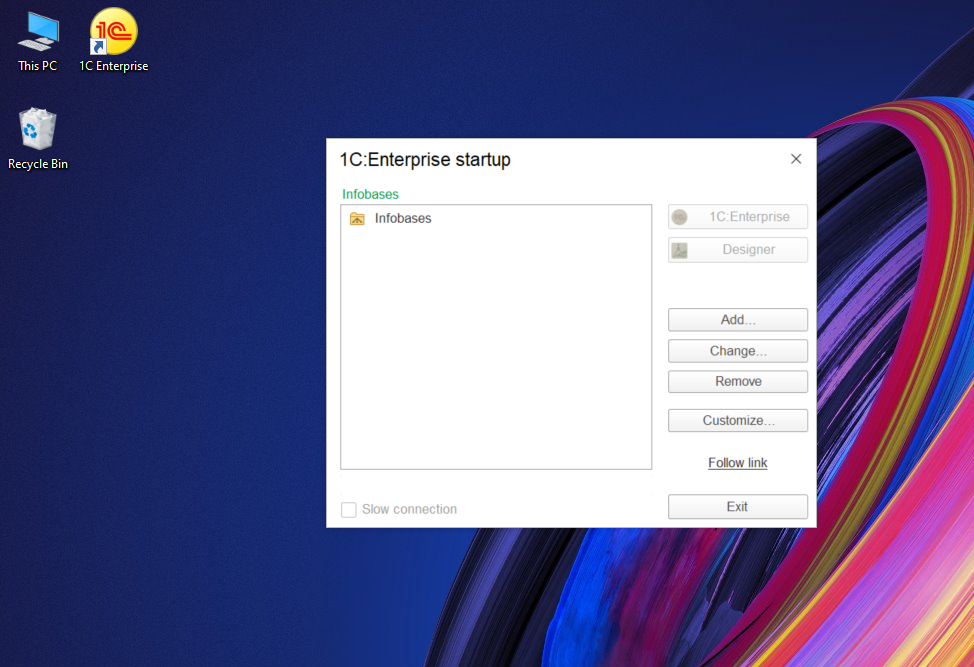
Step 1: Launch 1C:Enterprise #
- Launch 1C:Enterprise using the 1C:Enterprise Desktop icon.
- Click Add to begin creating a new infobase.
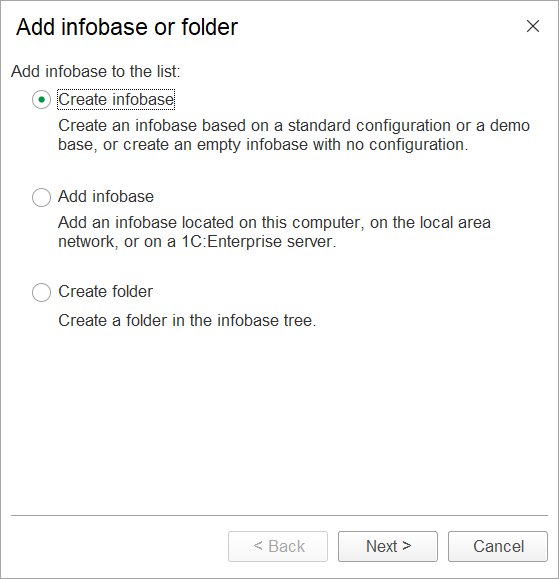
Step 2: Select Create Infobase #
Select Create infobase and click Next.
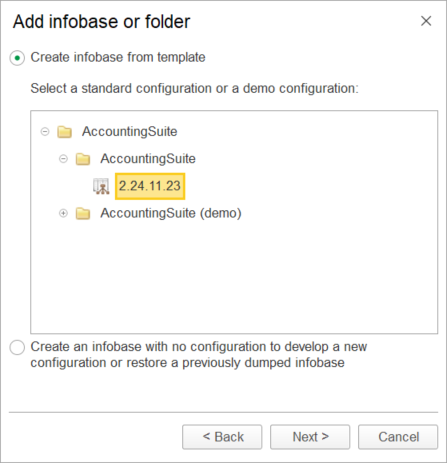
Step 3: Choose AccountingSuite Template #
Choose the AccountingSuite template and click Next.
Note: If you want to create the AccountingSuite database with initial demo data,
then choose AccountingSuite (demo) template.
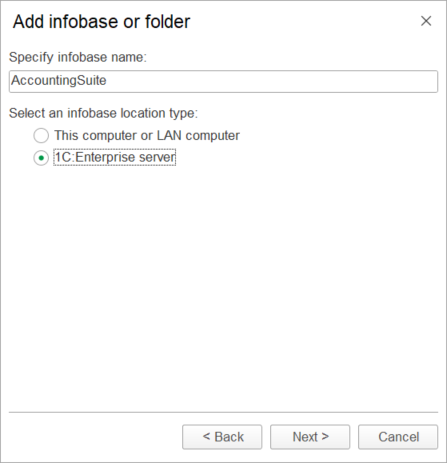
Step 4: Select 1C:Enterprise Server #
Select 1C:Enterprise server as the infobase location type, then click Next.
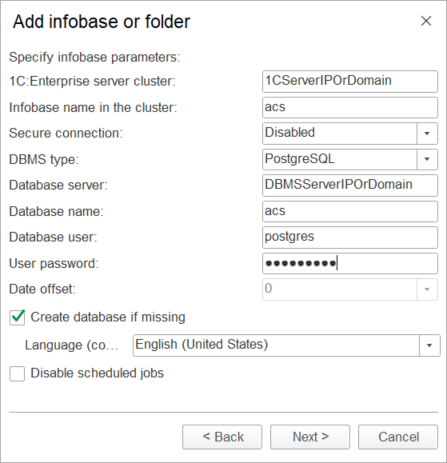
Step 5: Complete the Form #
Complete the form with the following details:
- 1C:Enterprise server cluster: Enter the IP address or domain name of your 1C server.
- Infobase name in the cluster: Provide a suitable name for your new database.
- Secure connection: Disabled (recommended for local, secure networks to optimize performance) or Enabled (for insecure networks where encryption is necessary).
- DBMS type: Specify the type of database server you are using.
- Database server: Provide IP-address or domain name of your database server. Use localhost if the database server is on the same host with 1c server.
- Database name: Assign a suitable name to your new database.
- Database user: Enter the user credentials for the database.
Click Next to proceed.

Important Notes: #
If your 1C:Enterprise server and DBMS server are hosted on the same machine, it’s best to use “localhost” as the database server domain name. Otherwise, make sure external connections to your DBMS server are allowed.
Step 6: Finalize the Installation Process #
When prompted, click Finish to complete the installation process.
If you have got License not found error, use How to acquire 1C:Enterprise software licenses guide.
Conclusion #
We have created AccountingSuite server database. For more information about managing server solutions based on 1C Enterprise Platform, see the articles on https://1c-dn.com/library/administration/. You can download PDF files 1C:Enterprise Administrator Guide and 1C:Enterprise Administrator Guide. Client/Server Mode.