Deposits issued typically arise in situations such as:
- Rental Agreements: Security deposits paid by tenants to landlords:
- Service Contracts: Advance payments made to secure services, such as catering or event planning;
- Product Orders: Deposits made to manufacturers or suppliers for goods that are not yet delivered;
- Brokerage: Container deposits and other.
If you have to account for an issued deposit, AccountingSuite offers the following solution, which uses standard functionality only. Further enhancements may be available through customization.
The main task here is to have an overview on deposit return dates.

Account for an issued Deposit #
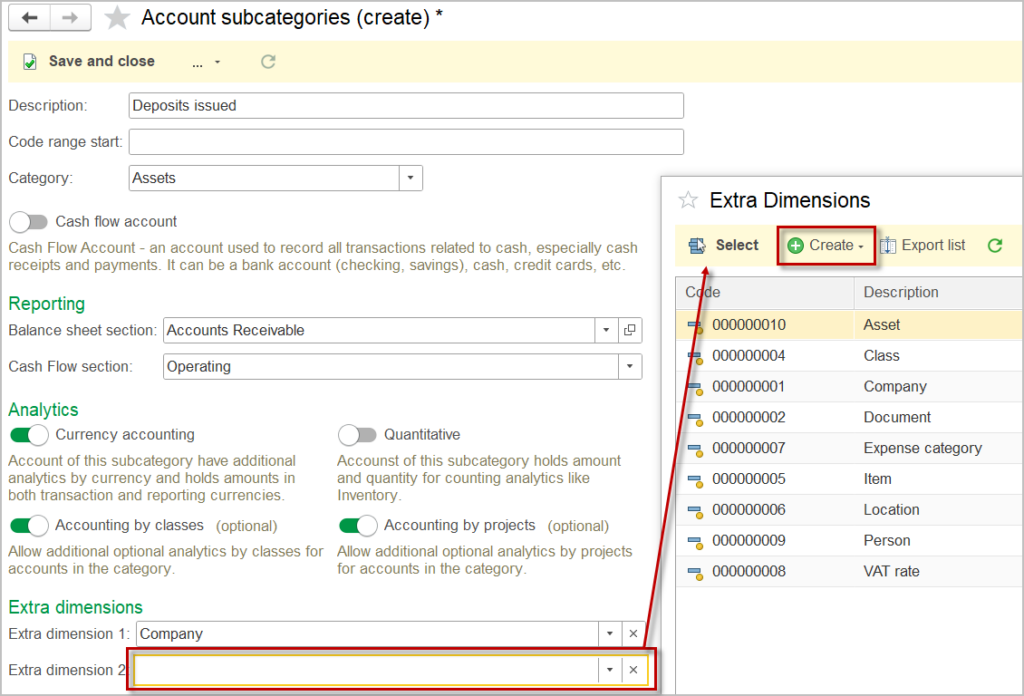
1. Create a new Account subcategory for accounts in the Chart of accounts
2. For this new Account subcategory, select the Extra dimensions: first one – Company, second one – new Extra dimension with the value type Project. The reason to select the Project is that this list has hierarchy, and thus may be used for different accounting tasks. Secondly, the Projects have a Custom field that can be displayed in the reports.
The other advantage of creating an Extra dimension with value type Project is that the use of Projects (enabled by the tick in the account) will still be available.


3. Create a new Account in the Chart of accounts and assign it with the created Subcategory. In the example below, the Deposits issued account has no parent, so that it would be shown separately in the balance sheet.

4. In the Projects list, create a new folder, e.g. Tracking deposits

5. Under this folder, create Projects. Use the Project period field for the deposit return tracking, e.g. on the image below, the deposit is paid out on Sep, 01 and supposed to be returned on Oct, 02.
Use the Custom field for any additional information that might be required.

6. Create a Payment document for the outgoing deposit payment. Remember to fill the Extra dimensions.

7. Navigate to Accounting – General journal and use filter to select the Deposits issued account.

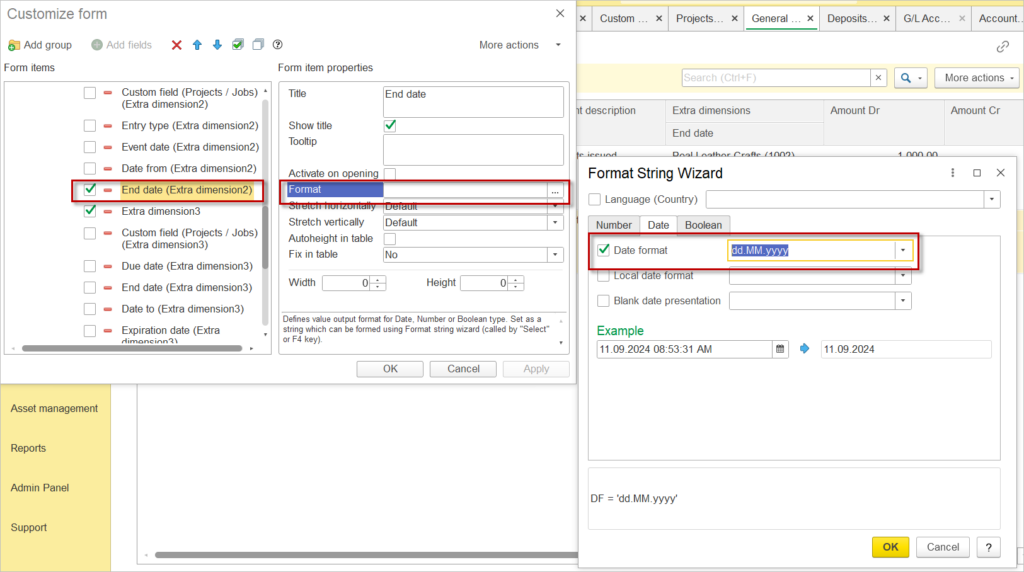
8. Click More actions – Settings – Customize form.
Select Extra dimension 2 – Add fields – tick the End date. If Custom field contains information required for the report, tick Custom field too.

9. For the End date, change the format if required

9. Now General journal offers an overview on the Deposit issued, together with the return dates.

