Step 1. Setup Wizard #
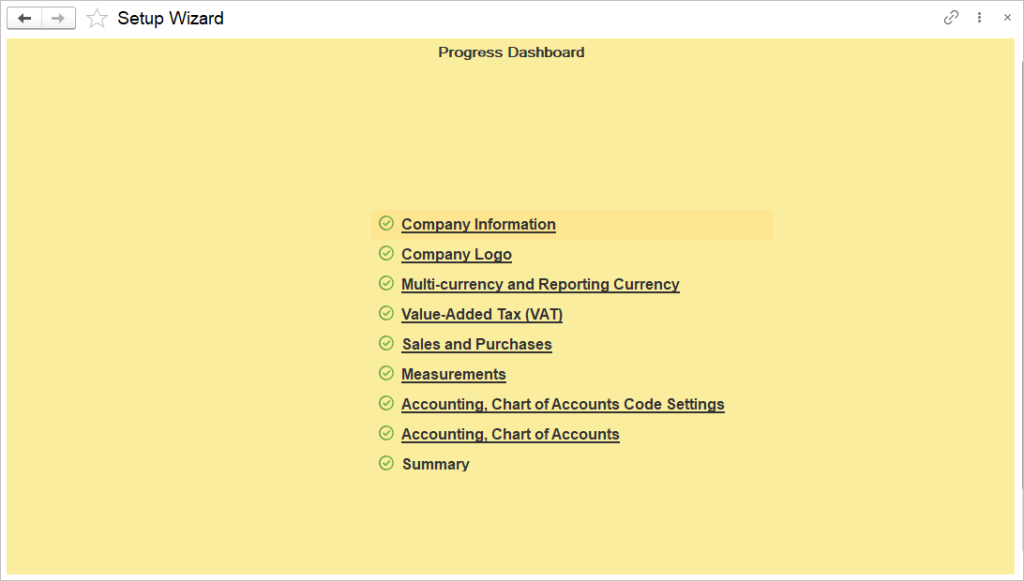
The first thing you need to do is complete our Getting Started Wizard, which will set up your Chart of accounts, settings and other details for your account. You must complete the wizard in order to use the account. It will run automatically after first log in to system.


You can always reach the Setup Wizard by navigating to Admin Panel – Tools – Setup Wizard.
Step 2. Assign default posting accounts #
Skip the step if you have chosen the default Chart of accounts in the Setup Wizard.
Assigning default posting accounts ensures efficient, accurate, and consistent financial data management. These accounts are used in various situations in the software and may be changed on individual documents.
Step 3. Setup Numbering #
The flexible Document and Lists numbering system allows virtually any customized numbering scheme.
For example, valid numbering schemes can be:
- All numeric (5, 5000, 500) characters.
- All alpha (SF-WIY-CT) characters.
- A combination of alphanumeric (SF-001-IA)
In addition, the characters can be in any order. If a number is used anywhere in the scheme, it will be incremented each time you create a new document. For example, SF-001-IA will become SF-002-IA, SF-003-IA, etc. and 5000 will become 5001, 5002 and so on. Invoices schemes that consist of only letters will not change upon creating a new document.

Change the Numbering Scheme #
- Navigate to Admin panel→ Tools → Auto-numbering.
- Double-click on the line of the document of list for which the numbering scheme will apply.
- In the dialog that appears, enter the your scheme of letters and numbers in the Number box.
- Click Save.

Step 4. Setup Customers #
A Customer is a company that purchases goods or service from your company. A detailed step-by-step guide on how to create a new Customer can be found here.
The Data Import Tool allows you to create multiple Customers by importing a list.
Step 5. Setup Vendors #
A Vendor is a company that supplies goods or services to your company. A detailed step-by-step guide on how to create a new Vendor can be found here.
The Data Import Tool allows you to create multiple Vendors by importing a list.
Step 6. Setup Items (products and services) #
An Item represents something that can be bought or sold (or both). An item can be a type of product or a service, and the attributes that are assigned differ depending on this distinction. Please refer to a separate article for step-by-step guide.
The Data Import Tool allows you to create multiple Items by importing a list.
Step 7. Enter the opening balances for accounts #
Use a Journal entry. The standard Chart of accounts contains an Opening Balance Equity account. For example, opening bank balance can be entered as Dr Bank account Cr Opening Balance Equity account.
The Data Import Tool allows you to post batch of Journal entries.
Setup Wizard. How to init your new AccountingSuite database
Posting Opening Balances #
Depending on the nature of the opening balance account, there are several option for posting it in the AccountingSuite. Combine these options when moving to AccountingSuite by applying the most suitable method for each class of G/L accounts that have opening balances as at the transfer date.
Opening Balances Options Overview #
| Option 1 Journal Entry | Option 2 Import Documents with Opening Balances | Option 3 Batch Historical Data Import Will be available in late 2025 | |
| Supports inventory attributes (Lot etc.) | No | Yes | Yes |
| Supports correct inventory costing method | No | Yes | Yes |
| Correct Aging AR/Aging AP can be derived after import | No | Yes | Yes |
| Correct Sales /Purchases history reports can be derived after import | No | No | Yes |
| Best suitable for | All opening balances except for: AR, AP, Inventory | AR, AP, Inventory | All entries, no limitations |
Option 1 – Entering Balances using Journal Entry #
To record account balances as of the opening date, excluding “historical tails” Journan Entry (table import or manual entry) should be used. Please refer to this article for a step-by-step guide.
When importing the opening balances with a JE, we would not import the entire documents posting, but rather just the remaining balance corresponding with the opening balances account (for example, instead of recording CR Revenue, DR Cost of goods sold, DR Accounts Receivable, CR Inventory for a sales doc we would just record DR AR and CR Opening balance).

To be able to apply the payment to the AR/AP entered by the Journal entry, please refer to it in the Document Extra dimension (Journal entry refers to itself):

Advantages: quick
Disadvantages: applying customer / vendor credits for this opening balances will have to performed manually, because the system will not have enough traceable information (Document extra dimension) to do it automatically; dates and document numbers are not entered; no Aging Report will be available for these entries, as Due Dates are not entered either; Costing methods (FIFO and Weighted average) will be distorted for the Inventory entered in this manner.
Option 2 – Import Documents with Opening Balances #
Option 2 is to create document (Sales invoices, Bills and Inventoory Adjsutment) for each separate historical transaction, that ends in an open balance of Accounts Receivable, Accounts Payable or Inventory on stock as at the transfer date. Please refer to this article for a step-by-step guide.
Advantages: all relevant information for calculation of overdue payables and receivables, inventory valuation will be in place.
Disadvantages: time consuming,
Option 3 – Batch Historical Data Import #

Data Import Tool for documents to import historical transaction will be available soon in AccountingSuite. Until then, there are two options offered to post the opening balances depending on the level of details that is expected.
