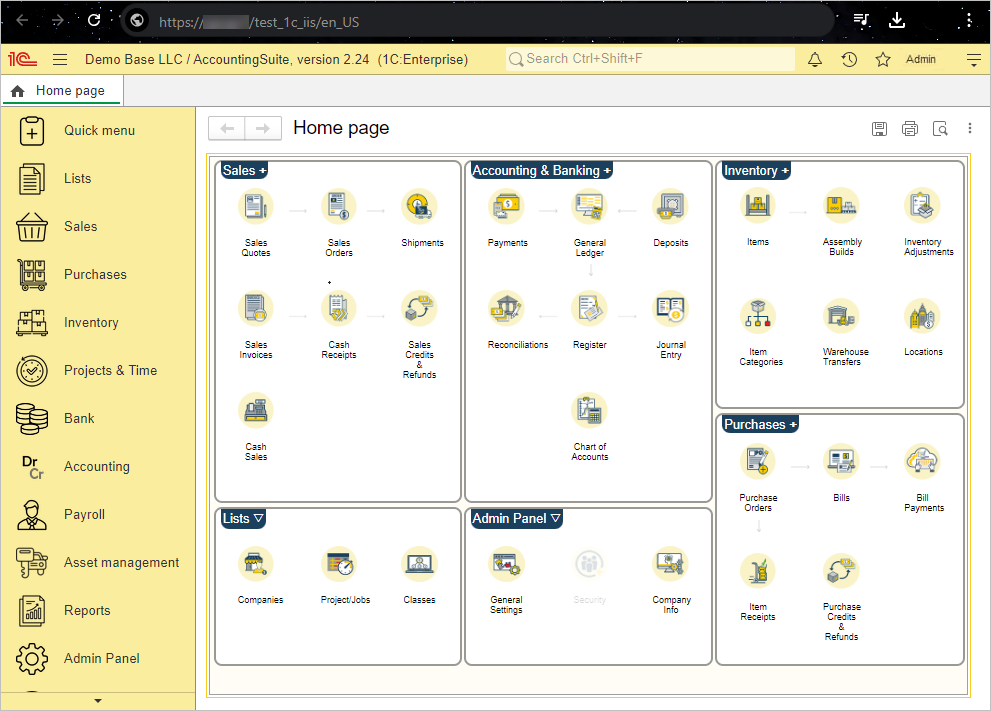
Overview #
The web server allows you to access the information database via the Internet using a browser or a mobile client. The publication of the database is also needed to build consolidated financial statements for several legal entities in separated databases (branches and headquarters).
To publish the information base on the Internet, you need to set up a web server (this is third-party software).
The Microsoft Windows 10 operating system includes the IIS (Internet Information Services) web server. By default, this web server is disabled. We will use this web server to publish the “1C: Enterprise” information databases that are part of the service. Therefore, we need to enable the IIS web server and configure it.
Enabling IIS and ISAPI Extensions Support #
Using the Control Panel #
You can also enable IIS and ISAPI extensions support using the Control Panel.
Launch the Control Panel.
Navigate to Programs — Turn Windows features on or off.
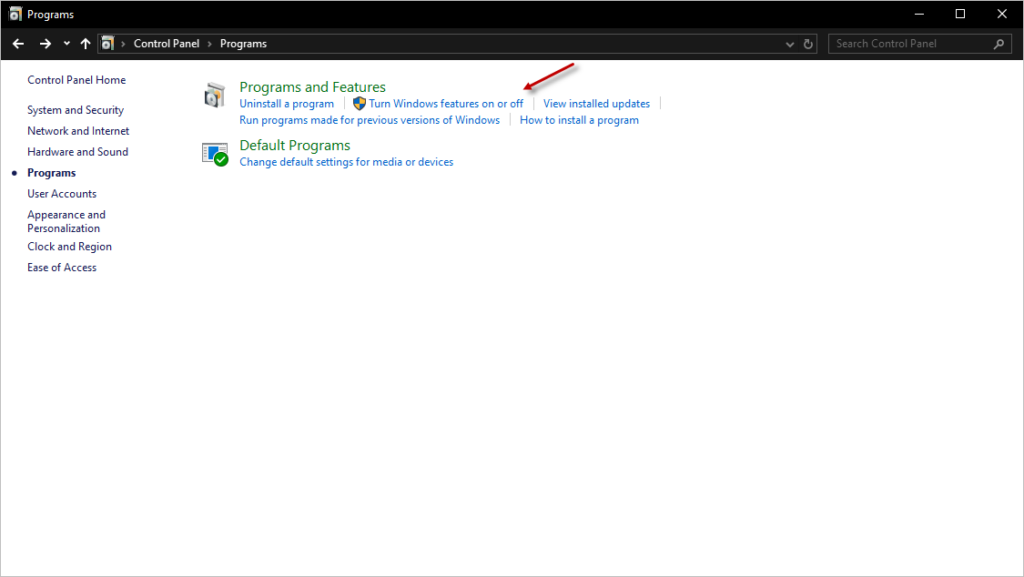
Select the following checkboxes:
- Internet Information Services — Web Managment Tools — IIS Managment Console
- Internet Information Services — World Wide Web Services — Application Development Features — ISAPI Extensions
- Internet Information Services — World Wide Web Services — Application Development Features — ISAPI Filters
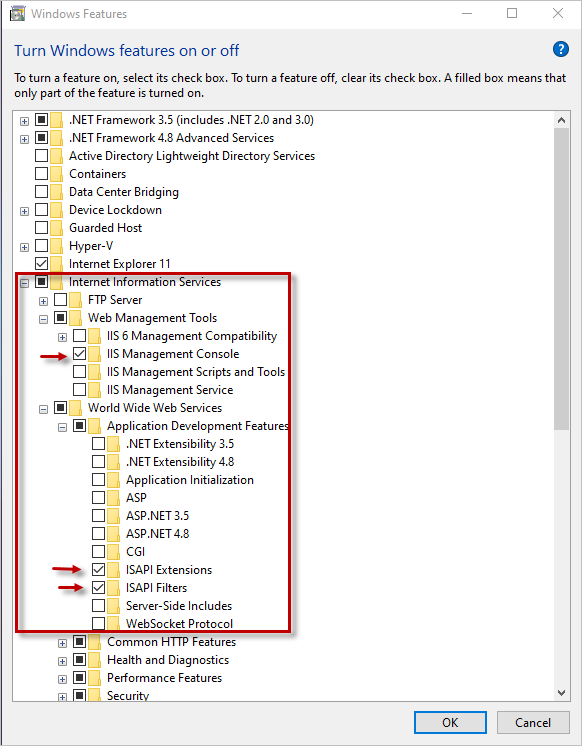
If desired, you can enable additional IIS features by selecting additional checkboxes under the IIS Services section.
Checking IIS Service Status #
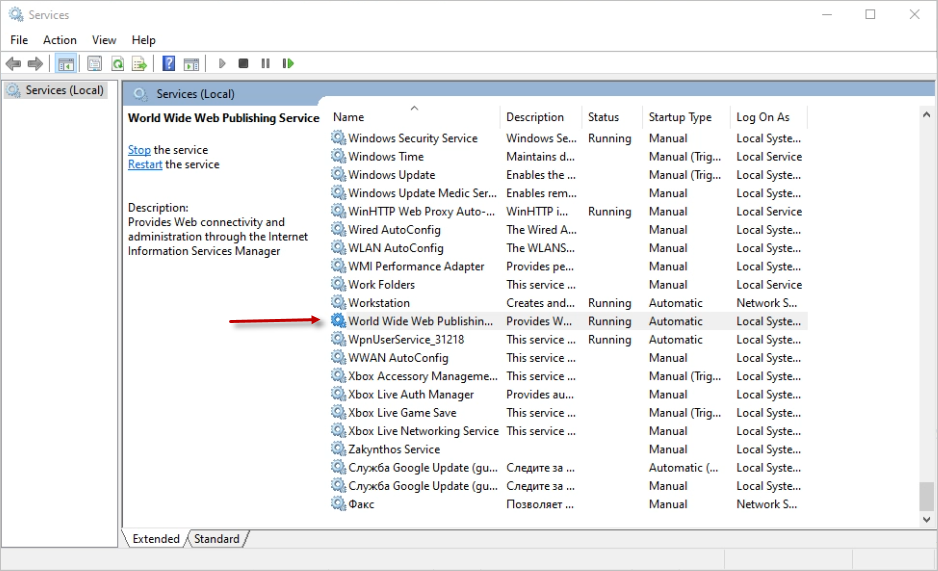
You can check the status of the IIS service using the Services:
Launch the Services.
In the Services window, you should see the World Wide Web Publishing Service listed. This service should be running and have the startup type set to Automatic.
After completing this step, you can proceed right to creating IIS manager shortcut.
Enabling with Powershell #
Enabling IIS #
To enable IIS, you can launch PowerShell with administrator privileges: right-click the Start button and select Windows PowerShell (Admin) from the menu. Then, enter the following command in the PowerShell window:
Enable-WindowsOptionalFeature -online -featurename IIS-WebServerRoleA progress indicator will be displayed as the command executes. If you receive a message prompting to allow the computer to restart, allow the restart, and then repeat the specified actions. Upon completion of the IIS activation, the following messages should be displayed:
Path          :
Online        : True
RestartNeeded : False
Enabling ISAPI Extensions Support #
To enable ISAPI extensions support, you can enter the following command in the PowerShell window:
Enable-WindowsOptionalFeature -Online -FeatureName IIS-ISAPIExtensionsA progress indicator will be displayed as the command executes. Upon completion, the following messages will be displayed:
Path          :
Online        : True
RestartNeeded : False
Enabling additional IIS features #
To view the list of enabled IIS features, you can enter the following command (it should be entered on a single line):
Get-WindowsOptionalFeature -Online | Where-Object {$_.FeatureName -like "IIS*"} | Format-TableA response will be provided:
FeatureName                                State
-----------                                 -----
IIS-WebServerRole                         Enabled
IIS-WebServer                             Enabled
IIS-CommonHttpFeatures                    Enabled
IIS-HttpErrors                            Enabled
IIS-HttpRedirect                         Disabled
IIS-ApplicationDevelopment                Enabled
IIS-Security                              Enabled
IIS-RequestFiltering                      Enabled
IIS-NetFxExtensibility                   Disabled
. . .
In this response, the FeatureName column indicates the feature name, and the State column indicates whether the feature is Enabled or Disabled.
If needed, you can enable additional IIS features using commands of the form:
Enable-WindowsOptionalFeature -Online -FeatureName name-of-the-featureCreating IIS manager shortcut #
For convenience in working with IIS, it is advisable to create a shortcut on the desktop to launch the IIS Manager. To do this, you can follow these steps:
- Navigate to the directory
C:\Windows\System32\inetsrv. - Right-click the file InetMgr.exe.
- Select the option “Send to — Desktop (create shortcut)” from the context menu.
- If desired, you can assign a more convenient name to the created shortcut. To do this, you need to
- Right-click the created shortcut.
- Select “Properties” from the context menu.
- In the Properties window, go to the “General” tab.
- Assign the desired name to the shortcut, such as “IIS Manager”.
- e) Click the “OK” button.
Generating self-signed certificates #
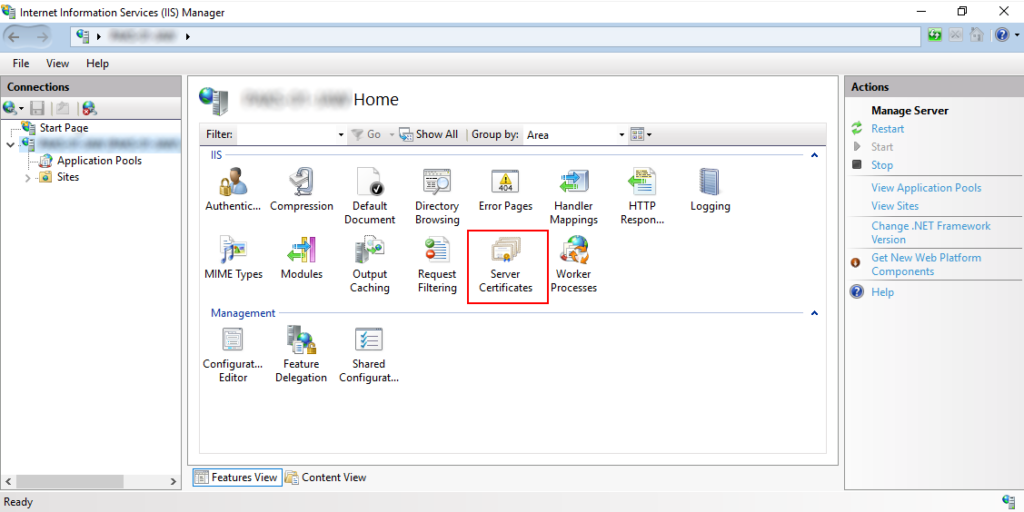
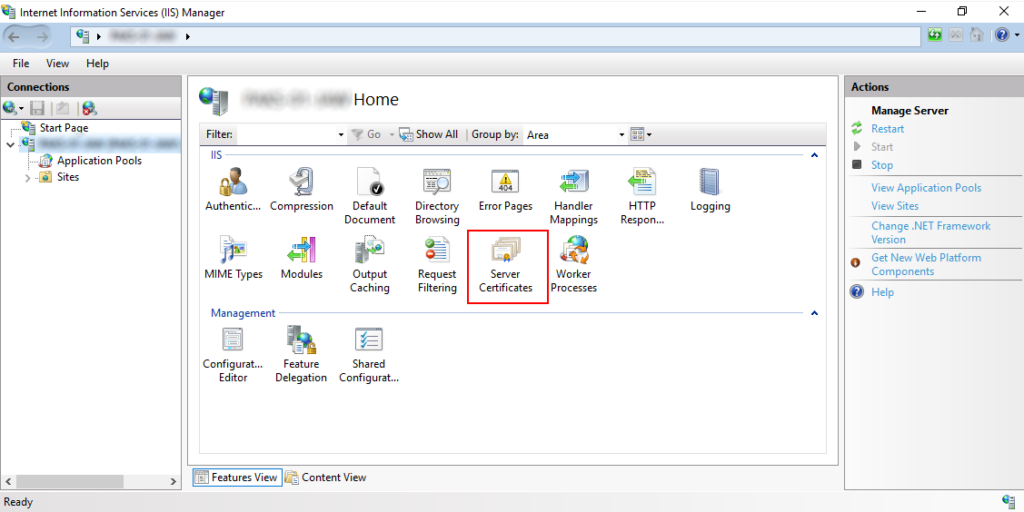
To begin the generating procedure, open the Internet Information Services (IIS) Manager and select the server in the Connections list. Then click on the Server Certificates link.
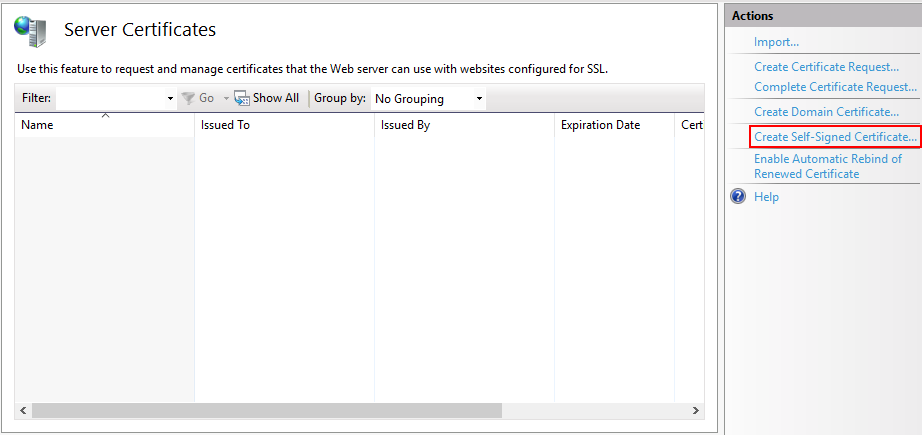
The Server Certificates window will open, where you need to click Create Self-Signed Certificate…
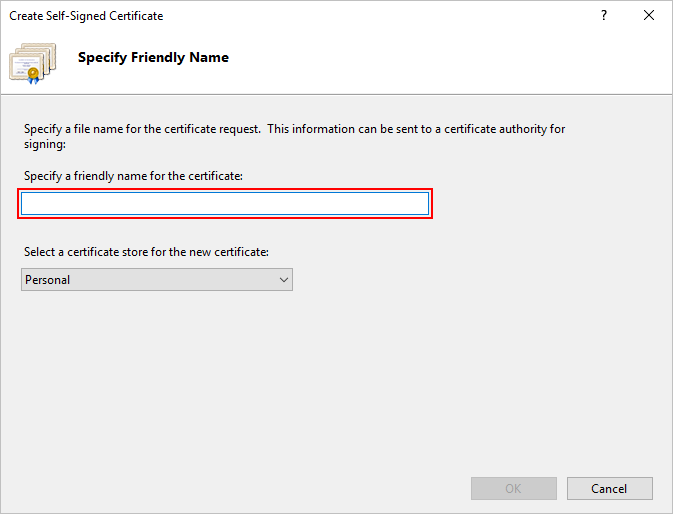
In the Self-Signed Certificate Creation Window, you only need to specify a name for the certificate. In most cases, to avoid confusion, it is better to specify the server address where the IIS server is located. Once the certificate name is set, click the OK button and proceed to the certificate binding step.
Certificate Binding #
Assuming the certificate has been obtained and added to the server certificates list. If the certificate was obtained through a certification authority, it must be imported in advance in the Server Certificates window.
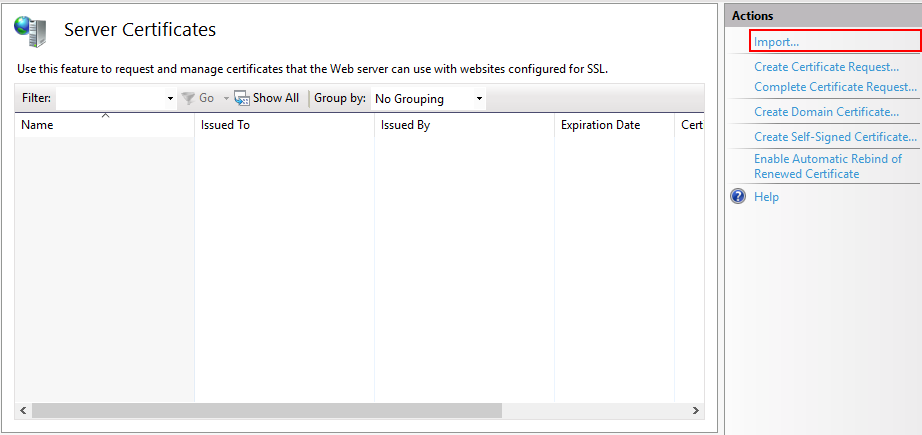
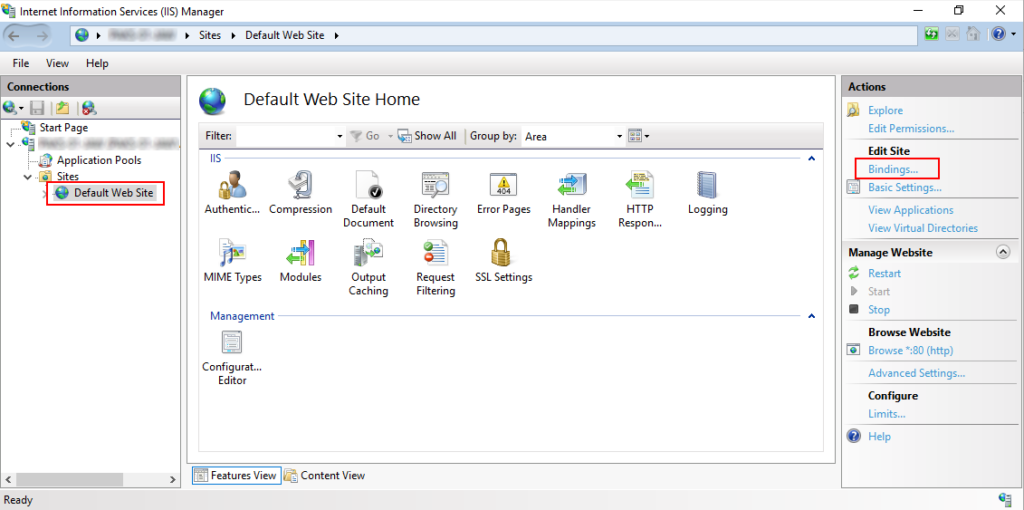
Once the certificate appears in the list, proceed directly to binding it to the site publication. To do this, select Default Web Site and in the Actions window, click on Binding.
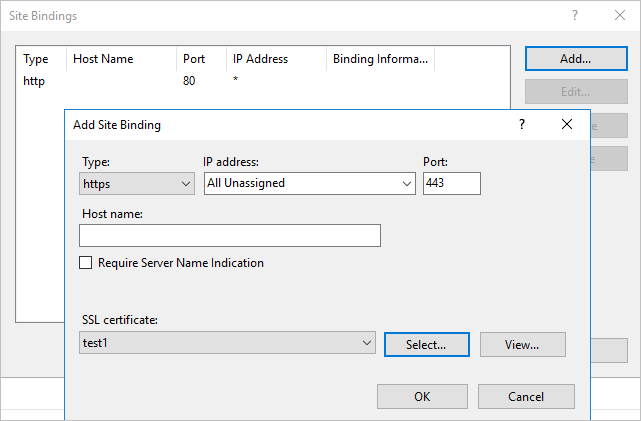
In this window, you will see that the publication is only working on port 80, which is associated with the unsecured HTTP protocol. To extend it, click the “Add…” button to the left of the site bindings list, and in the opened window, select “https” as the Type. The final step of the setup is selecting the previously imported certificate from the “SSL certificate” list. Click the OK button and close the site bindings wizard.
You can now proceed to publish the information database and check its functionality.
Publishing the infobase #
To publish the infobase, you need to run 1C: Enterprise as an administrator, then open the Designer of the specific infobase as an administrator and go to the Administration menu. Then select Publish to web server.
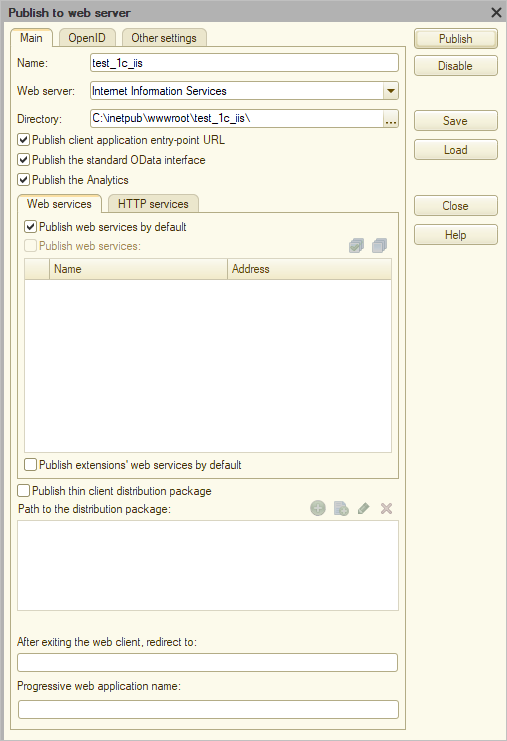
In the publication window, specify the name and optionally define the directory where the publication settings will be located. This can also be left as the default.
After this, click the Publish button and wait for the operation to complete.
To verify that you done everything correctly, you need to open a browser and go to a link that consists of two parts:
- The name of your server (e.g.,
server1) - The name of the infobase publication (as specified in the publication settings window)
For these parameters, the link will be:
https://server1/test_1c_iis
