Introduction #
This article covers basic operations of the 1C server utility for a client-server setup. The 1C server utility allows administrators to manage users lists, monitor memory usage by 1C processes, enable single-user mode for database updates, and more. Note that this utility is only available for Windows operating systems.
Installation #
To install the administration utility, select the Administration of 1C:Enterprise server feature during setup. Follow the instructions in How to Install 1C:Enterprise Server on Windows (Step 5).
Registering 1C Server #
To register your 1C server in the administration utility:
- Open the 1C Server Administration Utility:
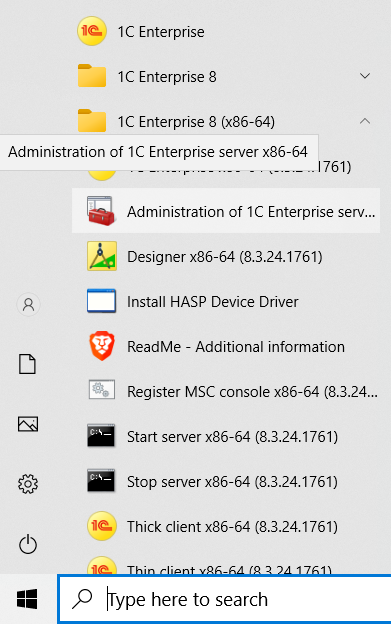
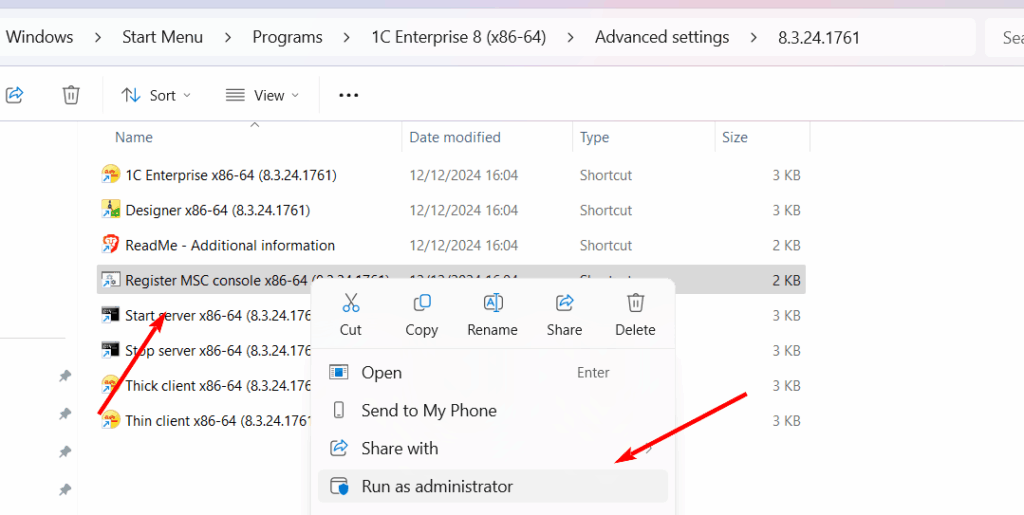
If you’re encountering errors in the 1C Administration Utility, try registering it in the operating system. Run the Register MSC console utility as an administrator:
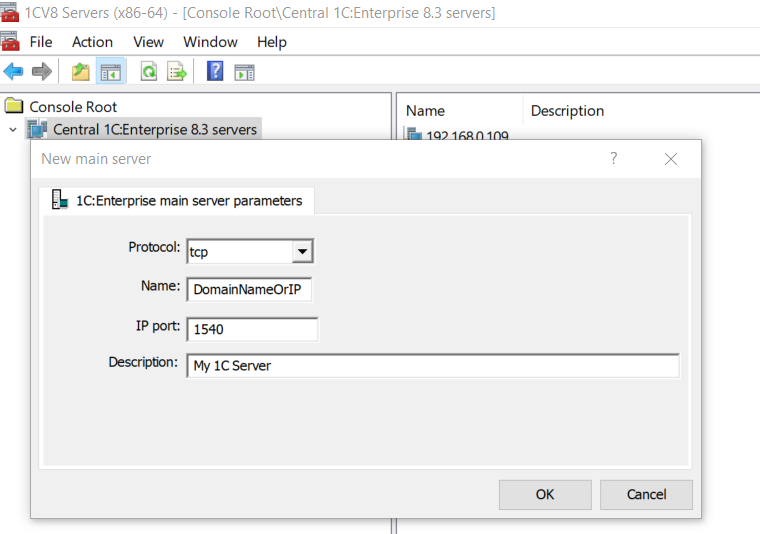
- Add your 1C server to the utility by right-clicking the Central 1C:Enterprise 8.3 Servers node.
- Select New-> 1C:Enterprise Main Server.
- Enter the Server Name and IP Port (default: 1540) and press Ok.
Database Sessions and Connections Lists #
In 1C:Enterprise, a session represents an authenticated user, while connections are used by sessions to perform specific tasks.
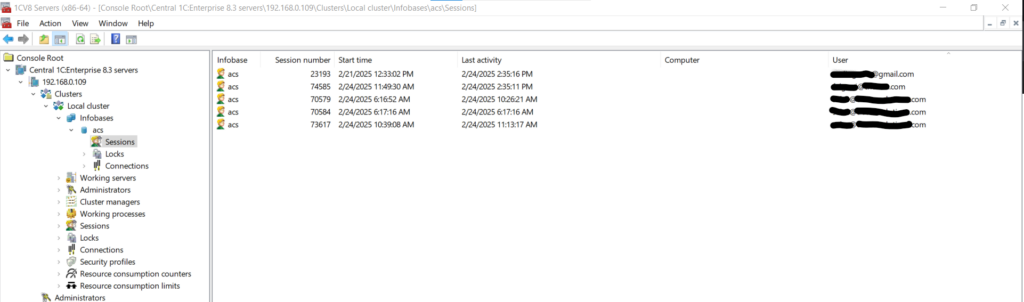
- To view the session list for a specific database:
Navigate to ServerNameOrIP → Clusters → Local Cluster → Infobases → DatabaseName → Sessions.
- To view the connection list for a specific database:
Navigate to ServerNameOrIP → Clusters → Local Cluster → Infobases → DatabaseName → Connections.

If the database has at least one user with a configured password, you will be prompted to enter administrator credentials.

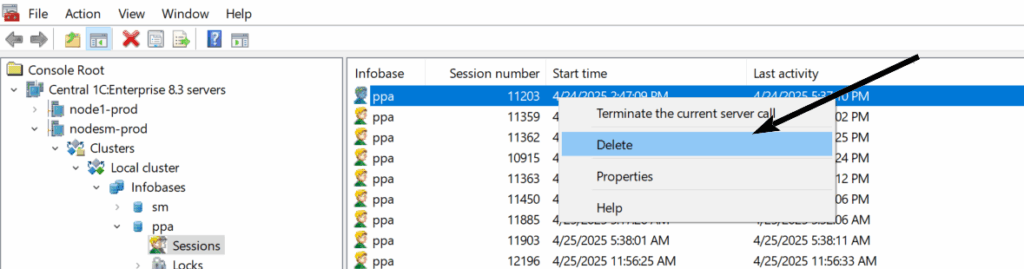
Aborting Sessions #
If a client session hangs, consumes too many resources, or you need to free up a license, you can abort the session (and/or connection) using the administration utility. Simply right-click on the session, select Delete, and confirm the action.
RAM Statistics #
You can monitor RAM usage per session and per connection, along with other key metrics, in the console columns. If the columns don’t fit on the screen, use the horizontal scroll bar to view additional details.

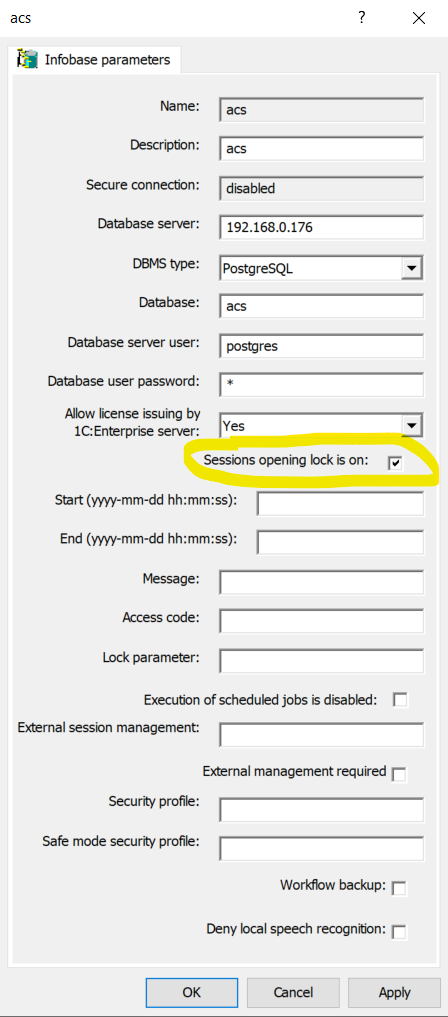
Single-user mode #
Single-user mode is useful for administrative tasks such as database configuration updates. To enable it:
- In the console tree, right-click the database, check the Sessions opening lock is on box, and click Apply
- Close all sessions except the one intended for maintenance: Right-click the selected sessions, then choose Delete from the context menu.
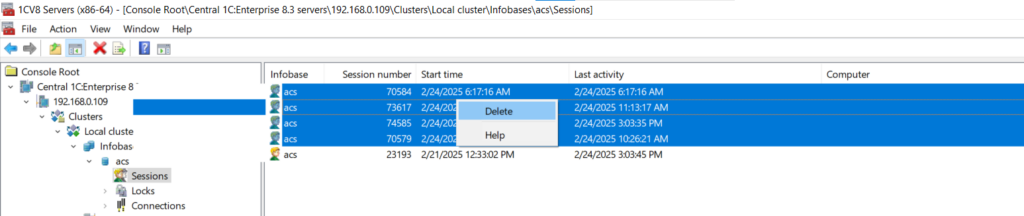
- Repeat the same process for connections.
After completing maintenance, restore multi-user access by unchecking Sessions opening lock is on and clicking Apply.
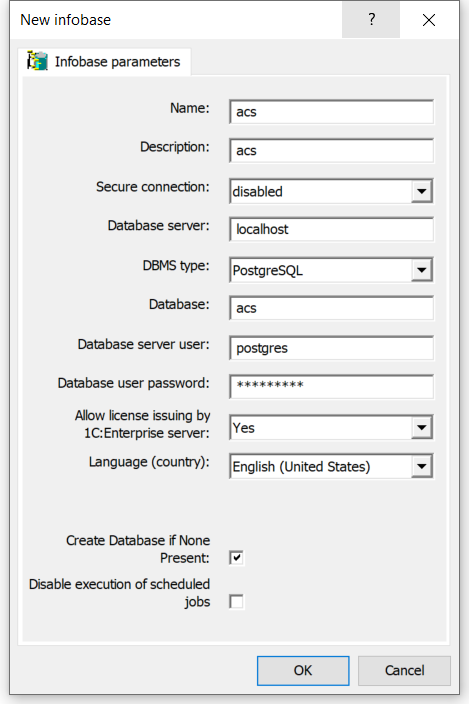
Adding or Creating Database #
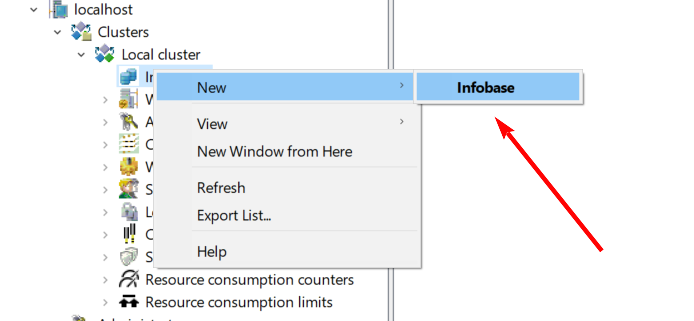
- Go to the Server ->Clusters -> Local cluster -> Infobases
- Right-click on the Infobases and select New -> Infobase
- Complete the form, using this example, and press Ok
Troubleshooting. Known problems and their solutions #
1C:Enterprise server not found #
Error seems like: 1C:Enterprise server not found server_addr=tcp://NameServer:1541 descr= No connection could be made because the target machine actively refused it
The error “No connection could be made because the target machine actively refused it” indicates a network-level issue where the connection request reached the server NameServer, but the server’s application (1C:Enterprise Server Agent) was not listening on port 1541 or actively blocked the connection.
Here are the steps to troubleshoot and resolve the issue:
1. Verify the 1C:Enterprise Server Service is Running
The most common cause is that the server service is stopped or not running correctly.
- On the server machine (NameServer):
- Open Services (run
services.msc). - Locate the service named 1C:Enterprise 8.x Server Agent (the exact name may vary based on your version, e.g.,
srv1cv8). - Check its Status. It should be set to “Running”.
- If it’s not running, try to Start it. If it fails to start, investigate the system event logs for more specific errors.
- Open Services (run
2. Check Firewall Settings
If the service is running, a firewall might be blocking the incoming connection on port 1541.
- On the server machine:
- Check both the Windows Firewall and any third-party antivirus/security software that includes its own firewall.
- Ensure that an inbound rule exists to allow connections to the 1C:Enterprise Server Agent application (e.g.,
ragent.exeorrmngr.exe) or specifically open TCP port 1541. - For a quick test, you can temporarily disable the firewall(s) on the server and try connecting from the client. If it works, you need to configure the firewall rules correctly.
3. Verify Server Name Resolution and IP Address
Ensure the client machine can correctly resolve the server name NameServer to its correct IP address and that the server is listening on the correct network interface.
- On the client machine:
- Open a command prompt and run
ping NameServerto ensure the name resolves and the server is reachable.
- Open a command prompt and run
- On the server machine:
- Run
ipconfig /allto verify the server’s IP address. - You can use the
netstat -aoncommand in the command prompt to check if any application is actively listening on port1541(look for aLISTENINGstate for the local address ending in:1541).
- Run
4. Check 1C Server Configuration
Sometimes, configuration issues within the 1C server can cause it not to listen on the expected ports.
- Open the 1C:Enterprise Server Administration console.
- Verify the server name and port are correctly configured. The main port for the central server is
1541by default. - If the issue persists, consider recreating the working process/cluster in the administration console, as this has resolved similar issues for other users.
5. Clear the 1C Client Cache
A corrupted client-side cache can sometimes cause connection issues.
- In the 1C:Enterprise launch window, select the problematic infobase and click Edit.
- Note the path to the infobase.
- Close 1C:Enterprise, navigate to the cache directory (usually in
C:\Users\<UserName>\AppData\Roaming\1C\1cv8\), and delete the relevant cache folder (it can be like folder\7357d7d9-c54b-4846-9f56-471667e95a14).
By following these steps, you should be able to identify and resolve the root cause of the connection error.
Conclusion #
In this guide, we covered how to add 1C server to the administration utility and manage users sessions. These are just a few of the many features available in the 1C administration utility. For more details, refer to 1C:Enterprise Administrator Guide. Client/Server Mode and 1C-DN Library.