To install a DBMS, you need to have the rights and competencies of a system administrator in the company’s network.
In this article we will install step by step PostgreSQL on Windows with default settings. For detail information about PostgreSQL administration official documentation of the PostgreSQL Open-Source project or documentation of different PostgreSQL derivatives can be used.
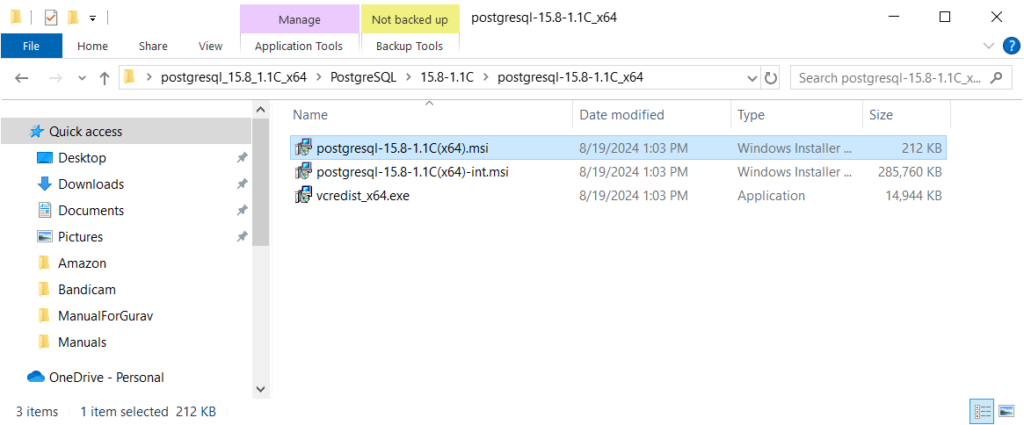
Step 1: Obtain the Installation Archive #
- Download installation archive from AccountingSuite Portal: PostgreSQL for Windows (64-bit) – for Windows Server-like distributions
Step 2: Prepare the Installation Directory #
- Create a new directory where you want to store the installation files.
- Extract the contents of the installation archive into this directory.
Step 3: Run the Installer #
Locate the postgresql-version-(x64).msi file in the extracted directory. Double-click the file to start the installation process.
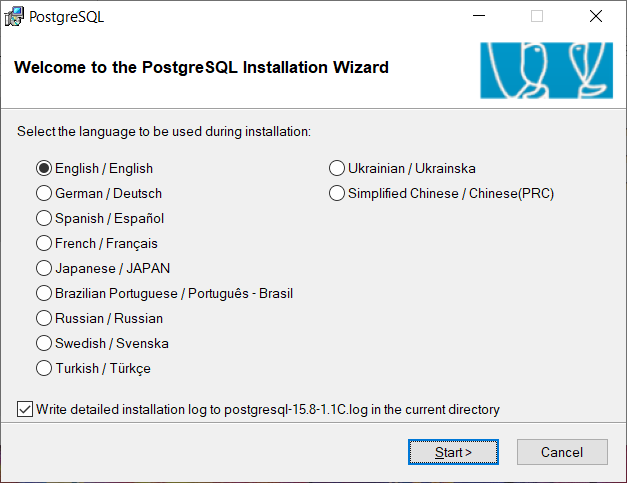
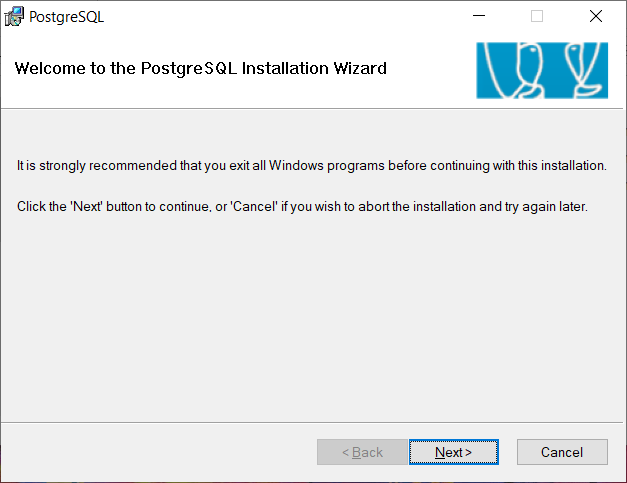
Step 4: Begin Installation #
- Click Start to initiate the installation.
- If Windows operation system ask you to confirm the installation then press Yes.
- Exit all Windows programs.
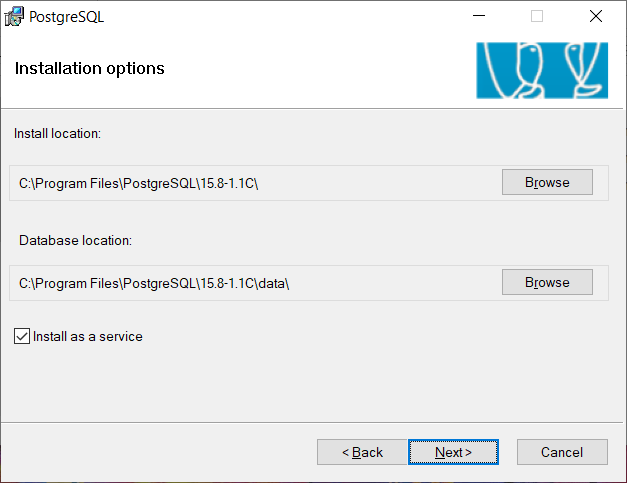
Step 5: Select installation options #
- Choose appropriate install location.
- The “Install as a service” checkbox should be set up to install the PostgreSQL as a service.
- Click Next.
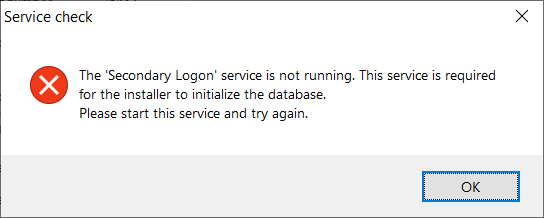
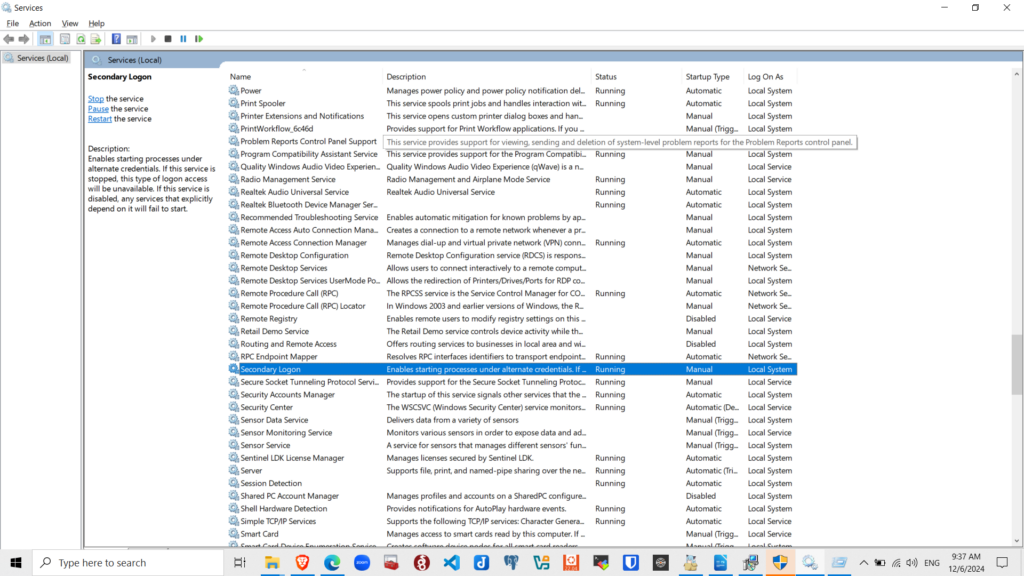
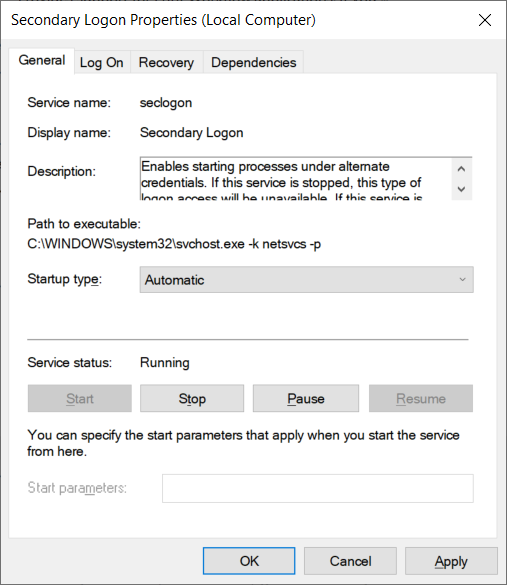
Step 6: Start ‘Secondary Logon’ service if necessary #
- If the ‘Secondary Logon’ service is not running then Sevice check error will pop-up.
- Open the Run window by pressing
Win + Rand typeservices.msc. - Enable and start ‘Secondary Logon’ service.
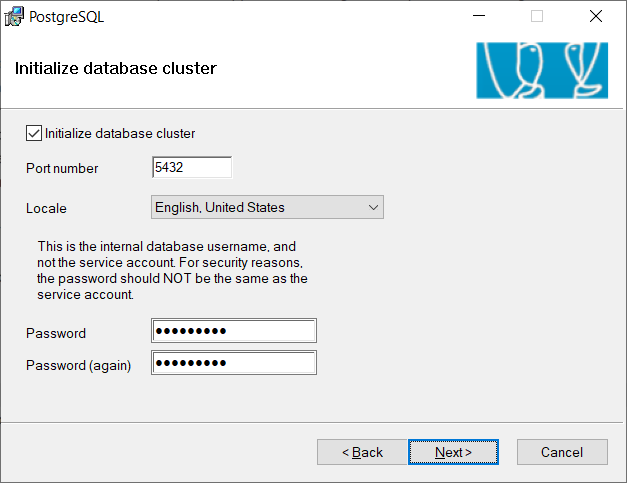
Step 7: Initialize database cluster #
- Set a password that is at least 8 characters long, includes at least one number, and contains at least one special character.
- Click Next.
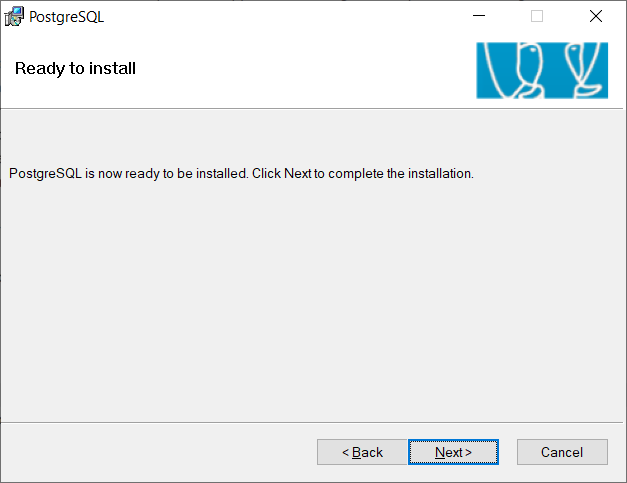
Step 8: Install PostgreSQL #
Click Next to installPostgreSQL:
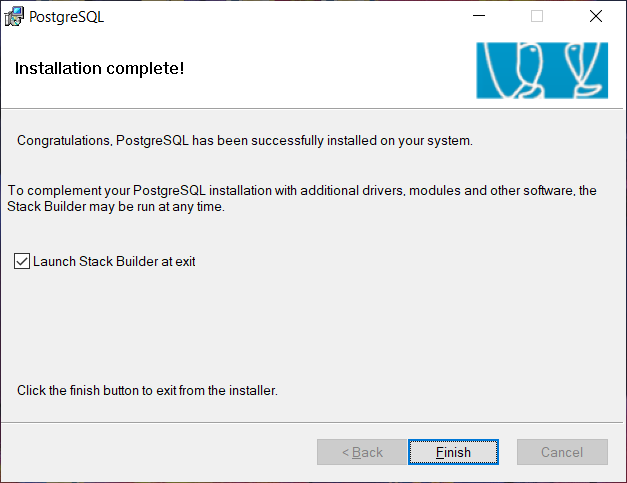
Step 9: Complete the Installation #
Once the installation is finished, click Finish.
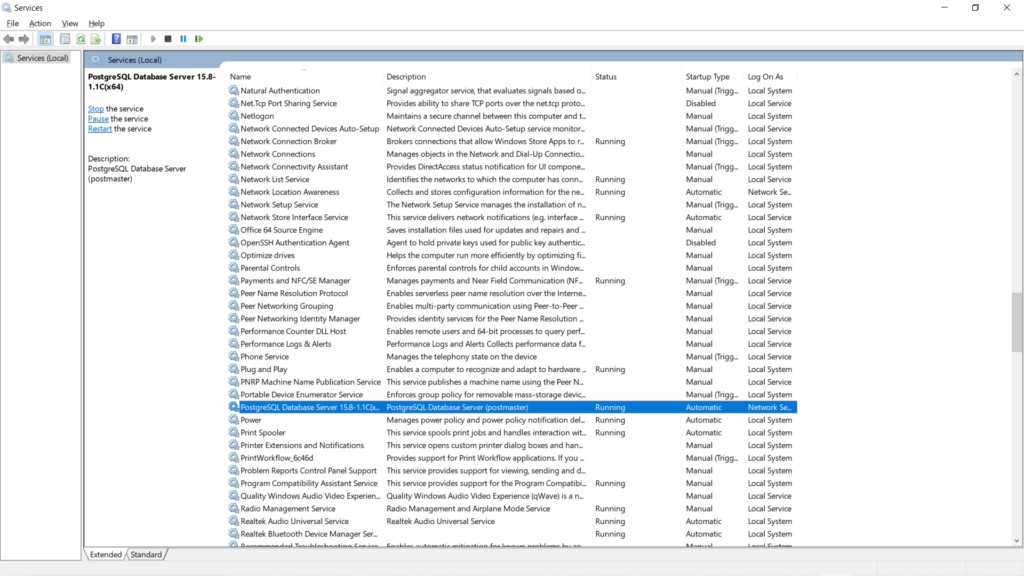
Step 10: Verify the Installation #
- Open the Run window by pressing
Win + Rand typeservices.msc. - In the Services console, ensure that the 1C:Enterprise service is enabled and its status is set to Running.
Step 11: Recommended PostgreSQL Starter Configuration #
For initial setup, consider these baseline PostgreSQL settings (file C:\Program Files\PostgreSQL\<version>\data\postgresql.conf):
Core Settings:
shared_buffers = 25% of total RAMtemp_buffers = 256MBwork_mem = RAM/32 to RAM/64fsync = onsynchronous_commit = off(improves write performance)
WAL & Checkpoint Tuning:
checkpoint_completion_target = 0.5-0.9min_wal_size = 512MB-4GB(scale to your server size)max_wal_size = 2 × min_wal_sizebgwriter_delay = 20ms
Maintenance:
autovacuum = onautovacuum_max_workers = CPU cores/2 to cores/4 (minimum 4)autovacuum_naptime = 20s
Performance Optimizations:
effective_cache_size = RAM - shared_buffersrandom_page_cost = 1.1-1.3 (SSD) or 1.5-2.0 (HDD)max_files_per_process = 8000
Query Planning:
from_collapse_limit = 20join_collapse_limit = 20geqo = ongeqo_threshold = 12
Connection Management:
max_connections = 500...2000max_locks_per_transaction = 512...1000
String Handling:
standard_conforming_strings = offescape_string_warning = off
Online Analyze Settings (Optional):
online_analyze.enable = off
For the typical AccountingSuite server you can use these PostgreSQL settings (postrgresql.conf.d) as a starting configuration. Add them to the end of your postgresql.conf file (usually found in C:\Program Files\PostgreSQL\<version>\data) and adjust based on your PostgreSQL version and hardware specs.

Please note:
- RAM values should reflect your server’s actual memory
- Ranges (like 512MB-4GB) allow customization for your hardware
- These are starter values only – always fine-tune based on:
- Your specific workload patterns
- Production monitoring data
For production deployments, consult PostgreSQL DBMS’s official documentation, continuously monitor performance to refine these parameters.
Conclusion #
We have installed step by step PostgreSQL on Windows. Further you need to install 1C:Enterprise Server.