Introduction #
Before start installation works you need to download installers for AccountingSuite application and 1C:Enterprise platform from your AccountingSuite Portal then receive your License key for the number of users you want.
Please check System requirements of your hardware. Be sure you use modern and powerful devices.
Use Downloads tab to download files for on-premises version.
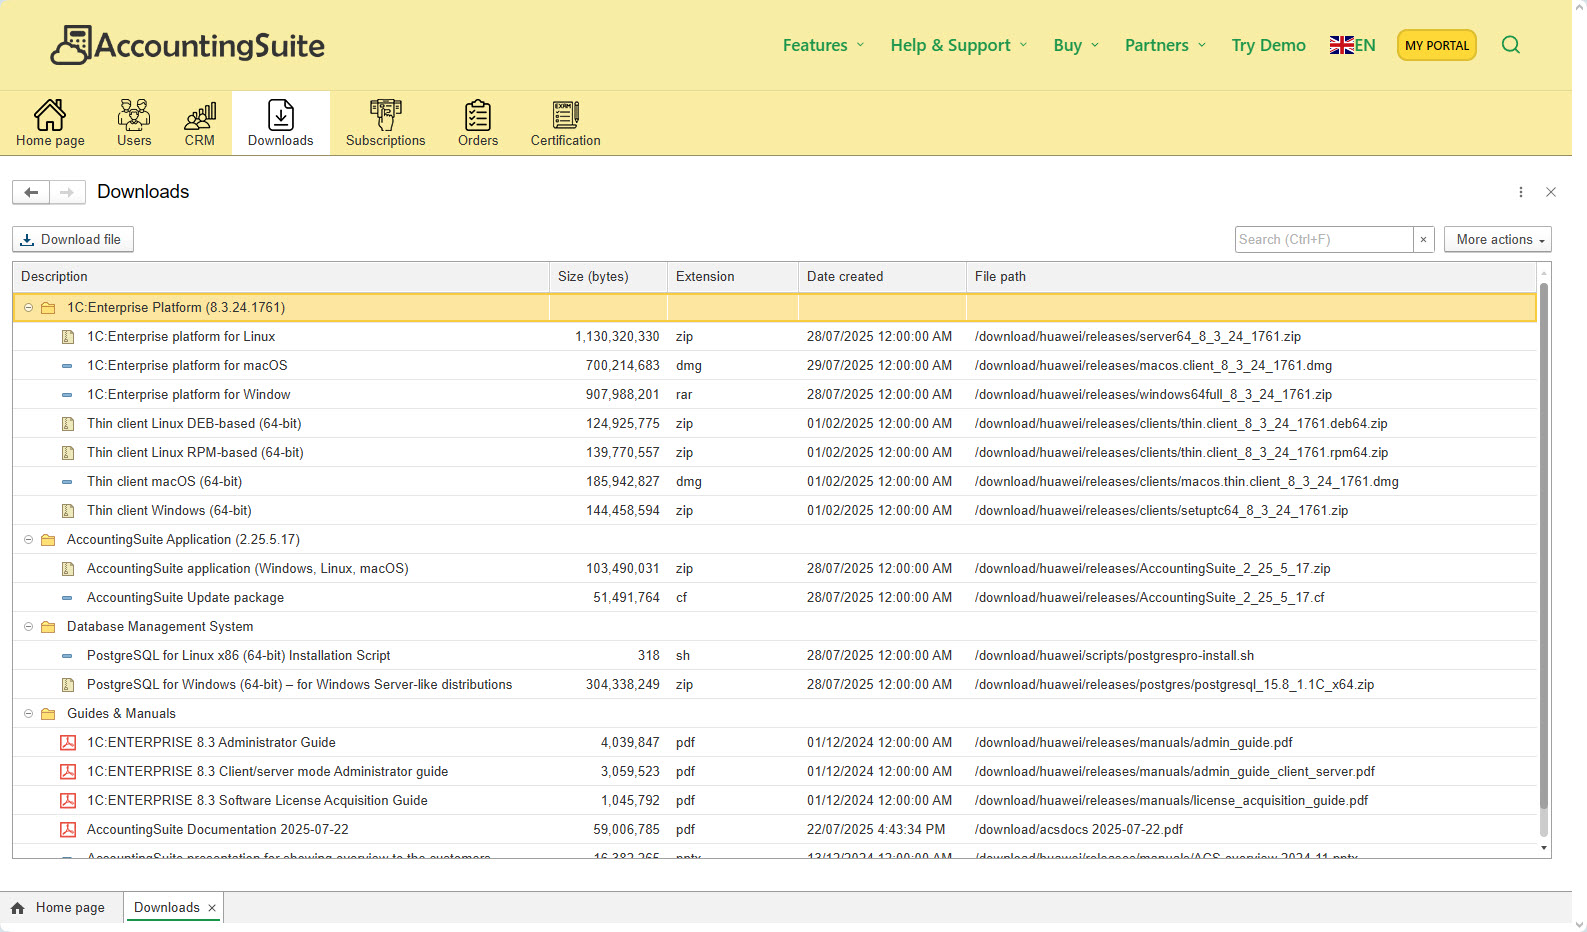
Platform (current version number) for different operating systems:
- 1C:Enterprise platform for Windows – full server version with thin and thick client
- 1C:Enterprise platform for Linux – full server version with thin and thick client
- 1C:Enterprise platform for macOS – thick client for file-mode on-premises
Thin client for access to web cloud version or to client-server on-premises version of AccountingSuite for different operating systems:
- Thin client Windows (64-bit)
- Thin client Linux RPM-based (64-bit)
- Thin client Linux DEB-based (64-bit)
- Thin client macOS (64-bit)
AccountingSuite Application (current version number)
- AccountingSuite application (.zip file) – setup file with empty base for work and demobase for study.
- AccountingSuite Update package (.cf file) – use it for update only. How to update your existing database – please read this documentation.
- (optional) EF_ACS_<number>.cfe – patch file for this version. How to install patches.
Please see Release Notes page for more info about new and old versions.
The AccountingSuite application .zip file contains installation packages for all operating systems.


Please note: Versions should be updated sequentially by the third number. If you have an older version, check the 1C Platform version first. Install the actual one. Next, in the AccountingSuite version archive, download all missing .cf files for version numbers for installation.
For example, you have 2.24.12, you need to upgrade to 2.25.3. You need to install 2.25.1, then after working out the upgrade procedure, install 2.25.2, then after working out the upgrade procedure, install 2.25.3.
If you don’t have the necessary files in the Downloads list, then you don’t have an active subscription to the on-premises version. Please contact us to issue you this status in your Portal Account.
Installation process with File mode database #
You can install the database in File mode in your personal computer or into network folder with shared access by several users. Users running the AccountingSuite on their own computers have access to this file over the local network. All transactions and requests from the application are performed directly on their PCs.
This is a very simple way to install a database for one or several users (up to 5). Does not require additional server software.
File mode is an installation option when the on-premises application is installed on one laptop or PC as one file of database. One user can install several databases for different companies on his laptop or PC.
You need to download installers for AccountingSuite application and 1C:Enterprise platform then receive your License key for the number of users you want.
Only the Client/server or On-cloud mode enables you to use the Mobile Application. Select them if you intend to carry out your accounting via Tablets or Smartphones.
Scheme of work with File mode

Quick manual:
- Download, unpack and install the platform for your OS
- Download, unpack and install the AccountingSuite application
- Add the application to the database list
- Apply your licence key the first time you run 1C:Enterprise Platform
Installation on different operating systems #
AccountingSuite can work on Windows, Linux and macOS. The installation of the program is similar for different operating systems. Please watch our video instructions above on how to install it.
Installation of the 1C:Enterprise system is performed by the program installation specific to each supported operating system: the Linux OS family, macOS and the Windows OS family.
Before you begin installation, you should make sure that your computer is not infected with viruses and that your hard drive is not contains errors and there is enough free space to complete installations. For installation you will need distribution media for the operating system installed on the computer, as well as rights local or network administrator.
Windows #
How to install On-premises version AccountingSuite on Windows
For Windows OS, installation is performed using a special installation programs. Depending on the rights of the user performing installation, and installation parameters, installation can be performed in two modes: “for computer” or “for user”.
Installation is performed by a special assistant, navigation through the pages is performed using the Next button. To start the assistant, you should run program setup.exe from the directory of the selected distribution. On each page you must indicate any necessary information that will be used in the future to install the 1C:Enterprise system. The description of the installation program will indicates which pages will be skipped when you select the installation mode “for user.”
MacOS #
How to install On-premises version AccountingSuite on macOS
For macOS installation is in progress using a special installation program. This program does not allow select components to install.
The client application distribution is located in the files *.dmg (for example thin.clientosx_8_3_23_1997.dmg).
To complete the installation you need to know username with administrative rights and password. For installation required:
- Double-click on the file with an image. As a result, a new window will open, in which there will be the contents of the image are displayed.
- To install the client application itself, you need double click on the file with the view name
- 1cv8-client-A.B.C.D.pkg ‑ installation program for thin and thick client applications.
- 1cv8-thin-client-A.B.C.D.pkg ‑ thin client application installer.
- The client installation wizard will open applications. On the first page of the wizard, you must click the button Continue, and on the next screen of the wizard you should press the Install button. After prompting for a username and password user with administrative rights will be installed client application 1C:Enterprise.
Linux #
How to install On-premises version AccountingSuite on Linux
When running Linux OS, the system 1C:Enterprise supports several processor architectures. Wherein there are two ways to install the system: using a specialized installation program or using a package manager operating system being used. Differences in installation methods:
- Installer – not used operating system package manager. The installer has a graphical user interface. When using the installer from a command line lines (batch installation) the composition of the installed components is determined using startup command line options. Installer exists only for operating systems running on x86/x86-64 architecture processors.
- Package manager – for installation The standard package manager of the operating system used is used. The composition of installed components is determined by the set of installed packages. No graphical user interface. This option Available for all supported processor architectures. More common for Linux network administrators.
To start the installation, you should start installation program (file*.run). Before starting, you need to check that the installer is installed execution access right. The right must be granted to the current user. This right is configured for the group and other users optional. To set execution rights, you can use the command operating system chmod or file properties dialog in the GUI. To set the performance rights can you will need superuser rights (root).
The installation program can be started interactively or in batch mode. The installation program is special assistant whose pages are navigated using the Next button. On each page you need to indicate some necessary information that will be used in the future to installation of the 1C:Enterprise system. The description of the installation program will indicates which pages will be skipped when you select the installation mode “for user.”
License file #
You will receive a license key file of the following format:

It consists Registration number and 3 Pincodes.

Please note: All the licenses for the server and the workplace are one piece for each use. For a single user or server device. No need to share them with anyone else. Three PIN codes are needed to update the license when changing hardware. These are NOT 3 licenses keys. PIN codes cannot be used in parallel on different devices. If PIN 2 is used, the first one stops working.
Do not use the same license in parallel on different devices. Otherwise the license can be blocked and added to the blacklist by the license center.
In the RDP connection you need as many license as there are users by profile.
These are different users for the system.
If you use a server database, you can install shared user licenses on the server, rather than on workstations. Licenses on the server allow a limited number of users to work simultaneously without being linked to their workplaces.
Please read Licenses and Key Computer Parameters for more information.
Please use your owner information for registration step.
Fill e-mail field, it will help you to restore license’s PIN later.
Use Save details button to save your owner data. It will be used on next time of activating.

To activate a license with a new PIN code if you have changed your device, you need the activation parameters (company owner information) to be the same as the first time. Use the saved file from first activation steps.
If you need to restore License owner data, please use 1C Portal.
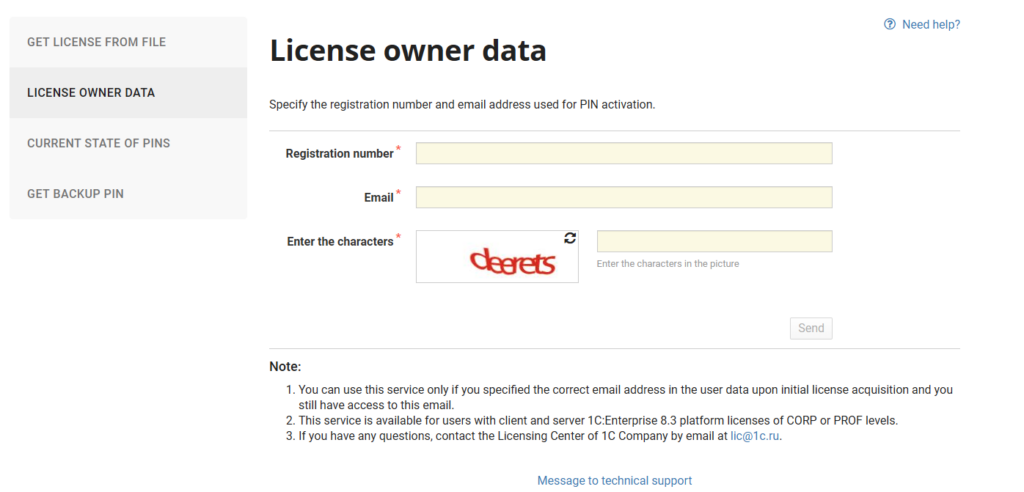
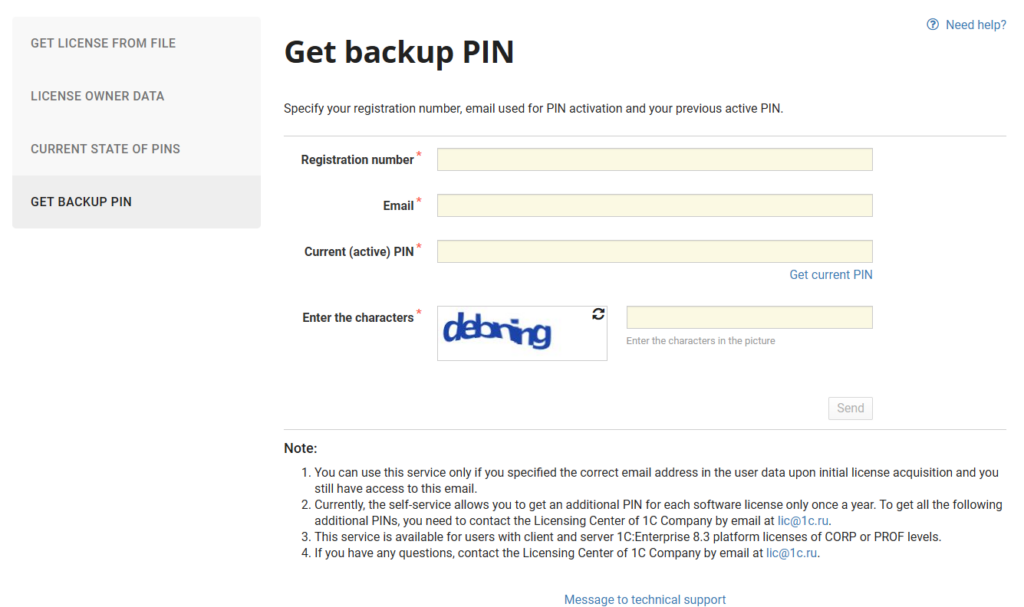
If you have spent all the PIN codes, you can request new PIN numbers once a year. Use Get backup PIN page.
For additional information use Help page.
Internet connection error when activating the license #
An error “Internet connection is not available” may occur when activating a license.
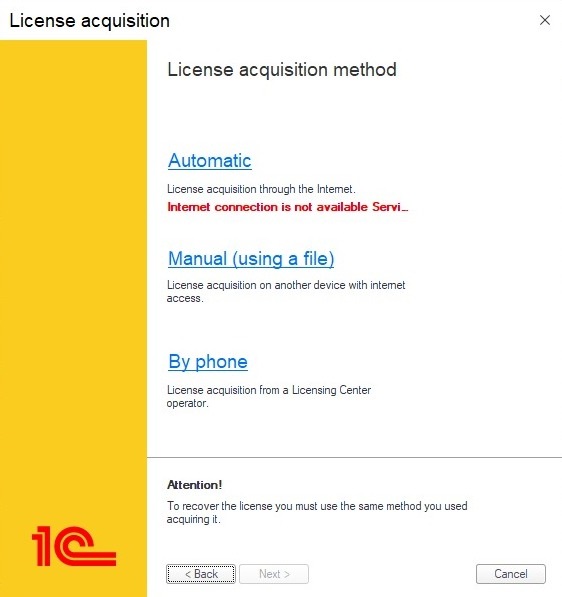
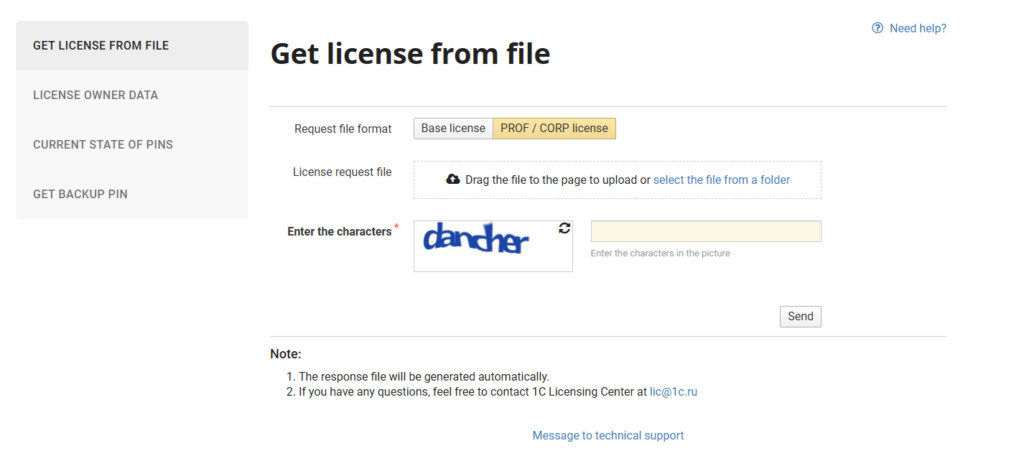
If you are sure, your connection is stable please use Manual (using a file) and save file for activation and send it to support@accountingsuite.io. We will send the answer file back to you to complete activation.
Or use 1C Portal for manual activation.
Client/Server mode #
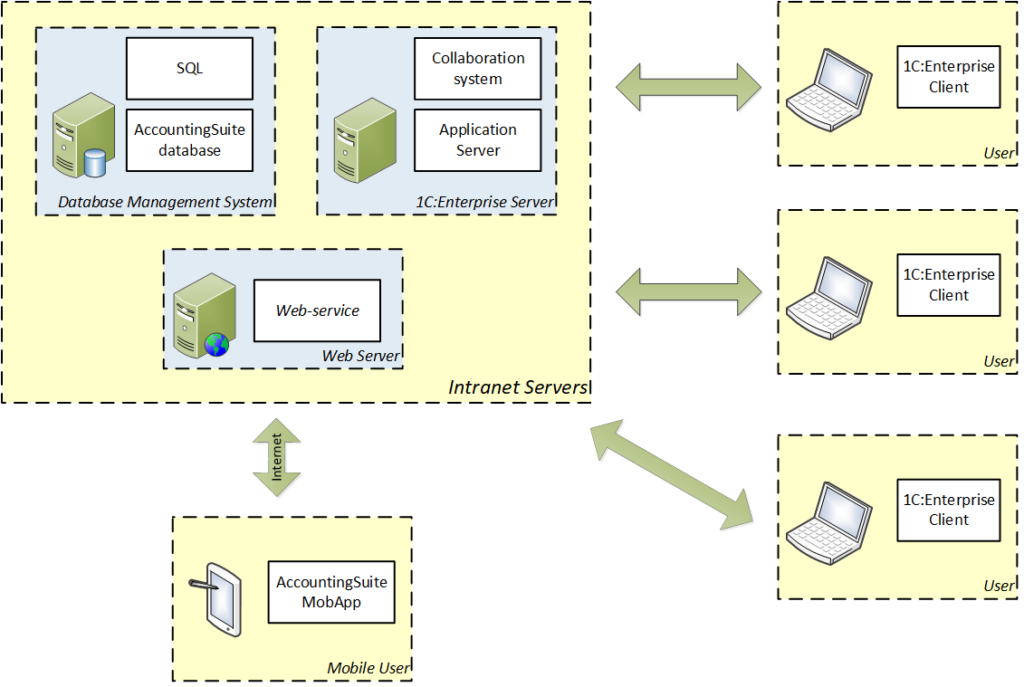
Client/server mode is an installation option where AccountingSuite, launched on a user’s PC, works with the 1C:Enterprise Server. The server software is installed on the local network server computer, it works with the AccountingSuite database.
This method of installation is used when mass work of many (more than 5) users is needed, and requires additional configuration and server software and hardware.
The DBMS (Database Management System) is used as a database management tool — PostgreSQL or MS SQL. In contrast to File mode, the client/server database consists of many different files. In this mode, resource-intensive operations are performed by the server in one location of database files, not on users’ PCs. You only need one powerful computer for the server role. Users’ PCs are only used for the visualization of the application and database.
The Client/Server mode allows you to use Mobile Application. To use the AccountingSuite Mobile Application, it is necessary to make your AccountingSuite database accessible through Web services technology from the company network to the Internet.
You require a single 1C:Enterprise Server license and multiple 1C:Enterprise platform licenses for each user.
You can start with a File mode database without a Server and scale AccountingSuite as your business grows.
Scheme of work with Client/Server mode
The choice of a DBMS for the on-premises version depends on the competencies of the company’s employees. And the desire to save money on open-source databases. If you have a ready-made specialist who will confidently provide work on PostgreSQL, then you can choose it for the Windows Server or Linux operating system. If there are no such people and someone knows only MS SQL + Windows, then the choice is obvious.
The system administrator must ensure the smooth operation of the company’s server and take care of data backups.
Our AccountingSuite can work with PostgreSQL (use it for free) and MS SQL (need to buy). The selection criterion here is on the side of the company’s specialists. What do they know? From this is what needs to be chose.
Quick start with Server mode:
- How to install PostgreSQL on Windows
- How to install 1C:Enterprise Server on Windows
- How to install 1C:Enterprise Client
- How to create AccountingSuite database
- How to install 1C:Enterprise Web Client for Cloud version
For a detailed study of the installation of the server operating system and database management system, please refer to the documentation and video tutorials of the vendors of this software.
For more information about managing server solutions based on 1C Enterprise Platform, see the articles on 1C Developer Network https://1c-dn.com/library/administration/. Here you find:
- How to publish 1C:Enterprise application to Web
- Data structure in 1C:Enterprise 8
- Backup and restore 1C infobases using SQL Server
- Choosing server-side hardware for 1C:Enterprise system
- Specifics of 1C:Enteprise server administration on Linux
You can download PDF files 1C:Enterprise Administrator Guide and 1C:Enterprise Administrator Guide. Client/Server Mode.
