All interactions with clients are recorded and managed in the system using the Event document.
Types of Events:
- Phone call
- Personal meeting
- Emails
- SMS/Chat message
- Note
The interaction history can be accessed at any time via the Events link. Each event form stores key details such as the subject, content, participants, and their contact information. Every event is assigned one of three statuses: Planned, Completed, or Canceled. Additionally, the importance of the event is specified, along with its planned or actual start and end dates.
Event: Phone call, SMS/Chat message, Personal Meeting, Note #
In the system, each interaction is logged as an event, including Phone Calls, SMS/Chat messages, Personal Meetings, and Notes. The user manually creates a record for each type of event, specifying essential details such as the contact person, the purpose of the interaction, and the main discussion points. This ensures a comprehensive history of client interactions, providing easy access to relevant information and maintaining transparency in communication.
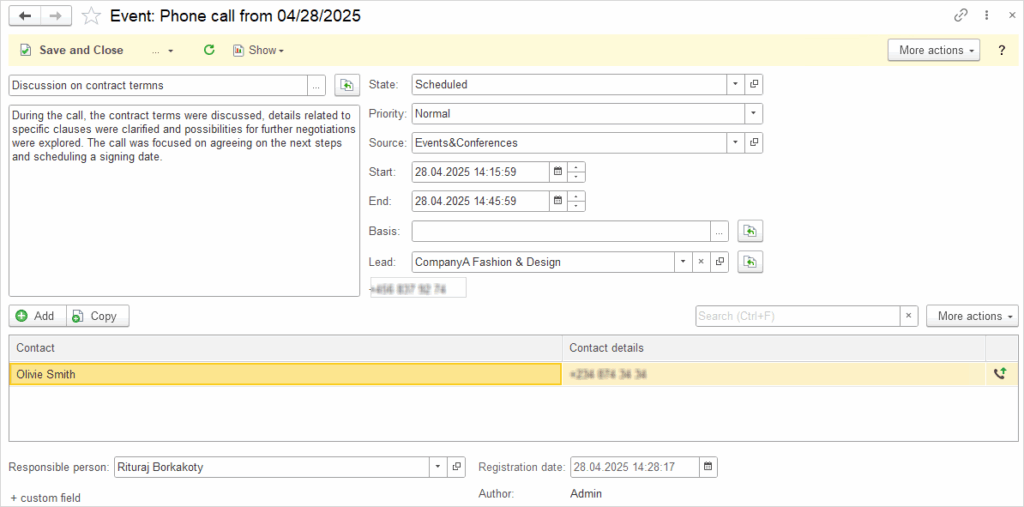
Here is one way to create an event::
- Open the lead with whom you wish to create an event, then select the specific type of event you want to create
- In the Subject field, enter a brief topic or title of the event that describes the purpose of the interaction
- In the Event Description field, enter a brief summary of the content and purpose of the event, including what was discussed and what the next steps are.
- There are three possible States for an event: Scheduled, Completed, and Canceled. You need to select the appropriate state based on the status of the event:
- Scheduled: The event is planned and yet to occur.
- Completed: The event has taken place.
- Canceled: The event has been canceled and will not occur.
- Priority defines the level of importance or urgency of the event. You can choose from three options:
- Normal: Standard priority, no urgent action required.
- Low: The event is not urgent and can be addressed later.
- High: The event is urgent and requires immediate attention or action.
- In the Source field: Specify the origin of the information or activity.
- Select Start event marks the beginning, while End event marks the conclusion of the process or activity.
- In the Basic event field, you need to enter the document based on which the process or activity will be initiated.
- The Company and Contact fields are automatically filled.
- Click Save and Close to finalize the creation of the new Event.
Event: Email #
This type of event allows for sending, receiving, and storing emails. To exchange emails, you can connect your IMAP account (such as Yahoo, Outlook, Mail.com, Gmail, and others) to the system. This event enables efficient management of email correspondence, which is useful for tracking communication with leads. Additionally, all information about sent and received emails is automatically recorded, making it easier to track the communication history. This type of event can also be useful for automatically archiving important messages and organizing email correspondence within the system.
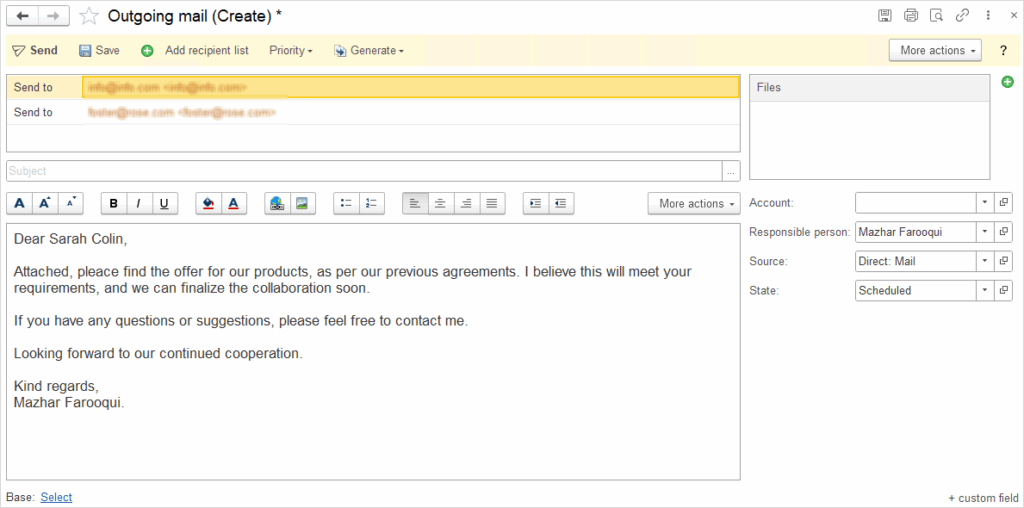
One way to create a Event – Email is:
- Open the lead with whom you wish to make a call, click on the Event button, and select Email from the provided menu
- The system automatically populates the Sent to fields by entering the lead’s email address and the contact person’s email address, which were previously entered into the system during the lead creation.
- Enter the Subject and Email text. Additionally, you can attach a file to the email
- In the Account field, enter the email address from which the email will be sent
- Enter in the Responsible person field the name of the person responsible for sending the email or managing the communication
- There are three possible States for an event: Scheduled, Completed, and Canceled. You need to select the appropriate state based on the status of the event:
- Scheduled: The event is planned and yet to occur
- Completed: The event has taken place
- Canceled: The event has been canceled and will not occur