Overview #
The web server allows you to access the information database via the Internet using a browser or a mobile client. The publication of the database is also needed to build consolidated financial statements for several legal entities in separated databases (branches and headquarters).
To publish the information base on the Internet, you need to set up a web server (this is third-party software).
Installation for Windows #
A list of available versions can be found here, in this article will use the first distribution from the list. It is delivered as a zip archive without an installer.
Therefore, you need to download the archive and extract it to any convenient folder, for example, C:\Apache24. The folder name includes the version number of Apache. In this case, version 2.4 is used. When publishing the information database from the command line, pay attention to this, as the platform provides separate web component libraries for Apache versions 2.2 and 2.4.
After extracting the archive file, open the command line as an administrator.
In the command line, navigate to the directory bin of the extracted Apache files using the cd command. For example:
cd C:\Apache24\binHere enter the command:
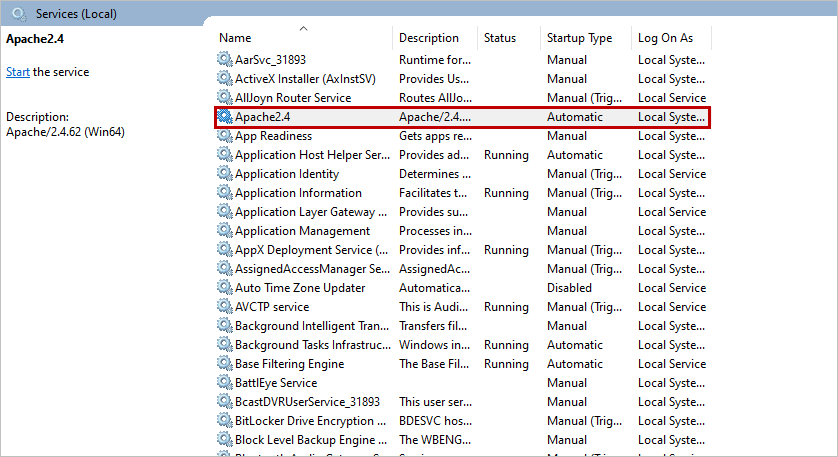
httpd.exe -k installThis will install the Apache services, which will be manageable throung Windows Services application. Make sure that Startup Type is set to Automatic.

Unlike IIS, the certificate for Apache is issued using third-party software called OpenSSL. This software is not available by default in the Windows, so you will need to download and install it manually. You can find possible OpenSSL distributions for Windows on the official OpenSSL website.
Publishing the infobase #
Before publishing the database, you need to edit the file located in the Apache distribution directory using any convenient editor.
C:\Apache24\conf\extra\httpd-ahssl.confIn the file, find the VirtualHost default:443 section and replace SSLCertificateFile and SSLCertificateKeyFile with the full paths to the prepared certificate and key files.
After this, you can proceed to publish the infobase.
To publish the infobase, you need to run 1C: Enterprise as an administrator, then open the Designer of the specific infobase as an administrator and go to the Administration menu. Then select Publish to web server.

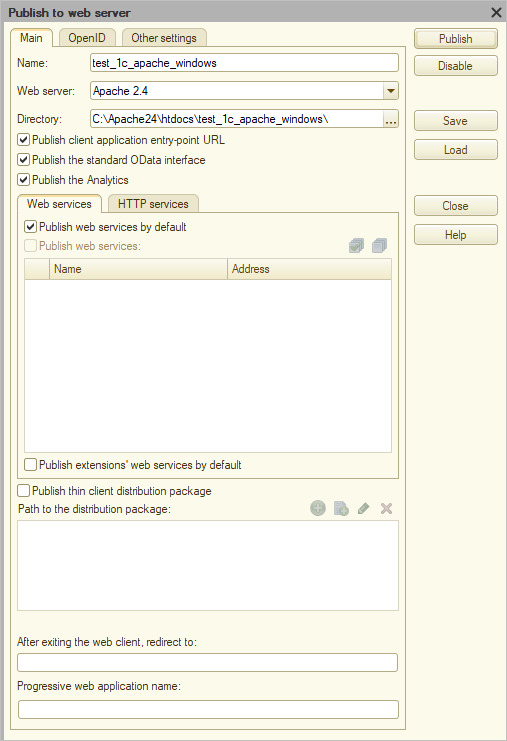
In the publication window, specify the name and optionally define the directory where the publication settings will be located. This can also be left as the default.
After this, click the Publish button and wait for the operation to complete.
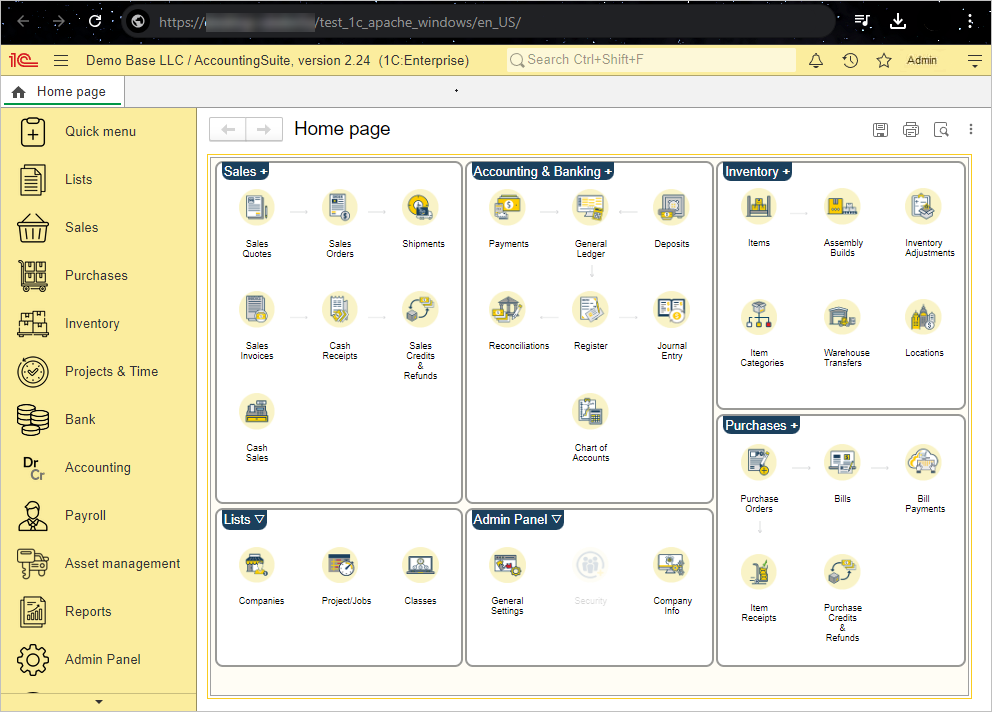
To verify that you done everything correctly, you need to open a browser and go to a link that consists of two parts:
- The name of your server (e.g.,
server1) - The name of the infobase publication (as specified in the publication settings window)
For these parameters, the link will be:
https://server1/test_1c_apache_windows/

Installation for Linux #
The “1C: Enterprise 8” platform supports the Apache web server for Linux versions 2.0, 2.2, and 2.4. Let’s check which version of Apache is available for installation. To do this, log in to the 1cfreshl.example server console as the root user and enter the following command:
apt-cache policy apache2The response is as follows:
apache2:
  Installed: (none)
  Candidate: 2.4.41-4ubuntu3.14
  Version table:
  ...
This means that the apache2 package is not installed and the candidate for installation has version number 2.4.41. This version is acceptable for our purposes.
Installing Apache #
To install Apache, enter the command:
apt -y install apache2After executing this command, the command:
apt-cache policy apache2should output a response like this:
apache2:
Installed:2.4.41-4ubuntu3.14
Candidate: 2.4.41-4ubuntu3.14
Version table:
...
This indicates that Apache version 2.4.41-4ubuntu3.14 is installed.
Checking Apache startup #
After installing Apache, it should be started and enabled to start automatically.
To check that the Apache service is running, enter the command:
systemctl status apache2You should receive a response similar to the following:
● apache2.service - The Apache HTTP Server
     Loaded: loaded (/lib/systemd/system/apache2.service; enabled; vendor prese>
     Active: active (running) since Sat 2023-05-13 09:47:59 MSK; 43s ago
       Docs: https://httpd.apache.org/docs/2.4/
   Main PID: 1789 (apache2)
      Tasks: 55 (limit: 9405)
     Memory: 5.1M
        CPU: 58ms
     CGroup: /system.slice/apache2.service
             ├─1789 /usr/sbin/apache2 -k start
             ├─1791 /usr/sbin/apache2 -k start
             └─1792 /usr/sbin/apache2 -k start
The message active (running) indicates that the Apache service is up and running.
To check that the Apache service is enabled to start automatically, enter the command:
systemctl is-enabled apache2You should receive the response:
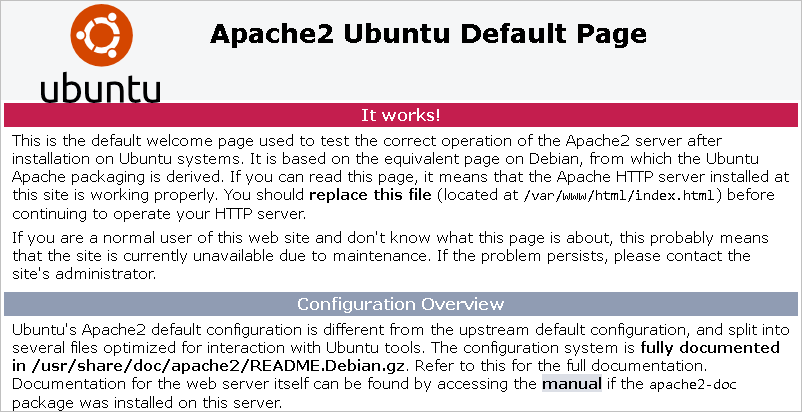
enabledTo verify the operation of the installed Apache web server, enter the following address in the address bar of a browser on the host computer and press Enter.:
If Apache is installed correctly, the following test page will be displayed in the browser window.

Configuration parameters #
If you plan to open infobases for access outside the local network, you must use SSL. Generate a self-signed certificate using OpenSSL. Then edit the 000-default.conf file and add the following configuration text at the end of the file:
<VirtualHost *:443>
    SSLEngine on
    SSLCertificateFile /your_link_to_certificate.crt
    SSLCertificateKeyFile /your_link_to_key.key
</VirtualHost>
After adding the necessary configuration, you need to save the file, close it, and run the following command to enable the SSL module for Apache:
sudo a2enmod sslAnd after that, you need to restart Apache and make sure that there are no errors.
Publishing for Linux #
Publishing an infobase on Linux is no different from publishing a infobase on Windows. You must also run 1C: Enterprise as a superuser. Then go to Designer → Administration → Publish to web server. Fill in the name and specify the directory. Click Publish and wait for the end of the operation
